Contents
- What Is a Flat Sketch?
- How Is a Technical Flat Different From a Fas…
- Why Do Factories Need Flat Sketches?
- What Does a Good Technical Flat Include?
- How Do You Draw a Flat Sketch, Step by Step?
- Which Views Do You Need: Front, Back, Interi…
- How Do You Build a Reusable Flats Library?
- Should You Draw Flats by Hand or in Vector S…
- How Do Stitch Lines and Topstitch Convention…
- How Do You Turn a Flat Into a Tech-Pack Spec…
- What Are the Most Common Flat Sketch Mistakes?
- How Do Flats Feed the Tech Pack?
- Frequently Asked Questions
- The Bottom Line
A flat sketch is where a garment stops being an idea and turns into something a factory can build. I've stood on a production line and watched a sample get pulled because the drawing said one thing and the pattern said another. That's expensive. A good technical flat kills that argument before it starts. It shows the front, the back, every seam, and every stitch, drawn to proportion so a pattern maker can trace it. This guide covers what flats are, how they differ from fashion illustration, and how to draw one that survives contact with a factory floor.
Key Takeaways
- A technical flat is a flat, proportional, black-and-white drawing of a garment, not a styled figure.
- Factories read flats as build instructions, so symmetry, closed paths, and consistent stroke weight matter more than beauty.
- Flat sketches are section one of the eight-section tech pack structure we build on.
- You can draw flats by hand or in vector software; vector wins for edits and reuse.
- Every line should trace back to a pattern piece, or it doesn't belong on the drawing.
What Is a Flat Sketch?
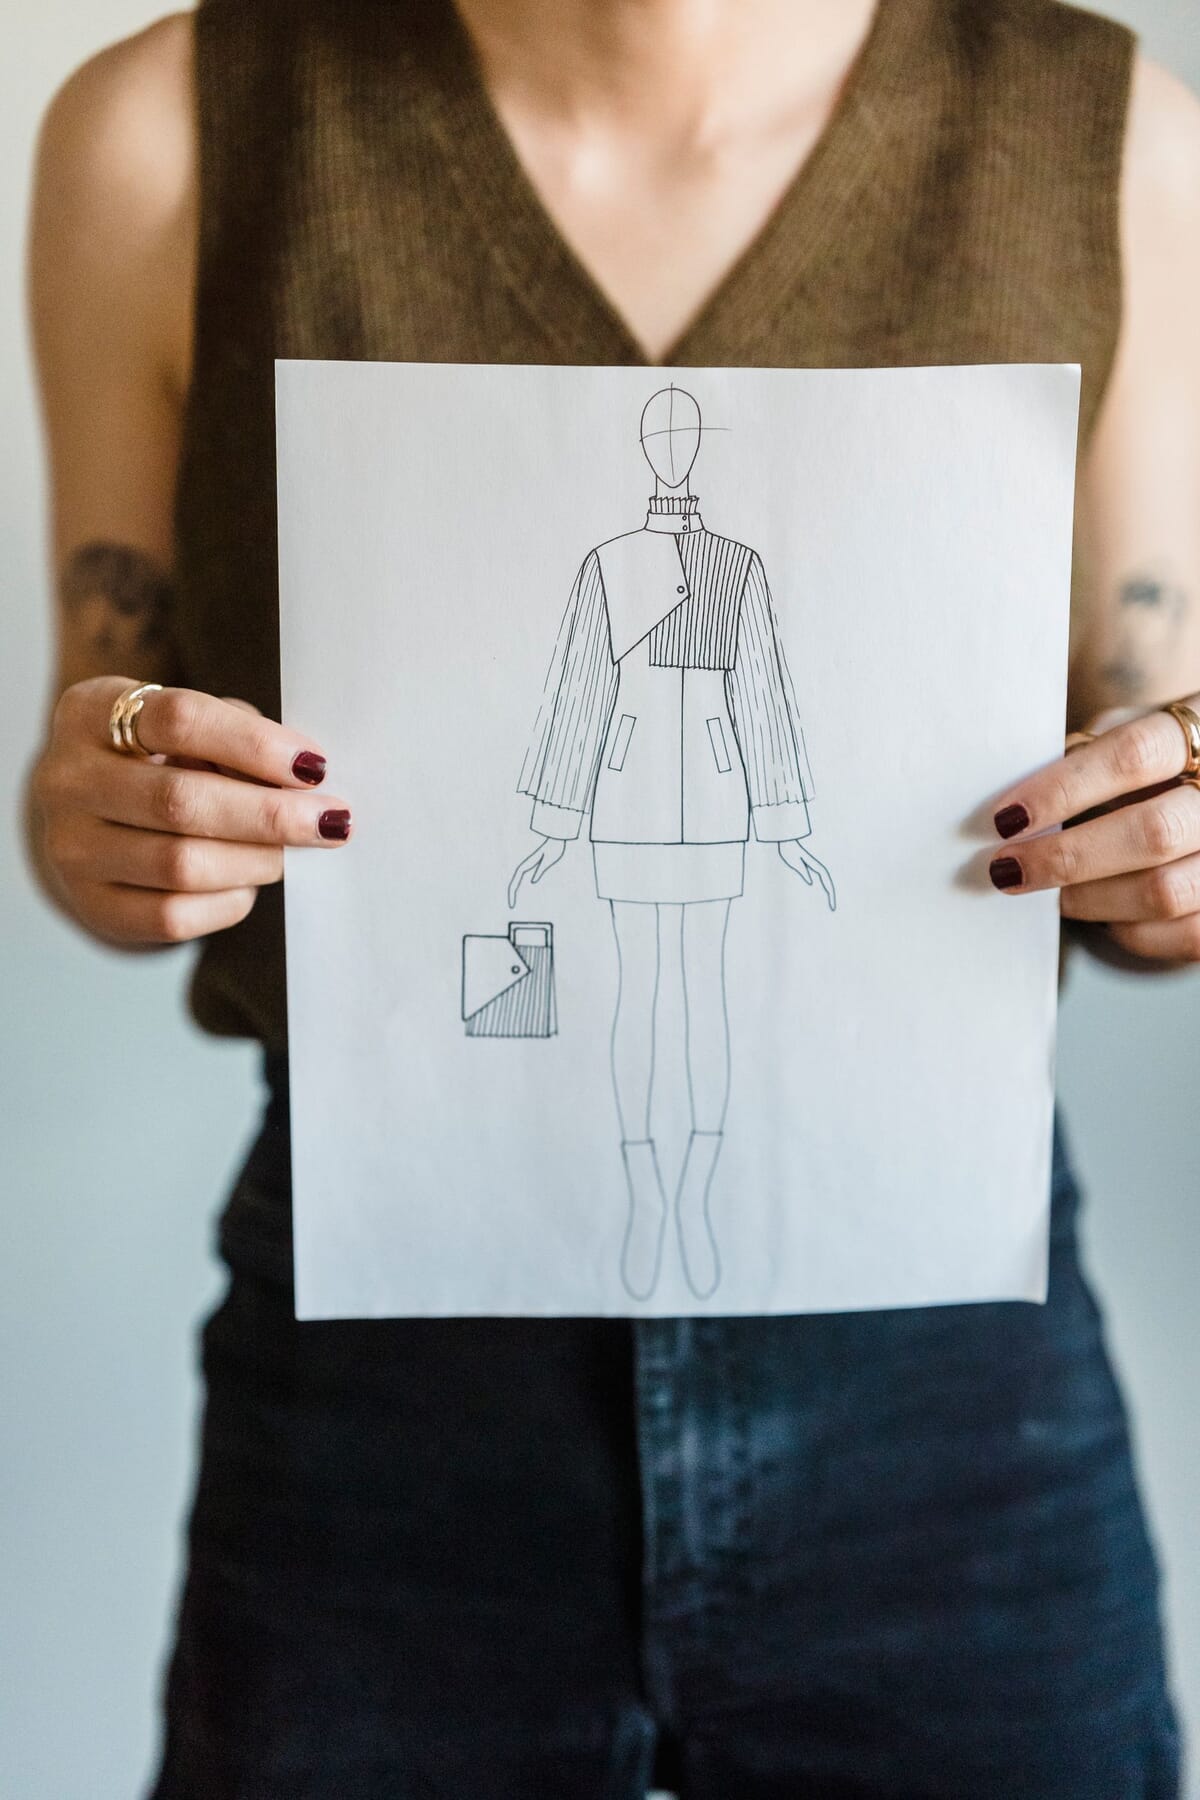
A flat sketch, also called a technical flat, is a two-dimensional line drawing of a garment shown as if it's laid flat on a table. It has no body, no pose, no shading. In the eight-section tech pack structure we build on, flat sketches come first. The drawing shows construction, not mood.
Think of it as a blueprint for cloth. The flat records proportion, seam placement, closure type, and stitch detail in a way a pattern maker and a sewing operator both understand. Color is optional. Style is irrelevant. What counts is whether the drawing tells the factory exactly what to cut and where to stitch.
Most designers keep two views at minimum: front and back. Some add side views, inside details, or exploded callouts for pockets and plackets. If you're new to the whole document, start with our guide on what a tech pack is before you refine the drawing itself.
How Is a Technical Flat Different From a Fashion Illustration?
A technical flat and a fashion illustration answer different questions. Sewport describes technical drawings as precise, proportional garment views built for production, while illustration sells a look (Sewport). One tells a factory how to build. The other tells a buyer how to feel. Confuse them, and you get a sample nobody can cut.
The croquis, that elongated nine-head fashion figure, exaggerates proportion on purpose. Legs stretch. Waists shrink. That's fine for a mood board and useless for a pattern. A flat keeps human proportion so measurements read true. When a sleeve looks long on a croquis, it might be the pose. On a flat, a long sleeve is a long sleeve.
Here's the split, laid out plainly.
| Feature | Technical flat | Fashion illustration / croquis |
|---|---|---|
| Purpose | Instruct a factory how to build the garment | Communicate mood, styling, and creative vision |
| Audience | Pattern makers, sample rooms, sewing operators | Buyers, marketers, clients, press |
| Detail | Seams, stitches, closures, callouts | Drape, texture, attitude, color story |
| Proportion | True to the human body and pattern | Stylized, often nine heads tall |
| Used in tech pack? | Yes, it's section one | No, it stays on the mood board |
The tell isn't the software. It's whether a stranger could rebuild the garment from the drawing alone. A pretty illustration fails that test every time.
Why Do Factories Need Flat Sketches?
Factories need flats because a sample gets inspected against a spec, and the flat anchors that spec. Garment inspections use sampling standards like ISO 2859-1, mirrored by ANSI/ASQ Z1.4, where an inspector checks a sample and counts defects against agreed limits. If the drawing is vague, "defect" becomes an argument, not a fact.
The Acceptable Quality Limit sets the threshold. QIMA notes that AQL 2.5 is the most common level for general consumer goods, AQL 1.0 applies to higher-risk products, and critical defects usually carry an AQL of zero (QIMA). A clear flat turns a subjective complaint into a measurable one. The pocket is 2 cm too low, or it isn't.
In our experience, the fastest rejections come from drawings that skip the back view. An operator sews what they can see. If the back yoke isn't drawn, someone guesses, and a guess on a production run is a reject waiting to happen.
There's a second reason, and it's quieter. A flat protects you legally and commercially. When a supplier disputes a fault, the flat plus the measurement chart is the reference document both sides signed off.
What Does a Good Technical Flat Include?
A good technical flat is symmetrical, proportional, and closed. Every path connects, every stroke weight is consistent, and both front and back appear. Proportion should reflect real sizing logic; ASTM D5585-21 defines women's misses body measurements for sizes 00 to 20 (ASTM, 2021), and your flat should look like it could wear those numbers.
Break the anatomy into checkable parts. Closed paths first: no gaps at hems, cuffs, or collars, because open paths break fills and confuse the eye. Consistent stroke weight next: a heavier outline for the garment edge, a lighter line for internal seams, and a dashed line for topstitch. That hierarchy lets a reader scan construction in seconds.
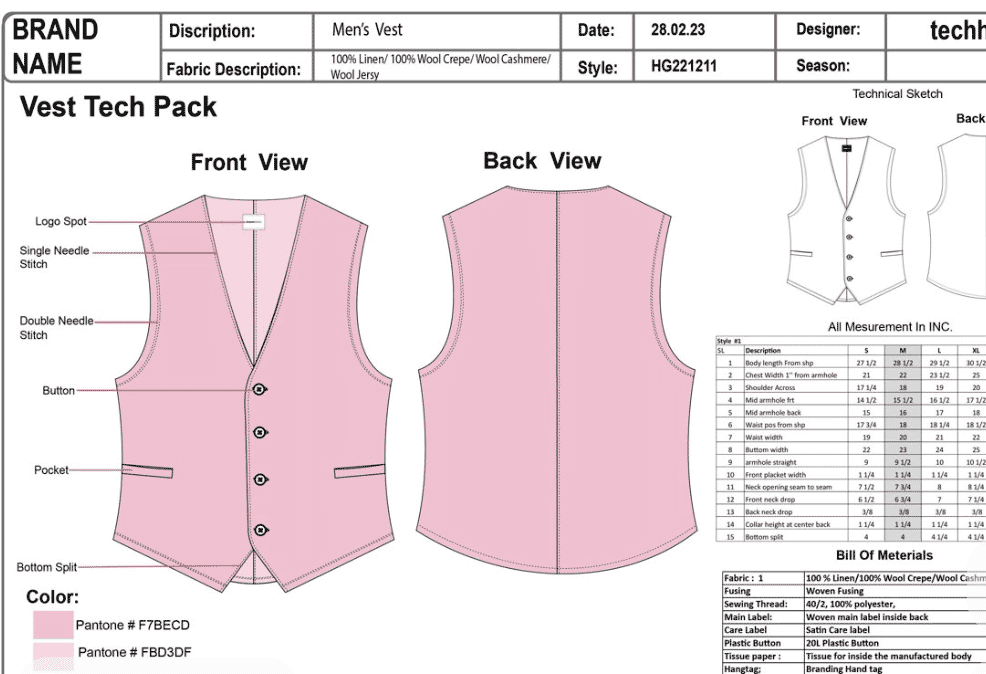
Add callouts for anything a line can't explain: a zipper type, a bartack, a specific hem allowance. Keep them short and numbered. Then confirm front and back agree. If the front shows a princess seam, the back better resolve it. When you're ready to slot these views into a document, our tech pack template gives you the frame. To see a finished flat sitting inside a real build, walk through our hoodie tech pack and t-shirt tech pack, where the drawing anchors every measurement and callout on the page.
How Do You Draw a Flat Sketch, Step by Step?
You draw a flat by starting from a proportion template, blocking the silhouette, mirroring one clean half, then layering seams, details, and callouts in that order. Outsourcing a single style runs $500 to $2,000 and eats 5 to 20 hours of skilled time (Guru, 2022), so a repeatable order saves real money.
Sequence is everything. Detail drawn on a wrong silhouette is wasted work, so the shape gets locked before a single stitch line goes down. The build below is the exact order I hand new designers, and it holds whether you draw by hand or in vector.
Step 1: Start From a Body or Croquis Template
Begin on a proportion template, not a blank page. A light body block, or a de-stylized croquis, gives you a shoulder line, a chest line, a waist, and a hem at true human proportion. Trace inside it. The template guarantees that a size 8 flat and a size 8 flat drawn next week share the same bones.
Step 2: Block the Silhouette
Block the outer shape first, working top to bottom: neckline, shoulder, armhole, side seam, hem. Ignore every detail at this stage. You're answering one question, does the overall shape read as the garment you mean? A blocked silhouette that's wrong is cheap to fix now and painful to fix after you've drawn forty stitch lines onto it.
Step 3: Mirror One Half for Symmetry
Draw only one half of the garment, cleanly, then mirror it across the center line. Hand drawers fold and trace; vector users hit the reflect tool. Either way, symmetry stops being a skill you perform and becomes a step you can't get wrong. A flat that's symmetrical by construction never wobbles at the collar or the hem.
Step 4: Add Seams, Then Details
With the silhouette locked, drop in internal seams, then details in a second pass. Princess seams, yokes, and panel lines come first because they change the pattern. Pockets, plackets, topstitch, and trims come after. Keep each element to scale, a real pocket at real size, so the drawing reads as the finished garment and not a symbol of it.
Step 5: Set Line Weights and Add Callouts
Finish with a stroke hierarchy and short numbered callouts. A heavy outline reads as the garment edge, a lighter line as an internal seam, and a dashed line as topstitch. Hold those weights identical across every flat in the pack. For the full convention set, stroke ratios, stitch notation, and leader-line rules, our fashion flat sketch rules guide is the deep dive; this pillar stays on method.
Keep Everything Traceable to a Pattern
Every line on a flat should map to a pattern piece. Draw a seam, and a pattern piece must produce it. Draw a dart, and the pattern carries that dart. A line that traces to nothing is decoration, and decoration is exactly what a spec drawing can't afford. For the full document flow, see how flats sit inside the tech pack format.
Which Views Do You Need: Front, Back, Interior, and Detail?
Every tech pack needs a front and a back at minimum, and complex styles add interior, side, and exploded detail views. Sewport describes technical drawings as precise, proportional garment views built for production (Sewport), and each view answers a question the others can't. Skip one the garment needs and the sample room fills the gap with a guess.
Front and back aren't optional, they're the baseline. Draw the front, then derive the back from the same outline: identical shoulder width, hem width, and length, changing only what the back requires, a yoke, a center seam, a different neckline drop. When the two views disagree at a shared point, the pattern maker inherits the mistake.
Beyond the baseline, add a view only when a line can't carry the information. An interior view shows linings, facings, pocket bags, and seam finishes a sewing operator needs but the outside hides. A side view resolves depth on a gusset, a bellows pocket, or a set-in sleeve. An exploded detail zooms in on a placket, a cuff, or a zipper pull that's too small to read at full scale.
The view that saves me the most sample rounds is the interior. A clean outside with an undrawn inside means the factory guesses the seam finish, and a French seam quoted as an overlock changes both the look and the cost. Draw the inside and the quote comes back right the first time.
How Do You Build a Reusable Flats Library?
A flats library is a saved set of templates, garment blocks, and components, collars, cuffs, pockets, plackets, you reuse instead of redrawing. It pays for itself fast: a single style already runs 5 to 20 hours to spec out (Guru, 2022), and a library turns each new flat into an assembly job, not a blank page.
Start with base blocks. Build one clean, proportional block for each core silhouette you use, a tee, a hoodie, a five-pocket pant, a set-in-sleeve jacket, and lock them at a fixed scale. Every new style begins as a copy of a block, so the bones are correct before you draw a single detail. In vector tools, save these as symbols or library assets so an edit to the master updates every instance.
Then build a component shelf. A pocket you draw once, at the right scale, becomes a pocket you drop onto any flat forever. Same for two-piece cuffs, hood shapes, waistbands, and zip pulls. Keep them on their own layer or artboard, named clearly, so you're pulling "welt pocket, 14cm" and not redrawing it from memory.
Scale is the rule that makes a library work. Every flat in a collection must sit at the same scale, or a size 8 dress and a size 8 jacket drawn larger read as different bodies. Pick a canvas size and a reference measurement, then hold them across the whole line. Consistent scale is also what lets a buyer flip through a range and trust that a wide sleeve is genuinely wide, not just drawn bigger.
The libraries that survive aren't the biggest, they're the most disciplined. A shelf of 200 sloppy components you don't trust is worse than 20 you drew once, correctly, and reuse without checking. Name them, scale them, and delete the duplicates, or the library quietly becomes the mess it was meant to prevent.
Should You Draw Flats by Hand or in Vector Software?
Draw by hand to learn proportion; draw in vector software to ship. Both produce valid flats, but vector tools give you clean, editable, infinitely reusable lines. Sewport notes that technical drawings are commonly produced as CAD files for exactly this reason (Sewport). Hand sketches are fast for ideation and slow for revisions.
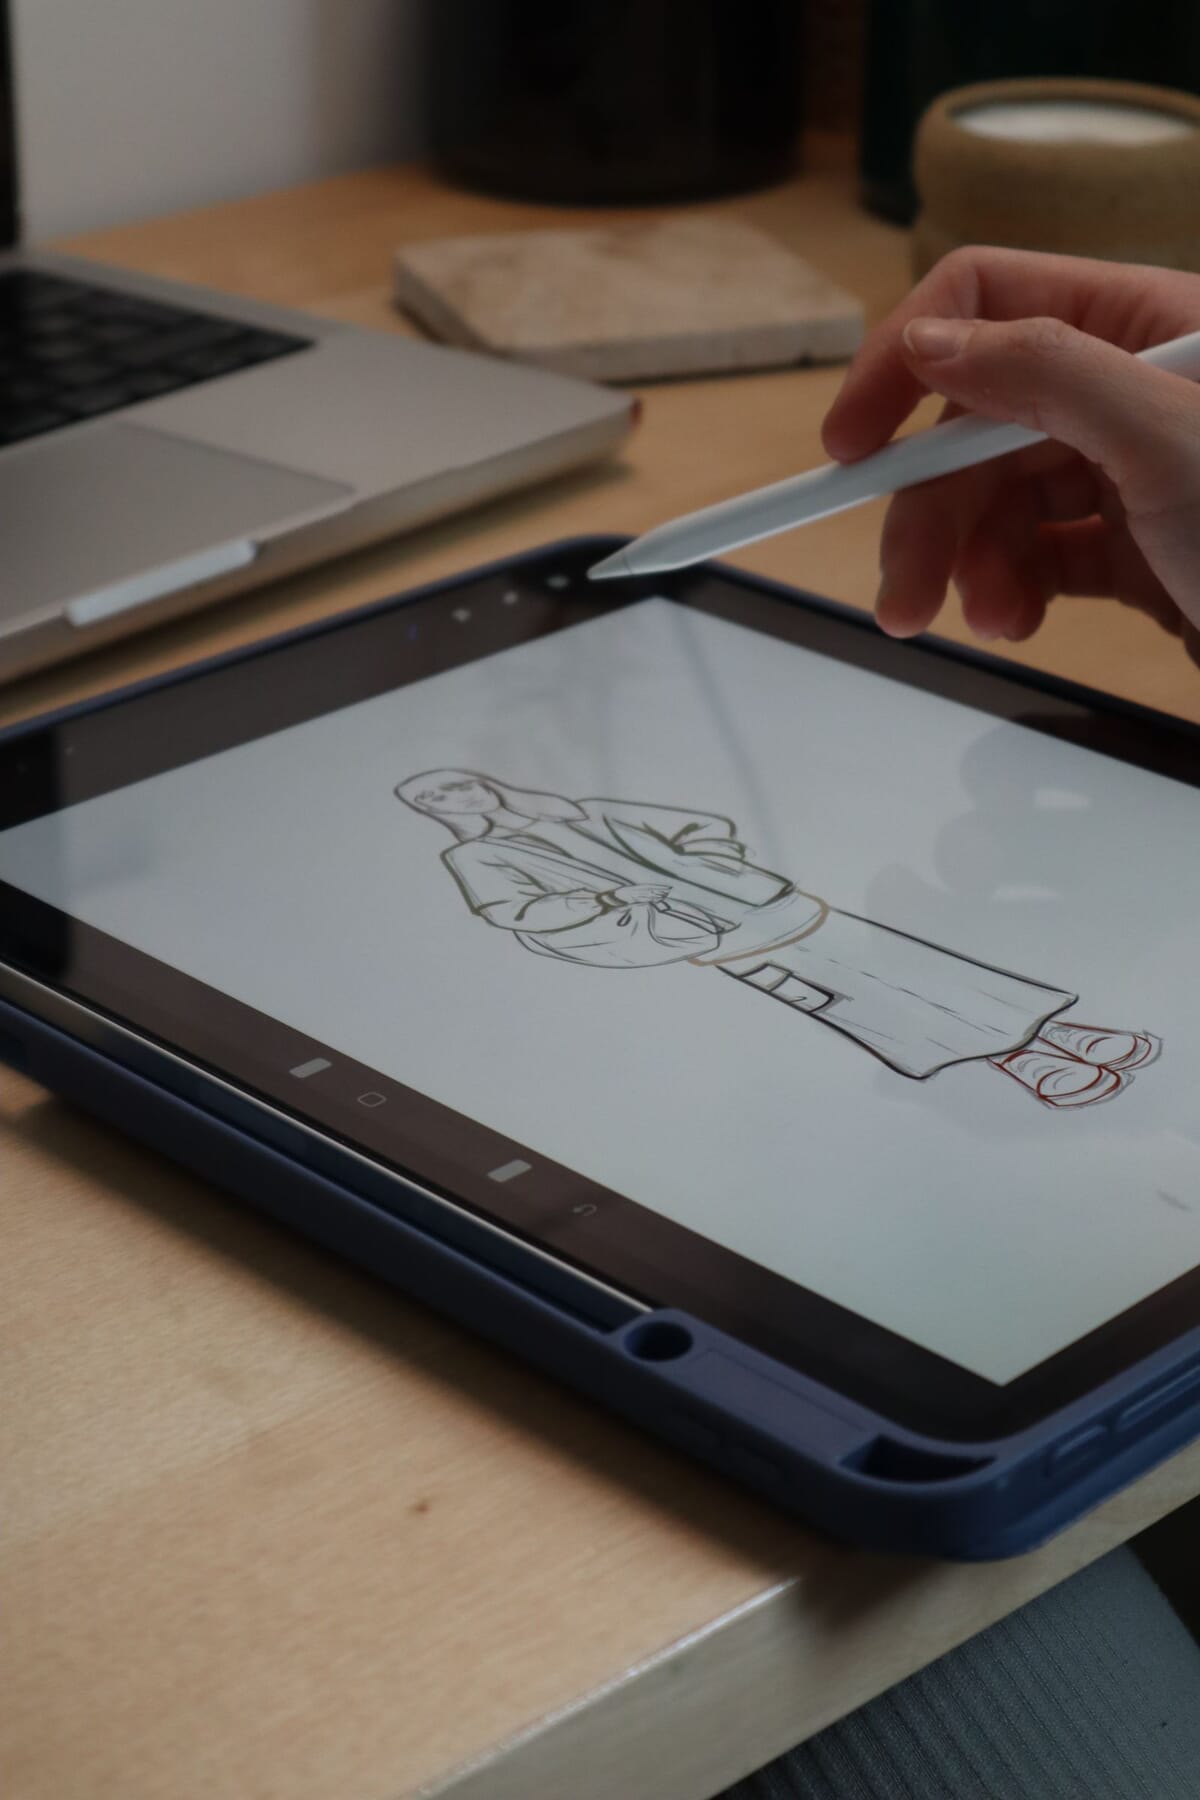
Hand drawing teaches your eye. You feel proportion when you draw it wrong and fix it. Keep a pencil, a ruler, and a French curve near your desk. But once a style goes to production, hand art creates friction. Every size grade, colorway, or seam tweak means redrawing. Vector lines just move.
Drawing Flats in Adobe Illustrator
Illustrator is the industry standard because a handful of its tools map exactly onto how flats work. The Reflect tool mirrors a clean half in one click, so symmetry is a step, not a struggle. Stroke weights and width profiles give you the outline, seam, and topstitch hierarchy without switching pens. Save collars, cuffs, and pockets as Symbols, and one edit updates every copy across the pack. Dashed-line brushes hold topstitch spacing steady from page to page. For the click-by-click workflow, our Illustrator flats guide pairs with this hub.
CLO, Kaledo, and Other Alternatives
Illustrator isn't the only option. CLO 3D builds a garment as a simulated sample and can flatten it into 2D views, which suits designers who pattern and drape digitally first. Kaledo, part of the Lectra suite, is a dedicated textile and flat-sketch tool used in larger apparel studios. Affinity Designer and Inkscape cover the same vector ground for a lower cost. The tool matters less than the discipline: clean paths, consistent scale, and a reusable library work in any of them.
Vector's real advantage isn't neatness. It's version control. When a buyer changes a pocket in week six, you edit one anchor point instead of redrawing a page, and the tech pack stays consistent everywhere the flat appears.
Need the document built for you instead? Our tech pack service delivers a factory-ready pack, flats included, from $299 per style. That's the practical route when a deadline beats a learning curve.
How Do Stitch Lines and Topstitch Conventions Work?
Stitch conventions are a shared visual language: solid lines for seams, dashed lines for topstitch, and callouts for anything specialized. Legibility is the whole point. A PDF that loses a dashed line at scale loses information a sewing operator needs, and a vague stitch line turns a defect into an argument instead of a fact.
The short version: use a solid heavy line for the garment edge, a solid light line for construction seams, and an evenly spaced dashed line for topstitch. Keep the dash spacing consistent so single-needle and double-needle stitching read differently. Bartacks, buttonholes, and rivets get a symbol plus a short callout. Don't lean on color, since many packs print in grayscale.
This is the one area where a full rulebook earns its keep, so rather than repeat it here, our fashion flat sketch rules guide breaks down stroke ratios, stitch notation, and gather, elastic, and ribbing symbols in detail. Standard sizing systems reinforce the same discipline; ASTM D6960/D6960M covers women's plus sizes 14W to 40W (ASTM, 2016), and the same rigor applies to how you notate every stitch.
How Do You Turn a Flat Into a Tech-Pack Spec Drawing?
You turn a flat into a spec drawing by anchoring points of measure to it and attaching numbered callouts, so the drawing carries the numbers the sample room measures. Body measurement standards give you the anchor logic; ASTM Subcommittee D13.55 maintains apparel body-measurement standards (ASTM D13.55), and a flat drawn to real proportion plugs into them cleanly.
A plain flat shows construction; a spec drawing shows where to measure it. Mark each point of measure with a letter or code, chest width at A, body length at B, sleeve length at C, then reference those codes in the measurement chart. The tape lands on the same spot every time because the drawing tells the grader exactly where the point sits, side seam to side seam, high point shoulder to hem.
Anchor callouts to details the same way. A numbered leader line from a pocket to a short note carries the trim, the stitch, and the allowance a plain line can't say. Keep the callouts non-crossing and parked outside the silhouette. When the flat carries both the POM anchors and the callouts, it stops being a picture and becomes the reference every other page measures against.
What Are the Most Common Flat Sketch Mistakes?
The most common flat sketch mistakes are open paths, missing back views, inconsistent scale, and detail crammed onto a wrong silhouette. These aren't style problems, they're build problems, and they surface at inspection, where a sample gets judged against sampling limits like AQL 2.5 for general consumer goods (QIMA). A flat that reads wrong becomes a sample that's cut wrong.
Open paths top the list. A hem or cuff left unclosed breaks fills and hints at a gap that isn't there. Close every path. The second offender is the missing back, or a back that doesn't reconcile with the front at the shoulder and hem. The third is drawing off a croquis, which stretches proportion and hands the sample room a shape that can't exist at true size.
Then come the scale slips. A pocket drawn as a small square "to represent" a pocket, rather than at real size, tells the pattern room nothing about placement. Callouts that cross each other or clip a seam read as stray lines. And color used to carry meaning vanishes the moment the pack prints in grayscale. Every one of these is cheap to fix on the drawing and expensive to fix on a cut sample.
The mistake I flag most often isn't a wrong line, it's a confident one. A designer draws a placket cleanly, at the wrong width, and because it looks finished nobody questions it until the sample lands two centimeters off. Draw to scale, and a wrong detail looks wrong on the page, where it's free to fix.
How Do Flats Feed the Tech Pack?
Flats are the visual spine of the tech pack, and everything else attaches to them. In our eight-section tech pack structure, flat sketches sit at section one and feed the measurement chart, bill of materials, and construction notes that follow. Get the flat right and the rest of the pack has an anchor.
Measurement points reference the flat. Points of measure like chest width or sleeve length map directly onto the drawing, so the grading team knows where to lay a tape. The bill of materials calls out trims the flat shows: zippers, buttons, labels. Construction pages describe seams the flat already draws. The flat is the picture every other page describes in words and numbers.
This is also where standards keep everyone honest. ASTM Subcommittee D13.55 maintains body measurement standards for apparel sizing (ASTM D13.55), and a flat drawn to real proportion plugs into those numbers cleanly. Start from a structured tech pack template so your flats land in the right section every time, and read the full tech packs pillar for how the eight sections connect.
Frequently Asked Questions
What is the difference between a flat sketch and a technical flat?
There's no difference; they're two names for the same thing. A flat sketch, or technical flat, is a proportional black-and-white line drawing of a garment laid flat. Some designers say "flat sketch" for the quick version and "technical flat" for the production-ready one, but the document is identical in purpose.
Do I need both front and back views on a flat?
Yes, always draw front and back at minimum. A sewing operator builds what the drawing shows, and skipping the back forces a guess on details like yokes, vents, or seams. Front and back must share the same shoulder width, length, and hem, or the pattern won't reconcile the two views.
Can I draw technical flats by hand?
Yes, hand drawing is valid and teaches proportion well. The catch is revisions. Every size grade, colorway, or seam change means redrawing the whole thing. Most working designers sketch by hand to plan, then rebuild in vector software so edits take seconds instead of a fresh page each time.
What software is best for fashion flat sketches?
Adobe Illustrator is the industry standard for CAD flat sketches because vector paths stay clean, editable, and reusable at any scale. It lets you mirror symmetrical halves, store libraries of collars and pockets, and apply consistent topstitch brushes. Our Illustrator spoke walks through the exact workflow step by step.
How many flats do I need for one tech pack?
At least a front and back view per style, plus detail callouts for anything a main view can't explain. Complex garments add side views, inside construction, or exploded pocket details. Flats are section one of our eight-part tech pack structure, and the rest of the pack references them directly.
How do you keep flats at the same scale across a collection?
Pick one canvas size and one reference measurement, then hold both across every style. Start each flat from a fixed-scale base block so a size 8 dress and a size 8 jacket share proportion. Consistent scale lets a buyer trust that a wide sleeve is genuinely wide, not just drawn larger.
What software do professionals use for flats besides Illustrator?
Adobe Illustrator is the standard, but CLO 3D flattens simulated garments into 2D views, and Kaledo from the Lectra suite is a dedicated textile and flat tool used in larger studios. Affinity Designer and Inkscape cover the same vector ground for less. Clean paths and consistent scale matter more than the brand.
What is the most common flat sketch mistake?
Open paths and a missing or unreconciled back view top the list, followed by drawing off a stretched croquis and slipping scale on details. Each one surfaces at inspection, where a sample is judged against limits like AQL 2.5. A flat that reads wrong becomes a sample cut wrong.
The Bottom Line
A fashion flat sketch isn't art, and treating it like art is how garments get rejected. A technical flat is a build instruction. Keep it symmetrical, keep the paths closed, keep the stroke weights consistent, and draw both front and back so nobody on the line has to guess. Every line should trace to a pattern piece. Start by hand if you're learning proportion, then move to vector so revisions cost seconds, not hours. When the flat is right, the measurement chart, the bill of materials, and the construction notes all have something solid to hang on. Ready to assemble the full document? Build from our tech pack template and read the tech packs pillar next.
Peter Midea is GarmentSpec's technical lead for brand development.
We build the factory-ready spec a manufacturer can quote from without a single question: technical flats, bill of materials, graded points of measure with tolerances, colorways and construction notes. $299 per style, 3 to 5 working days, 2 to 3 revision rounds.
Get your tech pack — $299Start with the free templateWe don't take your production. The spec is yours to send to any factory, anywhere. Talk to us first if you're not sure what you need.
Sources
Every statistic and definition in this article traces to one of the following. Each is listed once here, and cited inline where it is used.
Related guides
- Adobe Illustrator for tech packs
- Fashion flat sketch rules
- Flat sketch software
- Tech packs: the complete guide