Contents
- Is there a standard tech pack format?
- What format do factories actually want?
- What are the seven pages every tech pack nee…
- cm or inches, and how do you lay out the POM…
- How do you assemble the file in order?
- PDF, Excel, or Illustrator?
- Spreadsheet, PDF, PLM, or an AI generator?
- One file per style, or a whole range?
- How should you name and version your files?
- What belongs in every page header, and how d…
- Frequently asked questions
- The short version
A tech pack includes roughly eight core sections: flat sketches, a bill of materials, measurement specs, a cost sheet, size gradings, colorways, construction notes, and revision history. What it does not include is a fixed layout. There's no international standard for how those sections get arranged, which is exactly why brands keep inventing baroque ones, with color-coded tabs, landscape spreads, and cover pages that read like a lookbook. On a factory floor, none of that helps. What a pattern cutter needs is a PDF, one style per file, portrait, page numbered, with a version number in the header and measurements in a table that has a tolerance column. Guru puts the cost of building one at $500 to $2,000 per style (Guru, 2022). Spend that money on something we can actually read. For the measuring itself, see our guide on how to measure garments.
Key Takeaways
- No global standard exists for tech pack format, so factories default to a common spine of about eight sections.
- Ship a PDF, one style per file, portrait, page numbered, with a version number in every header.
- The measurement page carries the most risk: it needs points of measure, a graded size table, and a per-POM tolerance column.
- A single style pack typically costs $500 to $2,000 to produce (Guru, 2022).
If you want the wider picture first, our pillar guide on tech packs covers what these documents do across a whole production run. This page is only about contents: what sits on each page, the order they go in, and the file rules that keep them readable.
Is there a standard tech pack format?
No. There is no ISO or single industry format that dictates how a tech pack must look. A tech pack is the document that communicates every product detail to a factory, and it is built from around eight recurring sections rather than a mandated layout. The sections are conventional. The page design is not.
That gap is where things go wrong. Because nobody enforces a layout, each brand builds its own, and a factory receiving work from thirty brands ends up reading thirty formats. The most useful tech pack isn't the prettiest one, it's the one that looks like every other competent pack a factory has read, so nothing needs decoding. Convention is a feature.
The same document works as a blueprint that carries construction, materials, and measurements from designer to maker. Notice both references agree on the contents and stay quiet on the visual design. That silence is your permission to keep it plain.
Citation capsule: There is no international standard for tech pack layout. Industry references describe a tech pack as a blueprint communicating product details to the factory, listing roughly eight recurring sections, from flat sketches to revision history, without mandating a fixed page design.
For a plain-language definition first, read what is a tech pack and then come back for the format rules.
What format do factories actually want?
A PDF. One style per file. Portrait orientation, page numbers on every page, and a version number in the header. That's the whole answer, and it holds across most factories because a PDF renders the same on every screen and prints the same on every machine. Sewport treats the pack as a fixed reference document, not a live spreadsheet.
Why PDF over a live file? Because the pack is a contract snapshot. When we cut a sample, we cut the version in front of us, and we need to prove later which version that was. A shared spreadsheet that someone edits after the sample is cut destroys that proof. In the factories we work with, the first question when a sample looks wrong is always "which version were you working from," and only a locked PDF with a header version number answers it cleanly.
Keep one style in one file. A twenty-page document holding three styles guarantees that page 14 gets cut against the wrong colorway. Split them. The file name should carry the style number and version, so SS26-1042_v3.pdf tells us everything before we even open it.
Citation capsule: Factories read tech packs as fixed reference documents, which is why a page-numbered, version-stamped PDF is the practical standard. Industry guides describe the pack as a blueprint carrying construction, materials, and measurements to the maker, one product per document.
What are the seven pages every tech pack needs?
Seven pages carry the load: overview, sketch details, reference images, labels and tags, bill of materials, measurements, and revision history. These map directly onto the eight sections industry references describe, folded into a printable spine (Sewport). Add pages if a style is complex. Never drop one of these.
Here's the same spine as a table you can copy into your own template.
| Page | Section | What it must contain |
|---|---|---|
| 1 | Overview / cover | Style number, season, brand, base fabric, colorways, sample size, version number |
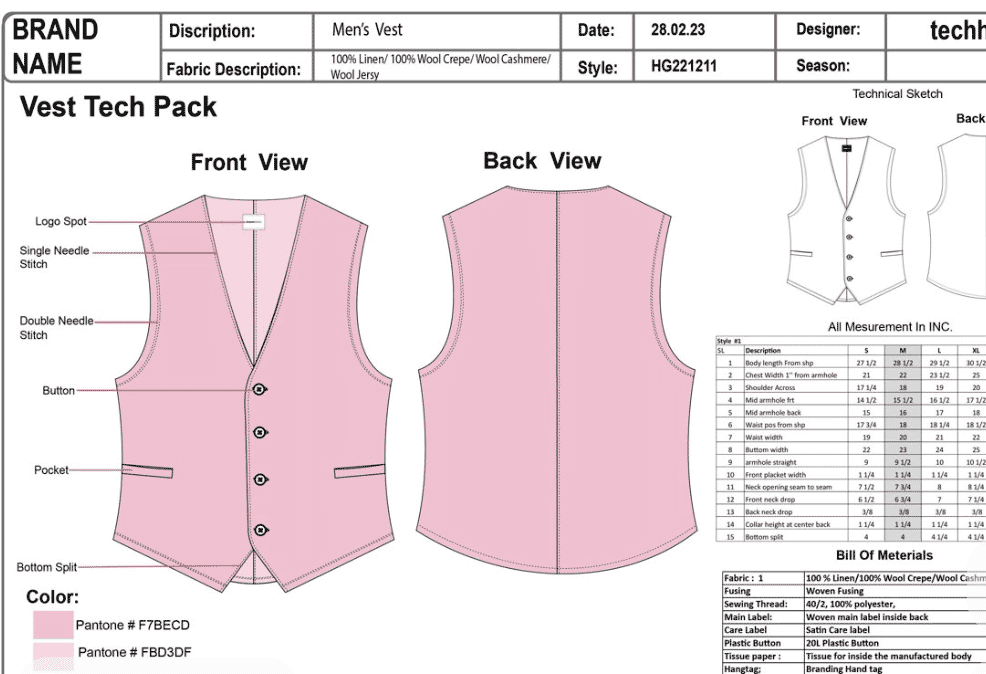
| 2 | Sketch details | Technical flats, front and back, with numbered callouts tied to construction notes |
| 3 | Reference images | Fit references, detail shots, and construction references for anything a flat can't show |
| 4 | Labels & tags | Brand label, size label, care label, hangtag, each with placement in mm |
| 5 | Bill of materials | Item, composition, GSM, colorway, quantity, and position for every material and trim |
| 6 | Measurements | Points of measure, graded size table, and a per-POM tolerance column |
| 7 | Revision history | Version, date, what changed, and who approved it |
Citation capsule: A complete tech pack folds into a seven-page spine: overview, technical flats, reference images, labels, bill of materials, measurements, and revision history. These map onto the roughly eight sections industry references list, including flat sketches, BOM, measurement specs, size gradings, and revision history.
Our free tech pack template is already built in exactly this order, so you can drop your details straight in.
Page 1: Overview / cover
The cover carries the identity of the style. Put the style number, season, brand, base fabric, colorways, sample size, and version number here, all on one page. This is the page a factory reads first to file the job correctly. Get the style number and version wrong here and every downstream reference points at the wrong garment.
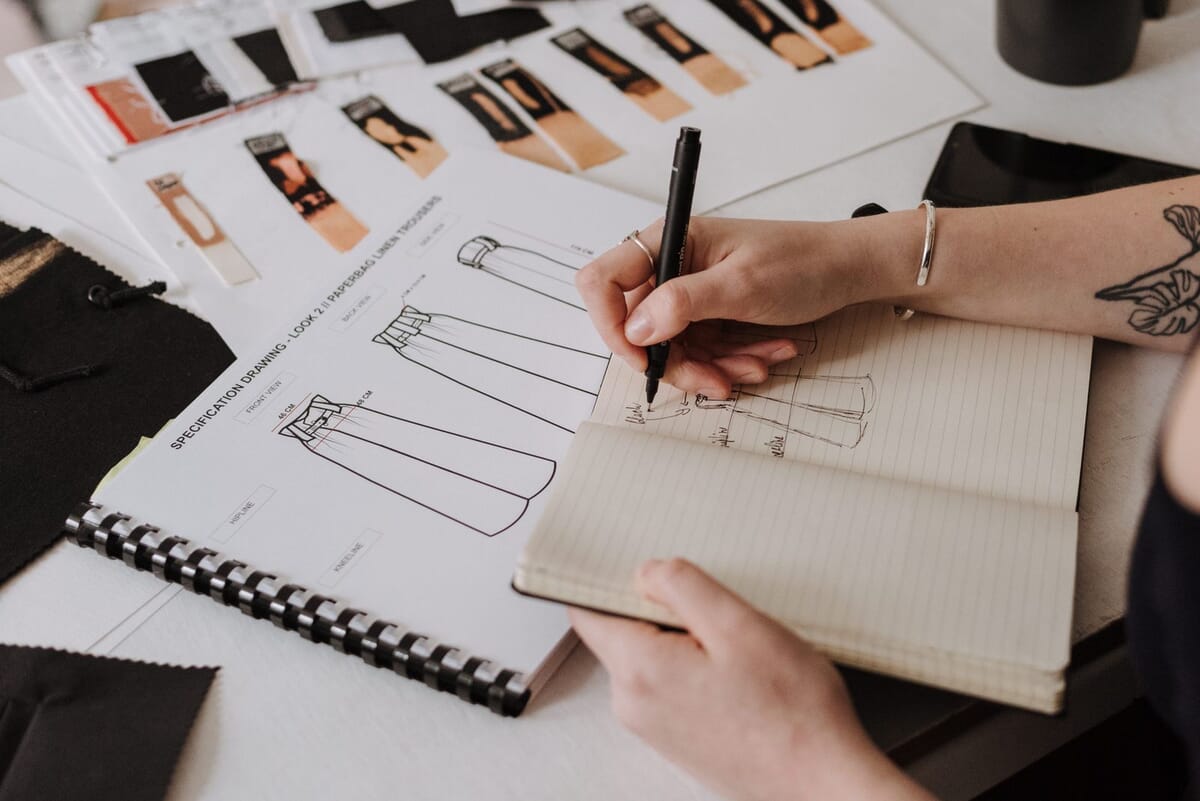
Page 2: Sketch details
Technical flats, front and back, drawn to proportion, with numbered callouts. Each callout number ties to a construction note: stitch type, seam allowance, topstitch position. Sewport describes construction notes as core to the pack, and the flats are where they live visually (Sewport). A photo of a mood-board sketch is not a technical flat. Draw the flat.
Page 3: Reference images
Reference images cover what a flat drawing can't. Fit references show how the garment should sit on a body. Detail shots show a pocket bartack or a specific pleat. Construction references show the inside of a seam. Label each image with what it's proving, not just "inspiration." These pages reduce the guesswork before the first sample.
Page 4: Labels and tags
Labels and tags need placement in millimetres, not "at the neck." Specify the brand label, size label, care label, and hangtag, each with position and attachment method. Labels and tags are among the BOM components a pack must define. Placement in mm removes the argument. "Center back neck, 10mm below the seam" cuts cleanly every time.
Page 5: Bill of materials
The BOM lists every material and trim as a table: item, composition, GSM, colorway, quantity, and position. Sewport itemises BOM components down to embroideries, prints, labels, buttons, tags, threads, trims, and fastenings (Sewport). If a component touches the garment, it belongs in the BOM with a supplier or a spec. A missing trim line stops a production run cold. Before you send it, run it through our tech pack checker.
Page 6: Measurements
This is the page that gets garments rejected. It needs three things: points of measure, a graded size table across your size run, and a per-POM tolerance column. The tolerance column tells the factory how much variance passes inspection. Without it, we guess, and guessing is how a batch fails.
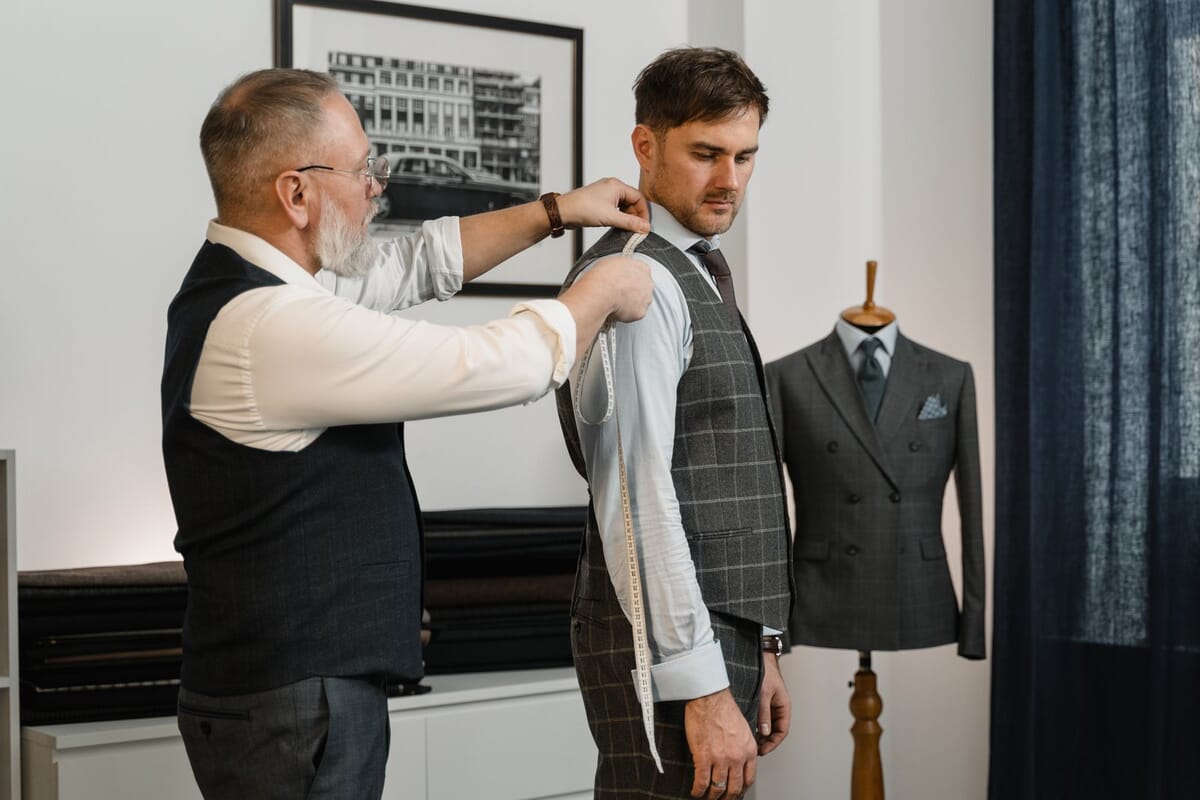
Grading rules are where public standards actually exist. ASTM D5585-21 covers women's misses figure sizes 00 to 20, and ASTM D6960/D6960M extends the plus range 14W to 40W, both maintained by ASTM Subcommittee D13.55 (ASTM). You don't have to grade to ASTM, but a graded table needs the same discipline: one row per point of measure, one column per size, and a tolerance beside it.
The tolerance column matters because inspection is measured against it. Under sampling standards like ISO 2859-1, also published as ANSI/ASQ Z1.4, inspectors pull a sample and count defects against an acceptable quality limit (QIMA). A measurement outside tolerance counts as a defect. Define the tolerance, or someone else defines it for you.
Page 7: Revision history
The last page is the audit trail: version, date, what changed, and who approved it. Revision history is a core section for good reason. Every time a spec changes, the version number in the header increments and a line lands here. This page is what settles disputes when a sample doesn't match the file.
cm or inches, and how do you lay out the POM table?
Pick one unit and state it once. Most factory-facing packs run in centimetres, and the graded women's sizing that ASTM D5585-21 codifies, misses figure 00 to 20, is published so measurements stay consistent across a size run (ASTM). Consistency, not the unit itself, is what protects the fit.
Mixing cm and inches on one page is how a chest measurement lands 2.5 times off. Choose the unit your factory works in, put it in the header, and never switch mid-file. If a client insists on inches for a US buyer, convert the whole table and label it, don't sprinkle both.
Every vertical measurement needs a fixed origin. Reference it to High Point Shoulder (HPS): "front length 68cm from HPS" is unambiguous, "length 68" is a guess. Horizontal measurements need a stated method too. Say whether you measured flat and doubled, single layer, or edge to edge, because the same body reads two different numbers depending on how the tape sits.
Lay the points of measure out as a real table, not prose. One row per POM, a short code column, a "how to measure" column, one column per graded size, then a tolerance column. The codes are what let the flats and the table talk to each other, which matters for the cross-references we cover further down.
Set the tolerance per POM, not one blanket figure for the whole garment. Tighten it where the wearer feels a millimetre, like neck width and shoulder, and loosen it where nobody notices, like sweep. In the factories we work with, a blanket "± 1cm on everything" pack is a red flag, because it tells us the designer never thought about which measurements actually carry the fit. Inspection then reads every band literally: under sampling standards like ISO 2859-1, also published as ANSI/ASQ Z1.4, an out-of-tolerance POM is counted as a defect against the acceptable quality limit (QIMA).
Citation capsule: A tech pack states one measuring unit once, references vertical measurements to High Point Shoulder, and sets a per-point tolerance rather than one blanket figure. Grading discipline follows public standards like ASTM D5585-21, and inspection counts any out-of-tolerance point of measure as a defect.
How do you assemble the file in order?
Build it front to back, then lock it. Assembling a tech pack in a fixed order stops sections from going missing, which matters because a single incomplete pack still costs $500 to $2,000 to produce. Follow the same sequence every time and the file becomes predictable to read.
- Start the cover. Enter style number, season, brand, base fabric, colorways, sample size, and set the version number to v1.
- Place the technical flats. Add front and back flats with numbered callouts, then write the construction note for each number.
- Add reference images. Insert fit, detail, and construction references, each labelled with what it proves.
- Specify labels and tags. List brand, size, care, and hangtag with placement in mm.
- Build the bill of materials. Enter every material and trim: item, composition, GSM, colorway, quantity, position.
- Fill the measurement table. Add points of measure, grade across the size run, and add a tolerance column for every POM.
- Open the revision history. Log v1 with the date and your name.
- Export to PDF. One style per file, portrait, add page numbers, and put the version number in the header. Name the file with style and version.
Citation capsule: Assembling a tech pack in a fixed order, cover, flats, references, labels, BOM, measurements, revision history, then exporting one style per PDF, keeps sections complete. Each style pack typically costs $500 to $2,000 and 5 to 20 hours to produce, so completeness protects real spend.
Need a worked example of a finished file? Our tech pack example walks through a real style in this exact order.
PDF, Excel, or Illustrator?
PDF for the deliverable, always. Build in whatever you like, Illustrator for flats, Excel for the measurement grid, but the file that reaches the factory is a flattened PDF. A PDF prints identically everywhere and can't be silently edited after a sample is cut. Sewport treats the pack as a fixed reference, which a live spreadsheet is not.
Excel has one honest use: building the graded measurement table, where formulas keep grade rules consistent. Export that sheet into the PDF as an image or a clean table. Illustrator owns the flats, because vector callouts stay sharp when we print at A3 on the cutting floor. The packs that cause the fewest questions at the factory arrive as a single PDF where every page prints legibly in black and white, because the machine near the cutting table isn't a color laser.
Don't send a link to an editable cloud file as the master. Send the PDF, and keep your editable source for the next version.
Citation capsule: The deliverable format is PDF, regardless of build tool. Industry references describe the tech pack as a fixed blueprint communicating construction and measurements to the maker, which a locked PDF preserves and a live, editable spreadsheet does not.
Spreadsheet, PDF, PLM, or an AI generator?
The build tool is your choice; the deliverable is a flattened PDF. A single style still costs $500 to $2,000 and takes 5 to 20 hours however you build it, so pick the tool that cuts your time without changing what the factory receives. Each option earns its place at a different stage.
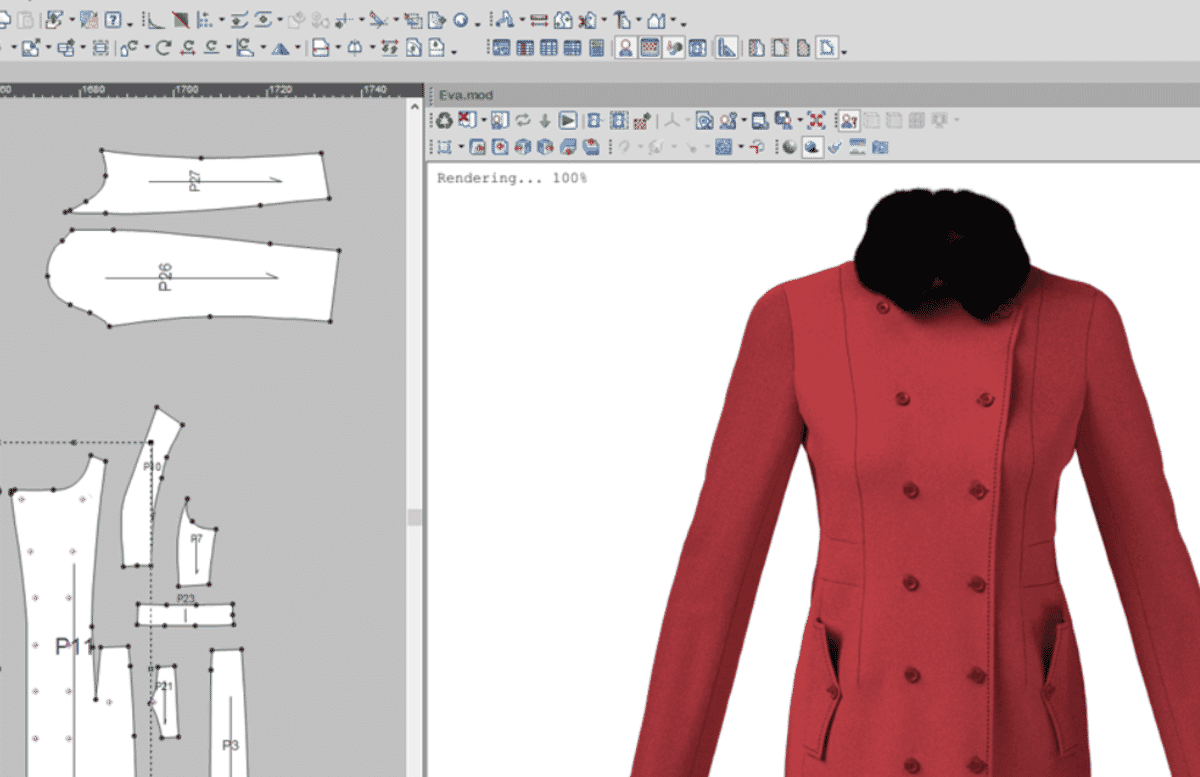
A spreadsheet is cheapest and best at grade math. Excel or Google Sheets handle the measurement grid well, because formulas keep grade rules consistent across the size run. As a deliverable, though, a live sheet fails: it's editable after a sample is cut, it prints badly, and it can't hold sharp flats. Use it to build the measurement page, then export that grid into the PDF.
A PDF from Illustrator or InDesign is the factory-ready output. Vector flats stay crisp when the cutting floor prints at A3, and the file renders and prints the same everywhere. The cost is manual updating: change a measurement and you re-export by hand. That's a fair trade for a locked, legible master.
PLM software sits above both for teams. Tools like PLM and dedicated tech pack apps give you version control, shared component libraries, and multi-user access, which pays off across a large range. The overhead is real: licence cost and setup time. Note that the factory still receives an exported PDF at the end, so PLM organises your side, not theirs.
An AI generator drafts the pack from a brief or a reference image. Adstronaut, disclosed here as an AI tech pack vendor, is one of a group of tools that auto-populate flats, BOM skeletons, and measurement grids from a prompt (Adstronaut, AI vendor). These tools genuinely speed the first draft, but they don't own the numbers: an AI will happily invent a plausible chest measurement and a tolerance it has no basis for, and a factory can't tell a guessed POM from a graded one. Treat AI output as a starting skeleton a human then verifies against a real sample, not as a finished file.
Freelance production sits across a wide band too. Tech pack work listed on Cad Crowd spans a broad observed range depending on complexity and component count (Cad Crowd, observed range), which mirrors the Guru figure. Whatever you pay and whatever you build in, the factory should still open one flattened PDF.
Citation capsule: The build tool is a choice; the deliverable is a PDF. Spreadsheets handle grade math, PDF tools handle sharp flats, PLM handles version control across a range, and AI generators like Adstronaut draft a skeleton a human must verify. A single style costs $500 to $2,000 to produce.
One file per style, or a whole range?
One file per style. A tech pack documents a single garment, and bundling a range into one document is how the wrong page gets cut. Keep each style in its own version-stamped PDF, then group them in a folder if you need to send a range. Sewport frames the pack around a single product's construction, materials, and measurements (Sewport).
The exception people ask about is colorways. Colorways belong inside one style file, listed on the cover and carried through the BOM, because they share the same pattern and measurements. Different silhouette equals different file. Same silhouette in three colors equals one file with three colorways.
Citation capsule: A tech pack documents one style per file, with colorways carried inside that single document because they share pattern and measurements. Industry references frame the pack around a single product's construction and materials, not a whole range in one document.
Working with an external factory for the first time and want the pack built and pressure-tested before you send it? Our tech pack service produces the file in this exact seven-page format.
How should you name and version your files?
Use one naming pattern and never break it: style number, revision, date. Version confusion is expensive, because inspection counts a garment built from the wrong revision as a defect against the acceptable quality limit, most commonly AQL 2.5 (QIMA). A file name is the cheapest defence you have.
Put the style number first so files sort by style, the revision next, then an ISO date so they sort chronologically inside a style. SS26-1042_rev3_2026-07-19.pdf tells us the style, the version, and the day it was cut without opening anything. Avoid spaces and client initials; they break on some systems and mean nothing to the floor.
Number revisions with discipline. The first file that reaches a factory is rev1. Every change that goes back out increments it: rev2, rev3, and so on. Keep internal drafts separate if you must, using a decimal like rev2.1, but only whole-number revisions get sent. Never edit and re-save a released file under the same name, because two different garments then share one identity.
Keep a change log, which is exactly what the revision-history page is for. Every new revision adds a row: version, date, what changed, and who approved it. "rev3, 2026-07-19, sleeve length +1cm all sizes, approved JM" is enough to settle any later dispute about which sample matched which file.
The version number lives in three places at once, and they must agree: the file name, the header on every page, and the top row of the revision history. When a sample looks wrong, the first thing we do is check those three against each other, and a mismatch usually explains the problem before anyone re-measures a single seam.
Citation capsule: Tech pack files follow one pattern, style number then revision then ISO date, with whole-number revisions for every release and a change-log row per version. The version number matches across the file name, the page header, and the revision history, because a garment built from the wrong revision counts as a defect.
What belongs in every page header, and how do pages cross-reference?
Every page repeats a compact identity block, and callout numbers tie the flats to the bill of materials. Freelance tech pack production observed on Cad Crowd runs across a wide range (Cad Crowd, observed range), so a self-identifying page protects that spend once files get printed, split, or emailed loose. A page that can't say which style it belongs to is a liability.
Put the same header on every page: style number, style name, brand, season, revision, and "page X of Y". Add a footer with the date, the designer or contact, and a short confidentiality line. Pages get printed and separated on a cutting floor, and a loose page 6 with no style number is an orphan nobody can place. Repetition is the point here, not clutter.
Make it legible on the worst screen and the worst printer in the building. Use black text at a readable size, roughly 9pt or larger, and never rely on color alone to carry meaning, because the machine near the cutting table is often mono. If a detail only reads in color, it won't survive the print, so label it in words as well.
Cross-references are what turn separate pages into one document. A numbered callout on the flat says "3". BOM row 3 says "16L corozo button". Construction note 3 says how it attaches. One number, three pages, no ambiguity. Renumber consistently if you edit, because a callout pointing at the wrong BOM row is worse than no callout at all.
Present multiple colorways inside the single style file, not as duplicate packs. List the colorways on the cover, then add a colorway column to the BOM that maps every material to its color per way. Duplicating a whole pack per color is the most common self-inflicted version error we see: someone fixes a measurement on the black pack and forgets the navy one. One pack with a colorway matrix keeps a single source of truth for the shared pattern.
Citation capsule: Every tech pack page repeats an identity header, style number, brand, season, revision, and page number, so separated pages stay traceable. Numbered callouts cross-reference the flats, bill of materials, and construction notes by a shared item number, and colorways live inside one file as a matrix rather than duplicate packs.
Frequently asked questions
What does a tech pack include?
About eight core sections: flat sketches, a bill of materials, measurement specs, a cost sheet, size gradings, colorways, construction notes, and revision history. No ISO or international standard fixes how they are laid out, which is why formats vary by brand. Deliver them as a page-numbered PDF.
What file format should a tech pack be?
PDF. Build flats in Illustrator and the measurement grid in Excel if you like, but export to a flattened, page-numbered PDF for delivery. A PDF prints identically everywhere and can't be edited after a sample is cut, which protects the version you actually produced.
How many pages should a tech pack be?
At least seven: overview, sketch details, reference images, labels and tags, bill of materials, measurements, and revision history. Complex styles need more pages, never fewer. These map onto the roughly eight sections industry references describe as core to a complete pack.
Why does the measurement page need a tolerance column?
Because inspection measures against it. Sampling standards like ISO 2859-1, also published as ANSI/ASQ Z1.4, count measurements outside tolerance as defects during acceptance checks. The most common general inspection level is AQL 2.5, with 1.0 for higher-risk items (QIMA). No tolerance means someone else sets it.
How much does a tech pack cost to produce?
Guru puts a single style pack at $500 to $2,000, taking roughly 5 to 20 hours of work (Guru, 2022). Cost rises with construction complexity and the number of components. A clean, complete format protects that spend by cutting back-and-forth with the factory.
Should a tech pack use cm or inches?
Either, as long as you use one consistently and state it in the header. Most factory-facing packs run in centimetres, and public grading standards like ASTM D5585-21 are published so measurements stay consistent across a size run. Mixing units on one page is a common cause of rejected samples.
Can an AI tool generate a tech pack?
Partly. AI vendors like Adstronaut draft flats, a BOM skeleton, and a measurement grid from a prompt or image, which speeds the first version. They don't own the numbers, though: an AI can invent a plausible measurement or tolerance, so a human must verify the output against a real sample before it goes out.
How should I name and version tech pack files?
Use one pattern: style number, revision, then ISO date, like SS26-1042_rev3_2026-07-19.pdf. Increment the whole-number revision on every release, and log each change in the revision-history page. The version must match across the file name, the page header, and the revision history, or a factory can build the wrong revision.
The short version
Format your tech pack for the person cutting the garment, not for a portfolio. Ship a PDF, one style per file, portrait, page numbered, with a version number in the header. Build the seven-page spine every time: overview, flats, references, labels, BOM, measurements, and revision history. Put a tolerance column on the measurement page, because inspection is measured against it, and a missing tolerance is a defect waiting to happen. None of this is glamorous. All of it saves a rejected batch. Start from our free tech pack template, which is already built in this order, and check your draft against the common errors in our tech pack mistakes guide before you send.
Peter Midea is GarmentSpec's technical lead for brand development.
We build the factory-ready spec a manufacturer can quote from without a single question: technical flats, bill of materials, graded points of measure with tolerances, colorways and construction notes. $299 per style, 3 to 5 working days, 2 to 3 revision rounds.
Get your tech pack — $299Start with the free templateWe don't take your production. The spec is yours to send to any factory, anywhere. Talk to us first if you're not sure what you need.
Sources
Every statistic and definition in this article traces to one of the following. Each is listed once here, and cited inline where it is used.