Contents
- What does Adobe Illustrator do for a tech pa…
- How do you set up the artboard and grid?
- How do you draw a clean vector flat in Illus…
- Which stroke weights read on a factory floor?
- Which Illustrator features speed up drawing…
- How do you draw construction details as vect…
- How do you add callouts and measurement tabl…
- How do you export a print-ready PDF?
- When should you not reach for Illustrator?
- Why does file hygiene matter more than the d…
- FAQ
- The short version
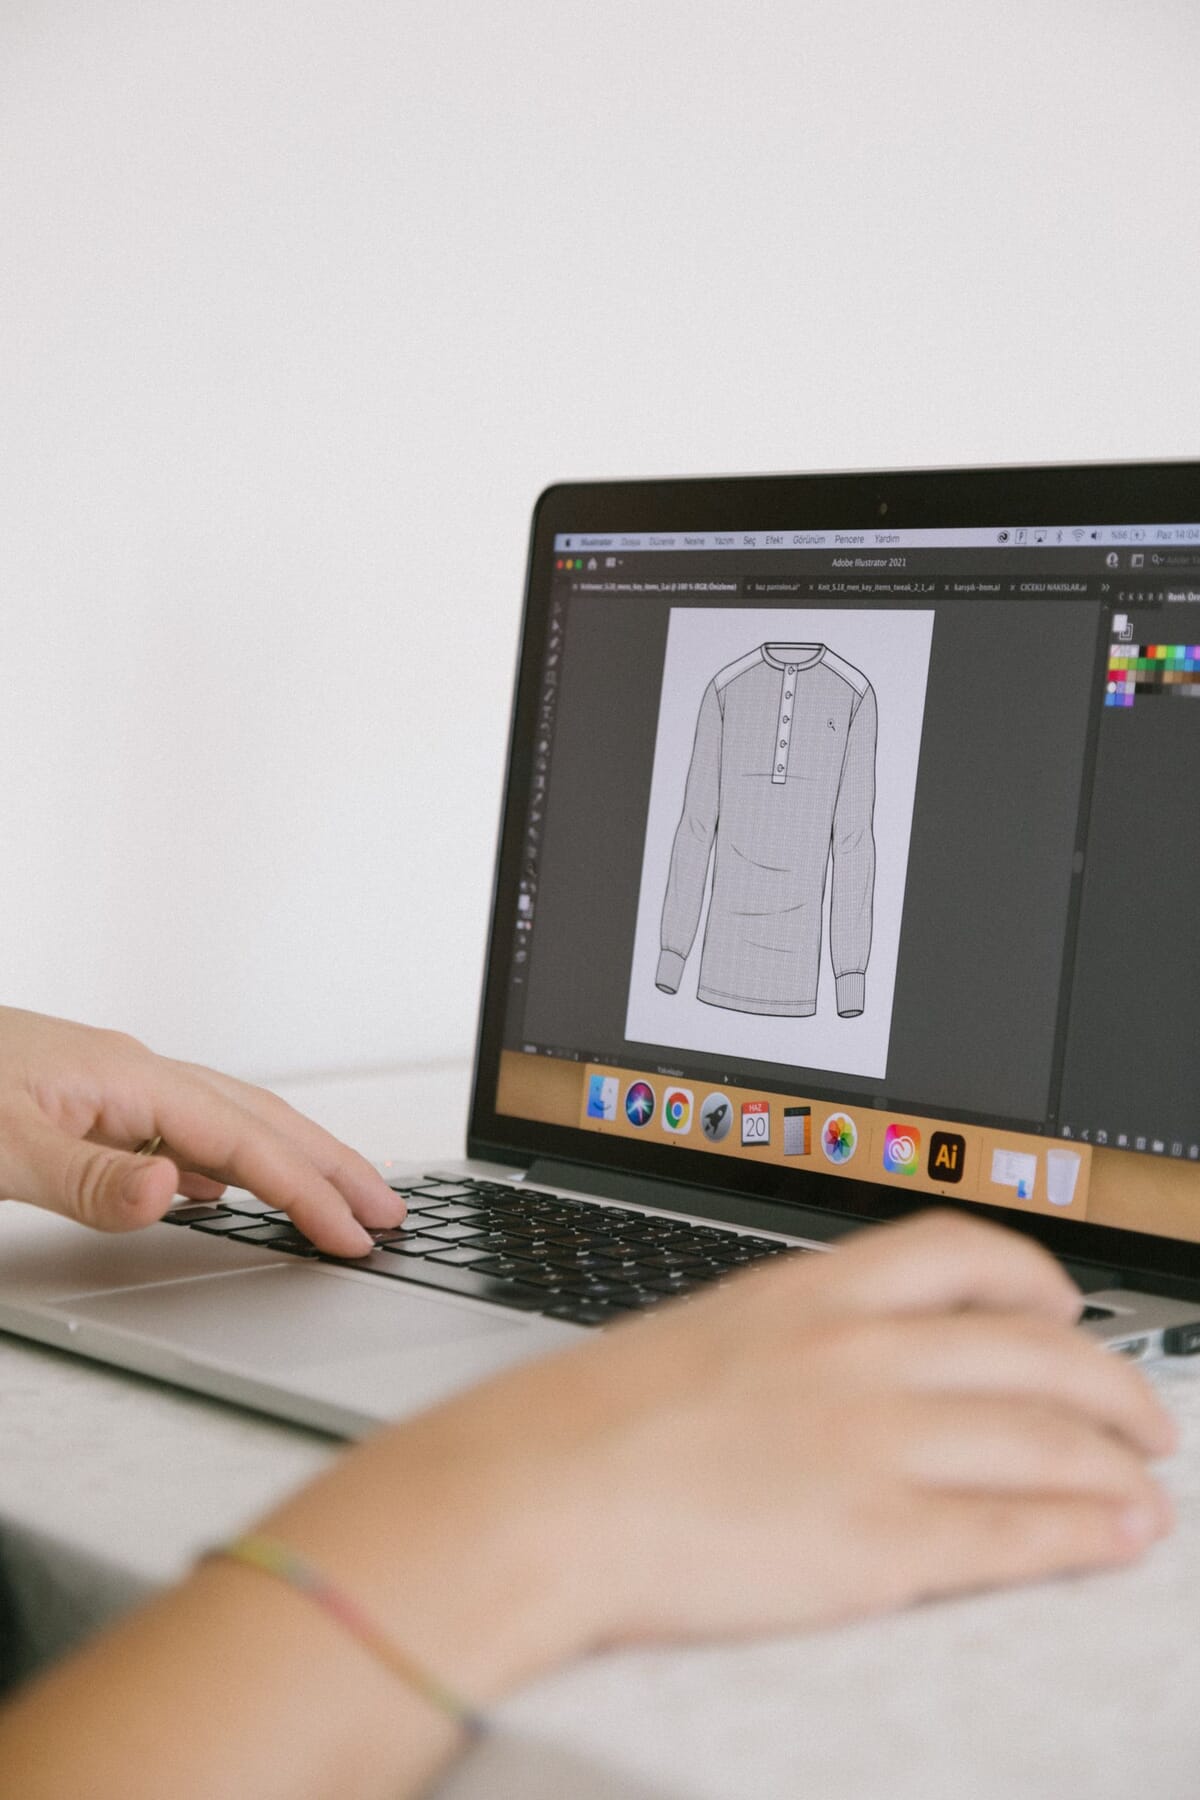
A tech pack costs between $500 and $2,000 per style, and takes 5 to 20 hours to build (Guru, 2022). Most of that time goes into the flats. Get the drawing wrong and every downstream page inherits the error. This is the workflow I use to draw technical flats in Adobe Illustrator so they still read when a cutter prints them at A3 on a table. It's ordered, it's plain, and it assumes you want the garment made right the first time.
Key Takeaways
- Technical flats are section one of a tech pack, the drawing everything else references.
- Build the flat as closed vector paths, then mirror it with Reflect for perfect symmetry.
- Use heavier outer strokes and lighter internal seam lines so the garment reads at A3 in pure black and white.
- Export a print-ready PDF, one style per file, layered and named. Guru puts a full pack at 5 to 20 hours (2022).
I've watched a run get pulled because a pocket sat two centimetres off, and the flat that "approved" it was a blurry raster export nobody could read. Vector fixes that. Let's build it in order.
What does Adobe Illustrator do for a tech pack?
Illustrator draws the technical flat, the vector line drawing that sits at the front of every tech pack. Flats are listed as the first of the eight standard sections. Because the drawing is vector, it scales to any print size without going soft, which is exactly what a cutting table needs.
A tech pack is the technical blueprint a factory reads to make your garment, and the flats are its spine (Sewport). Every measurement, callout, and construction note points back to the drawing. That's why the flat has to be a true vector, not a scan or a photo of a sketch.
New to the document itself? Start with our guide on what a tech pack is before you open Illustrator, then come back for the drawing steps.
How do you set up the artboard and grid?
Set up before you draw a single line. Create an A4 or A3 artboard in CMYK, drop a symmetry guide down the centre, and turn on Smart Guides. Getting this right costs minutes and saves hours, and remember a full pack already runs 5 to 20 hours (Guru, 2022).
The setup you skip now is the setup you redo later. A clean artboard, a centre guide, and named layers are the cheapest insurance you'll buy on the whole file.
Artboard and units
Pick A3 if the garment is large or detailed. Set your units to millimetres if you're spec'ing metric, inches if not, and don't mix them mid-file. Give yourself margins. Cutters print with crop marks and staple edges, and a flat jammed to the paper edge loses information.
The centre guide
Pull one vertical guide to the exact horizontal centre of the artboard. You'll draw half the garment, then reflect it across this line. That single guide is what makes a front bodice symmetrical, which is something the human hand cannot do freehand and a factory will notice instantly.
How do you draw a clean vector flat in Illustrator?
Draw one half of the garment with the Pen tool as a single closed path, then mirror it. Flats are drawn as vector line art, the CAD-style technical drawing a factory reads (Sewport). Closed paths matter because open ones leave gaps that print as breaks in the outline.
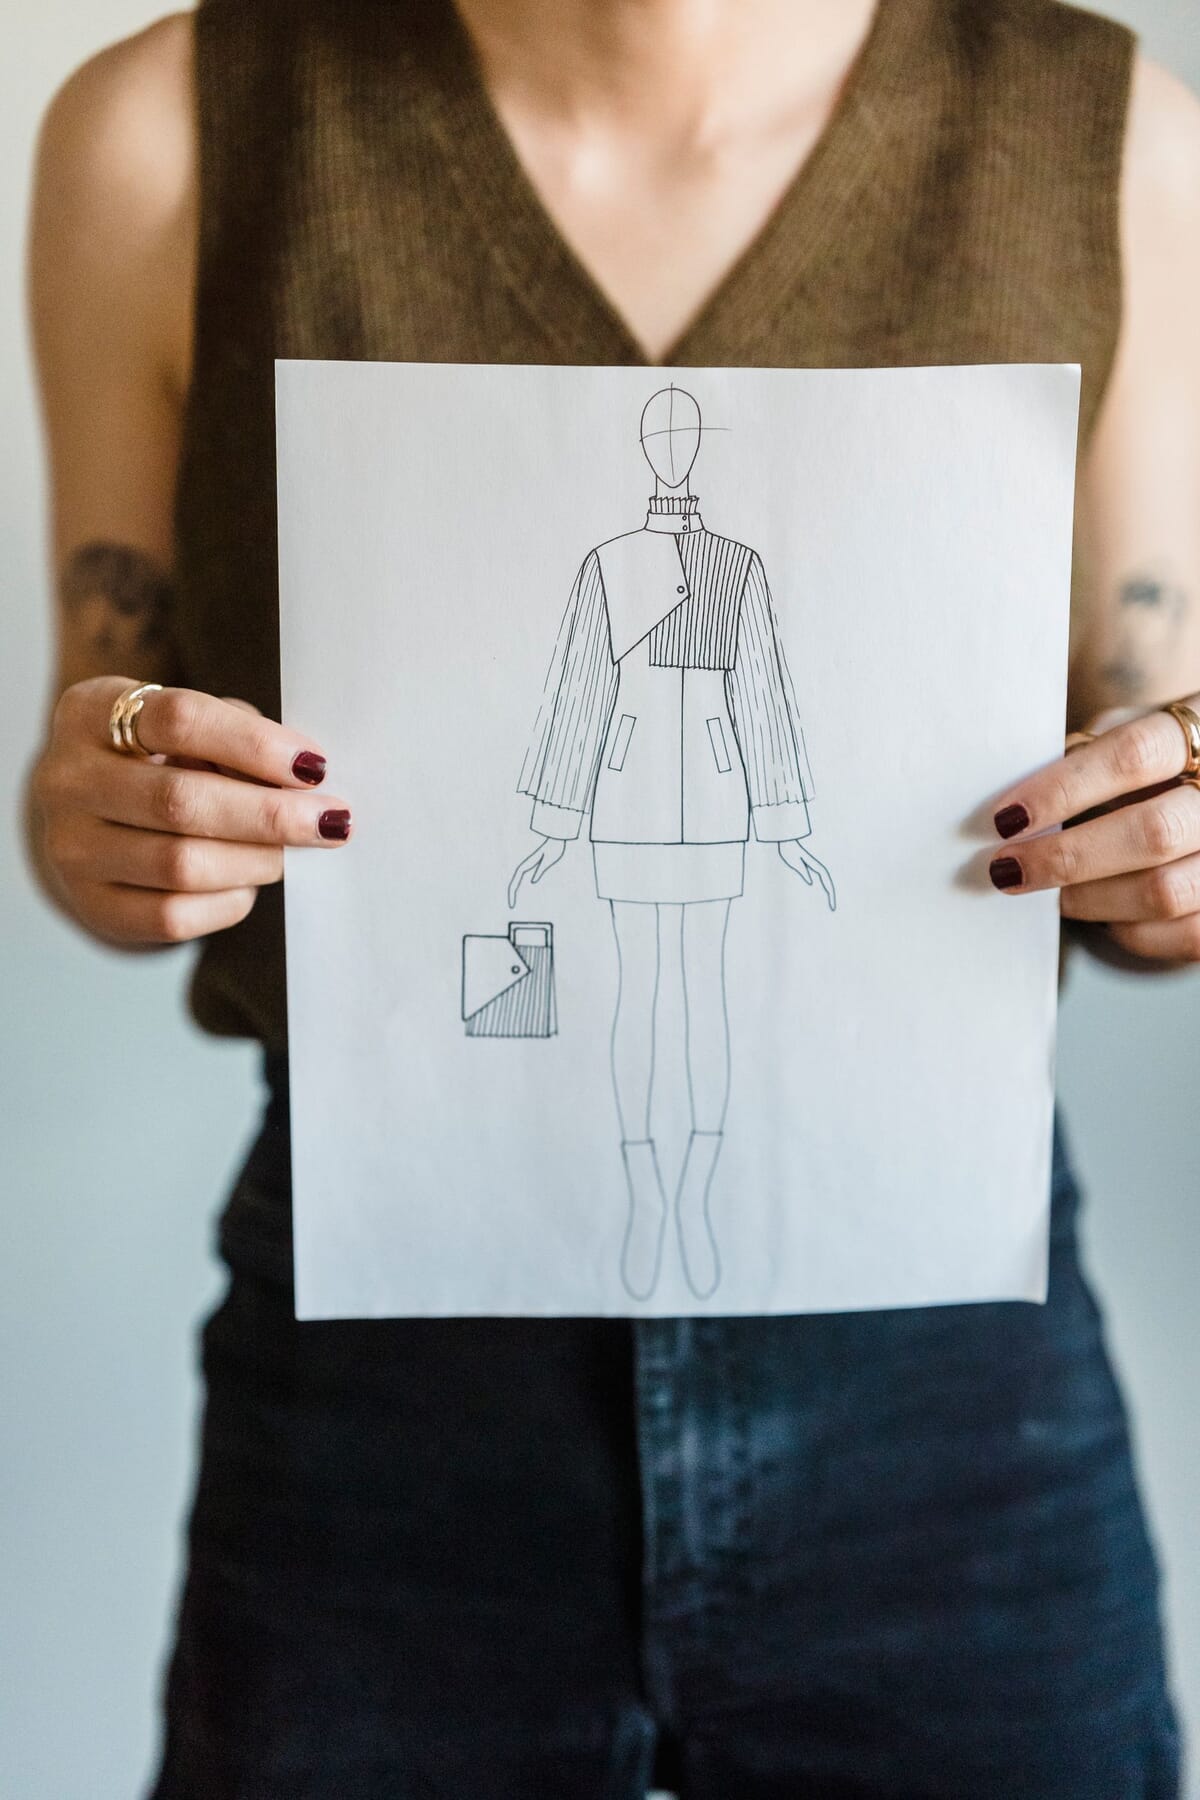
The technical flat is section one of the standard tech pack and the reference every other page cites. In Illustrator that flat has to be closed vector paths on a locked template, not a sketch dropped in as an image.
Pen tool and closed paths
Trace the outer silhouette with the Pen tool. Click, don't drag, for straight runs. Add anchor points only where the line actually changes direction. Fewer points means a cleaner curve. Close the path back to your start anchor so the shape is a true outline, not a stray line.
Symmetry with Reflect
Here's the step people skip. Select your half, hold Alt, and use Object then Transform then Reflect across the Vertical axis to copy a mirrored half. Join the two centre anchors. Now the garment is perfectly symmetrical. Do this and a seam that should line up, lines up.
Most rejected flats I've seen weren't wrong, they were asymmetrical by a hair, and the factory built exactly the lopsided thing that was drawn. Reflect is not a shortcut. It's a quality control step disguised as one.
Which stroke weights read on a factory floor?
Use two stroke weights at minimum: a heavy outline and a lighter internal line. Print your flat in pure black and white before you trust it. AQL inspection assumes a defect is visible, and 2.5 is the most common acceptance level for general goods (QIMA). If the inspector can't read the seam, they can't check it. The full set of drawing conventions, from stroke weights to topstitch and callouts, is in our fashion flat sketch rules.
Acceptance sampling under ISO 2859-1, also published as ANSI/ASQ Z1.4, only works when the spec is legible enough to inspect against; QIMA notes AQL 2.5 for general goods and 0 for critical defects (QIMA). A flat that goes muddy at A3 fails that test before the garment is even sewn.
| Illustrator setting | Recommended value | Why it matters on a factory floor |
|---|---|---|
| Artboard size | A3, CMYK | Prints large enough to read on a cutting table without pixelation |
| Outer stroke weight | 1.5 to 2 pt | Silhouette stays visible after photocopying and folding |
| Internal seam stroke | 0.5 to 0.75 pt | Seams and topstitch read as secondary, not competing with the outline |
| Colour mode | Pure black, no tints | Survives a black-and-white print on the line |
| Export format | PDF (print, vector) | Stays sharp at any zoom or print size |
The Width tool and brushes
Illustrator's Width tool lets you taper a single stroke, useful for topstitch that thins at a corner. Keep it restrained. A dashed brush reads as topstitching, a solid line reads as a seam. Pick a convention and hold it across every flat in the pack so nobody guesses.
The eight standard sections all lean on that legibility, and the flat is the first of them. Here's how they stack up.
Want the full page anatomy? Our breakdown of what belongs on each page shows where the flat sits relative to the other seven sections.
Which Illustrator features speed up drawing flats?
A handful of features turn a slow hand-drawing job into a fast, repeatable one, which matters when a full pack already runs 5 to 20 hours (Guru, 2022). None of these are advanced. They're the difference between redrawing the same zipper twenty times and drawing it once.
| Feature | What it does for a flat | Why it saves time |
|---|---|---|
| Symbols | Store a trim once, a zipper pull, a drawcord tip, a rivet | Reuse across every style; edit the symbol and all instances update |
| Graphic and character styles | Save your callout arrow and label look | Every leader line matches without eyeballing font sizes |
| Global swatches | Link a colourway fill to one swatch | Change the colour once and every panel using it updates |
| Pathfinder | Combine or subtract shapes to build pockets, plackets, cutouts | Cleaner than drawing complex panels point by point |
| Appearance panel | Stack multiple strokes on one path | Draw a seam and its topstitch as a single editable object |
| Width tool | Taper a stroke along its length | Topstitch that thins at a corner without a second path |
The feature that pays back fastest is Symbols, and almost nobody uses it early. Build a small library of the trims you reuse, a standard woven label, your usual zipper, a drawcord tip, and your third tech pack draws itself from parts you already own. The designers who stay slow are the ones redrawing a rivet from scratch on every style.
Lean on keyboard shortcuts too. Pen (P), Selection (V), Reflect off the Transform menu, and lock or hide layers with a keystroke. The mouse-only workflow is where hours quietly disappear.
One more habit compounds all of these: build the library on your first real style, not your fifth. It feels like overhead when you've only drawn one garment, so most people postpone it and pay full price on every flat after. Save the zipper as a symbol the first time you draw it, save the callout look as a style the first time it looks right, and the setup you resented on style one is the reason style four takes an afternoon. The tool rewards the founder who invests early and quietly taxes the one who doesn't.
How do you draw construction details as vector?
Draw each construction cue as a fixed stroke convention, so a factory reads the same visual language on every flat. The flat is section one of the tech pack and the reference every other page cites, so the way you draw a seam versus a topstitch has to be consistent and unambiguous. In Illustrator, each convention is a specific stroke setting you save and reuse.
- Seam: a solid line, roughly 0.5 pt, on the internal-lines layer.
- Topstitch: a dashed stroke. Set the dash in the Stroke panel, and keep the same dash across every flat so it always reads as stitching.
- Ribbing: short parallel strokes, or a saved pattern brush along the cuff and hem edge.
- Gathers: a wavy line where the fabric bunches, drawn with the Pen and smoothed.
- Pleats: fold lines with a small direction arrow showing which way the fold faces.
- Elastic: a zigzag or a wave inside the channel to signal stretch.
- Buttons and buttonholes: a button is a small circle symbol; a buttonhole is a short capsule shape, both reused from your library.
For the full grammar of what each convention means, our fashion flat sketch rules covers the conventions themselves. This page is about producing them cleanly in Illustrator. Pick your dash setting and your rib brush once, save them, and never redraw the decision.
How do you add callouts and measurement tables?
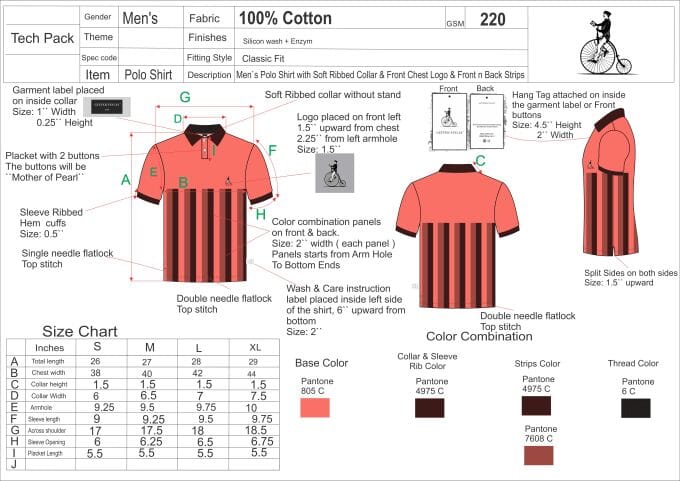
Add callouts as short leader lines with plain-language labels, then place a measurement table beside the flat. Measurements grade across sizes, and ASTM D5585-21 covers women's misses figure sizes 00 to 20 (ASTM). A vector callout stays sharp; a raster one blurs the instant someone scales the page.
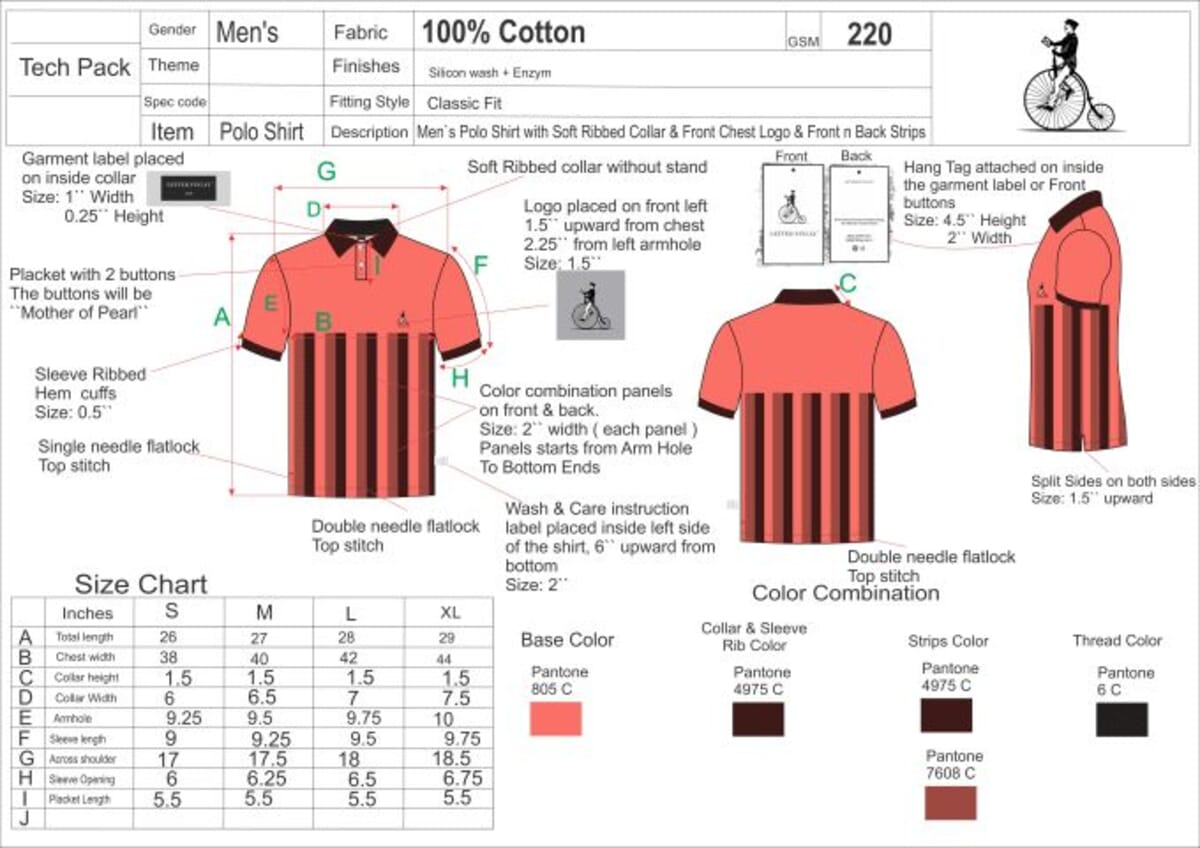
Body measurement tables trace to standards maintained by ASTM Subcommittee D13.55 (ASTM), which is why your points of measure and grading columns need to be exact, legible, and vector. A number that can't be read is a number the factory has to guess.
Leader lines that don't move
Draw leader lines on their own layer. Use a thin stroke, a small dot or arrowhead at the garment, and a label at the free end. Number your points of measure, A, B, C, and line those letters up with your table rows. Keep leaders off the garment outline so they never get mistaken for a seam.
The measurement table
Build the table in Illustrator or place it from a linked file. Columns: point of measure, code, and one column per size. Rows: chest, waist, length, and the rest. Line the letters in the table up with the callouts on the flat. This is the pair a grader actually works from.
You can skip most of this setup with our ready-made tech pack template, which ships the artboard, layers, and table structure already built. If you work only in Illustrator, the free Illustrator tech pack template has the layers, callout styles and POM table set up as an .ai file.
How do you export a print-ready PDF?
Export with Save As, choose Adobe PDF, and pick the High Quality Print or Press preset. Keep it vector, keep marks on if the factory prints trimmed, and check it opens clean. A legible PDF is the difference between a real check and a rubber stamp, because an inspector can only catch what they can see.
Any inspection breaks down when the reference document is unreadable, no matter the sampling plan. A vector PDF holds at any zoom. Flatten nothing, rasterize nothing, and the line stays crisp from screen to cutting table.
If drawing every page yourself sounds like a week you don't have, our tech pack service builds the whole document, flats and all, from $299 per style. It's the same workflow on this page, done for you.
Export checklist
Confirm colour mode before you export, not after. Turn off any RGB effects. Embed fonts or outline your type so labels don't reflow on a machine that lacks your font. Name the file with the style number and date. Open the finished PDF yourself and read it at A3 zoom, because that's how the floor will see it.
When should you not reach for Illustrator?
Illustrator owns the flats, but it isn't the right tool for every page of a tech pack. Knowing where it stops saves you from forcing a job into the wrong app. Three parts of the document belong elsewhere, and pretending otherwise slows you down.
The grade math is the clearest case. Illustrator's tables are static, so they can't step a measurement across a size run for you. Build the graded numbers in a spreadsheet where formulas keep the increments consistent, then place or type the finished figures into your flat. For picking the drawing app itself, our flat sketch software guide compares the alternatives. And if you want fabric drape and fit checked before sampling, that's 3D tools like CLO, not vector line art. Illustrator draws how a garment is built; it doesn't simulate how it hangs. Use it for what it's unmatched at, the legible vector flat that survives a printer and a folding table, and hand the grade math and the fit simulation to the tools built for each of them. Forcing every page through one app is how a workflow gets slow without anyone noticing.
Why does file hygiene matter more than the drawing?
Because a perfect flat in a messy file still gets built wrong. Keep one style per Illustrator file, use named layers, and label your artboards. Most of the rework I see comes from files nobody could navigate, not bad drawing.
The build balloons when a file has forty unnamed layers and three styles crammed together. One style, one file, named layers. That discipline is what lets a second person open your work and ship it without calling you.
Separate layers for the flat, callouts, text, and measurement guides. Lock the ones you're not touching. Name them in plain words. When you or your grader hands this off, and it does get handed off, the structure is the message. This is where our wider technical flats guide and the tech packs pillar go deeper on standards and handoff.
FAQ
Do I need Adobe Illustrator to make a tech pack?
No, but it's the standard tool for the flats. Illustrator draws vector line art that stays sharp at any print size (Sewport). Affinity Designer or Inkscape can also produce vector flats. What matters is that the drawing is vector, not a scan, so the factory reads it clean.
What size should my Illustrator artboard be for a tech pack?
Use A3 in CMYK for detailed garments, A4 for simple ones. Cutters often print flats at A3 on the table, so the artboard should hold up at that scale. Building the full pack takes real time, and correct setup protects it.
How do I make a technical flat symmetrical in Illustrator?
Draw one half, then use Object, Transform, Reflect across the vertical axis to mirror it, and join the centre anchors. Perfect symmetry matters because a factory builds exactly what's drawn. A lopsided flat gets built lopsided.
What stroke weight should I use for tech pack flats?
Use roughly 1.5 to 2 pt for the outer silhouette and 0.5 to 0.75 pt for internal seams. Measurements grade to standards like ASTM D5585-21 for misses 00 to 20 (ASTM), and legible line hierarchy keeps those details readable when the flat prints in black and white.
What file format should I export a tech pack in?
Export a vector PDF using the High Quality Print or Press preset. Vector stays sharp at any zoom, so the factory reads the same crisp line on screen or printed at A3. Keep one style per file and name it with the style number and date.
Which Illustrator tools speed up drawing flats?
Symbols, styles, and global swatches do the most. Save reused trims as symbols, your callout look as graphic and character styles, and colourway fills as global swatches, then reuse them across every style. Pathfinder builds complex panels, and the Appearance panel stacks a seam and its topstitch on one editable path.
How do I draw topstitching in Illustrator?
Use a dashed stroke. Draw the stitch line, then set a dash pattern in the Stroke panel, keeping the same dash across every flat so it always reads as stitching rather than a seam. The Width tool can taper it at a corner, and stacking it on the seam path through the Appearance panel keeps the two together.
The short version
Set up the artboard first. Draw one half with the Pen tool, mirror it with Reflect, and use two stroke weights so the flat reads in black and white. Add lettered callouts, line them up with a measurement table, and export a vector PDF at High Quality Print. Then keep the file clean: one style, named layers, labelled artboards. None of this is fancy. It's the difference between a garment made right and a run pulled off the line. If you'd rather not draw it yourself, our tech pack template gives you the whole structure to fill in.
Peter Midea is GarmentSpec's technical lead for brand development.
We build the factory-ready spec a manufacturer can quote from without a single question: technical flats, bill of materials, graded points of measure with tolerances, colorways and construction notes. $299 per style, 3 to 5 working days, 2 to 3 revision rounds.
Get your tech pack — $299Start with the free templateWe don't take your production. The spec is yours to send to any factory, anywhere. Talk to us first if you're not sure what you need.
Sources
Every statistic and definition in this article traces to one of the following. Each is listed once here, and cited inline where it is used.