Contents
- What Is a T-Shirt Tech Pack?
- What Must a T-Shirt Tech Pack Include?
- Where Do T-Shirts Actually Fail?
- How Do You Spec a Crew, V-Neck, or Scoop Nec…
- How Should the Shoulders, Sleeves, and Hems…
- How Do You Measure a T-Shirt Correctly?
- GSM, Combed vs Carded: What Fabric Spec Does…
- How Should You Spec Prints and Placement?
- Construction and Shrinkage: What Tolerances…
- What Should You Hand a Jersey Factory?
- How Much Does a T-Shirt Tech Pack Cost?
- Frequently Asked Questions

A t-shirt looks like the simplest thing you can sew. That's exactly why it's the easiest garment to get subtly wrong. A tee has fewer than a dozen measurements, one or two seams, and a neckline that quietly decides whether the whole thing reads premium or cheap. A tech pack is the document that stops small errors from ever reaching a cutting table. Guru estimates a full spec costs $500-$2,000 per style when you outsource it, and takes 5 to 20 hours to build (Guru, 2022). Build one yourself and it costs your time. This guide walks through every section a t-shirt tech pack needs, and the exact places tees fail once they hit the line.
Key Takeaways
- A t-shirt tech pack is a factory-facing spec sheet: flats, points of measure, BOM, construction, and print details.
- Necklines and shrinkage cause more tee rejections than any other feature, because both change after the first wash.
- Every measurement needs a tolerance. ASTM grading standards exist precisely because "close enough" fails inspection.
- A full spec runs $500-$2,000 outsourced, or your own time with a free template.
If you're new to the format, start with our guide on what a tech pack is and the full tech pack pillar before you spec your first tee.
What Is a T-Shirt Tech Pack?
A t-shirt tech pack is the technical document that tells a factory exactly how to cut, sew, and finish your tee. It bundles technical flats, a graded measurement chart, a bill of materials, construction notes, and print artwork into one file. It's the blueprint every manufacturer needs to make a garment correctly. Without it, the factory guesses. Guessing is where tees go wrong.
The tee is deceptively lean. There's no zipper, no lining, no complicated closure. So people assume a rough sketch and a reference sample will do. They won't. The neckline construction alone has four or five decisions baked into it, and each one shows on the finished garment.
A t-shirt tech pack translates a design into buildable instructions: flats, points of measure, a bill of materials, seam and stitch types, and print placement. A tech pack is the blueprint a factory needs to produce a garment accurately, which is why even a single-seam tee needs one.
In my experience across many factories, the tees that arrive without a proper spec aren't rejected for one dramatic reason. They're rejected for five small ones stacked together: a neck that's a hair too wide, a body that grew half an inch after wash, a print sitting low. None of those are catastrophes on their own. Together they read as "wrong."
What Must a T-Shirt Tech Pack Include?
A complete t-shirt tech pack covers eight core sections: technical flats, bill of materials, points of measure, cost sheet, size grading, colourways, construction details, and revision history. Sewport adds that the bill of materials should account for every component, from the shell fabric down to the neck tape and care label (Sewport). Skip one and the factory fills the gap with an assumption.
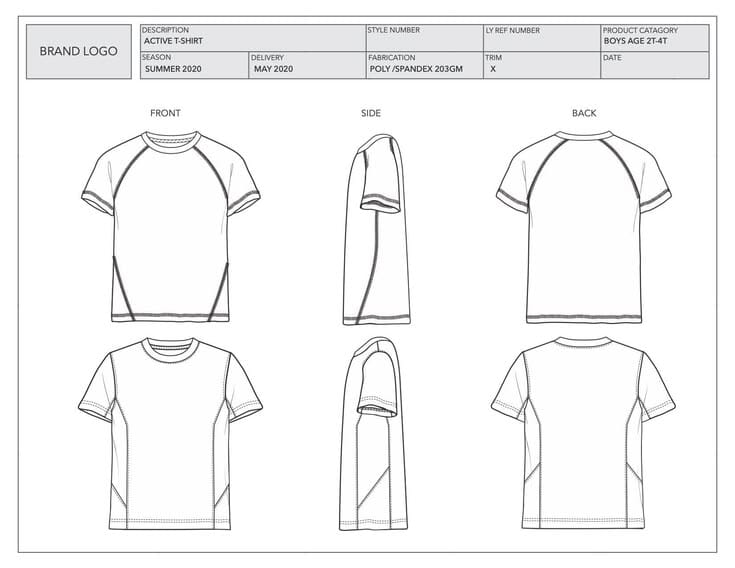
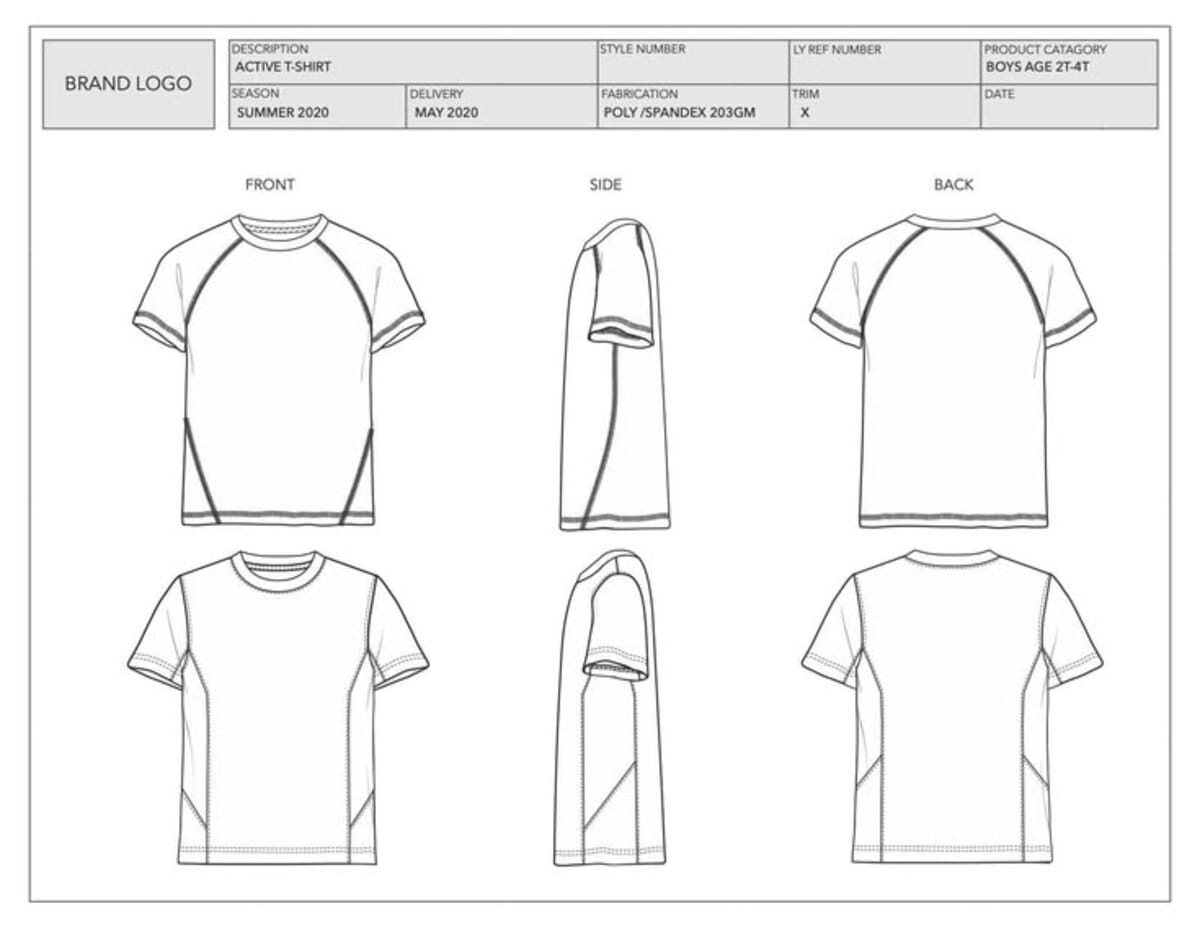
For a tee, the sections you can't shortcut are the flats, the measurement chart, and the BOM. Your flat needs front and back views with every seam drawn. Your measurement chart needs points of measure with tolerances, not just target numbers. Your BOM needs the exact jersey, thread, thread color, neck tape, and label spec.
Our free tech pack template already lays out these eight sections, so you're filling in blanks rather than building from scratch.
Where Do T-Shirts Actually Fail?
Tees fail at the neckline and at the wash, and both are avoidable. The single most common tee problem is neck rib width and recovery: a collar that stretches out during production and never springs back. Shoulder seam placement, body length, and shrinkage follow close behind. These aren't design flaws. They're spec gaps, and inspectors catch them under AQL sampling before the goods ship.
Here's the thing most spec guides miss. A tee's neckline is the one part of the garment that gets handled the most during sewing, so it's the part most likely to distort. If your rib collar has poor recovery, the operator stretches it to fit the neck opening, sews it, and it stays stretched. The customer pulls it over their head once and it gapes. You specced the width right on paper. You never specced the recovery.
Spell out three neckline numbers: rib width (finished), neck opening seam-to-seam, and rib composition with elastane content for recovery. A 1x1 combed rib with 5% elastane behaves nothing like a plain jersey self-fabric neck. Say which one you want, and say how the rib attaches.
Neckline distortion and post-wash shrinkage drive most t-shirt inspection failures, because both change dimension after the garment leaves the sewing operator. Rib recovery, not just rib width, decides whether a crew-neck holds shape. Standards like ASTM D5585-21 exist so those dimensions carry defined tolerances (ASTM) rather than "looks about right."
For a fuller list of what goes wrong, our guide to common tech pack mistakes covers the errors that repeat across every garment type.
How Do You Spec a Crew, V-Neck, or Scoop Neckline?
The neckline is where a tee reads premium or cheap, so spec the shape, the attachment method, and the rib composition together. A crew, a v-neck, and a scoop are three different builds, not three sketches. ASTM's D13.55 subcommittee defines the grading tolerances that keep neck openings consistent across a size run (ASTM), so the opening you draw is the opening the factory has to hold.
Start with shape, because each neckline attaches over a different curve. A crew is a closed ring of rib set flat into a round opening. A v-neck adds a mitred or overlapped join at the centre-front point, the single hardest stitch on the whole garment to keep clean. A scoop drops the opening wider and lower, so its binding travels a longer, flatter curve without rippling. Give each neckline its own opening number, measured seam to seam, plus a front-drop from HPS for the v and the scoop.
How the neck attaches matters as much as its shape, and you've got three common routes. Rib binding folds a separate strip of 1x1 or 2x1 rib over the raw edge and stitches it down, giving the crisp, springy collar most quality tees use. Self-fabric binding does the same with a strip cut from the body jersey: cheaper, but with less recovery. A coverstitched neck turns the raw edge under and topstitches it flat with a twin needle, common on lightweight fashion tees and prone to stretching out if the cloth lacks recovery.
Back-neck taping is the detail buyers notice without knowing why. A strip of twill or self-fabric tape runs shoulder to shoulder across the inside back neck. It covers the seam and stops the neckline stretching along the shoulder line. Spec the tape material and width. On a premium tee it's often self-fabric for a clean tonal finish; on a basic it's woven twill.
Rib composition decides recovery, and this is the number people skip. Call out the rib construction (1x1 or 2x1), the gauge, and the elastane content. A combed cotton rib with 3-5% elastane snaps back after stretching over a head; a plain cotton rib with none will bag out. The cheapest upgrade to a tee's perceived quality is moving from a 0% elastane self-fabric neck to a 5% elastane rib binding. It costs cents, and it's the first thing a hand feels.
A t-shirt neckline needs three numbers, not one: the finished neck opening seam to seam, the rib width, and the rib composition with elastane content. Rib recovery, set by that elastane percentage, decides whether a crew holds shape. ASTM D13.55 defines the grading tolerances that keep the opening consistent across sizes (ASTM).
How Should the Shoulders, Sleeves, and Hems Be Finished?
Shoulders, sleeves, and hems are finishing calls that inspection still measures, so each needs a stated seam and stitch. AQL sampling checks these joins numerically, and QIMA reports AQL 2.5 as the most common commercial limit for that check (QIMA). A dropped shoulder, a coverstitched hem, and a single-needle sleeve are three separate decisions, and the factory needs all three in writing.
Set-in versus drop shoulder changes the whole silhouette. A set-in shoulder puts the seam at the edge of the shoulder for a fitted, classic tee. A drop shoulder pushes the seam down the arm for a relaxed, oversized look, and the sleeve length has to shorten to compensate. State which one you want, because the same sleeve number means different things on each build.
Shoulder seams carry the garment's weight, so reinforce them. The standard build overlocks the seam, then runs a shoulder tape of twill or self-fabric along it to stop the knit stretching under load. Without tape, a heavy chest print or repeated hanging drags the shoulder line out of shape. Spec the tape and the topstitch if there is one.
Sleeve and bottom hems come down to coverstitch versus single-needle. A coverstitch lays two parallel rows on top with a looped underside, the durable, stretchy finish on almost every retail tee. A single-needle turned hem sits flatter and costs less, but it pops stitches when the wearer stretches it. Give the hem depth too, usually around 1 inch: a shallow hem curls, and a deep one stiffens.
The sleeve cap is the quiet one. On a set-in sleeve, the cap is eased into the armhole, and if your tech pack skips the armhole and sleeve-cap numbers, the factory drafts its own and your fit drifts. I've had two tees off the same sketch fit completely differently because one factory read a shallow cap and the other read a deep one. Spec the cap, or accept whatever you get.
A tee's shoulders, sleeves, and hems each need a named seam and stitch, because inspection measures them against a defined tolerance, not a subjective look. Coverstitch hems, taped set-in shoulders, and eased sleeve caps are separate calls, and ASTM D13.55 keeps their graded tolerances consistent across sizes (ASTM).
How Do You Measure a T-Shirt Correctly?
You measure a t-shirt flat, on a hard surface, at defined points, with a tolerance on every number. Points of measure (POM) are the specific locations you record: chest, body length, shoulder, sleeve, neck opening, hem. Each gets a base-size target and a plus-or-minus tolerance. ASTM's dimensional standards, including D5585-21 for women's misses sizing, exist so those tolerances are graded consistently rather than guessed (ASTM).
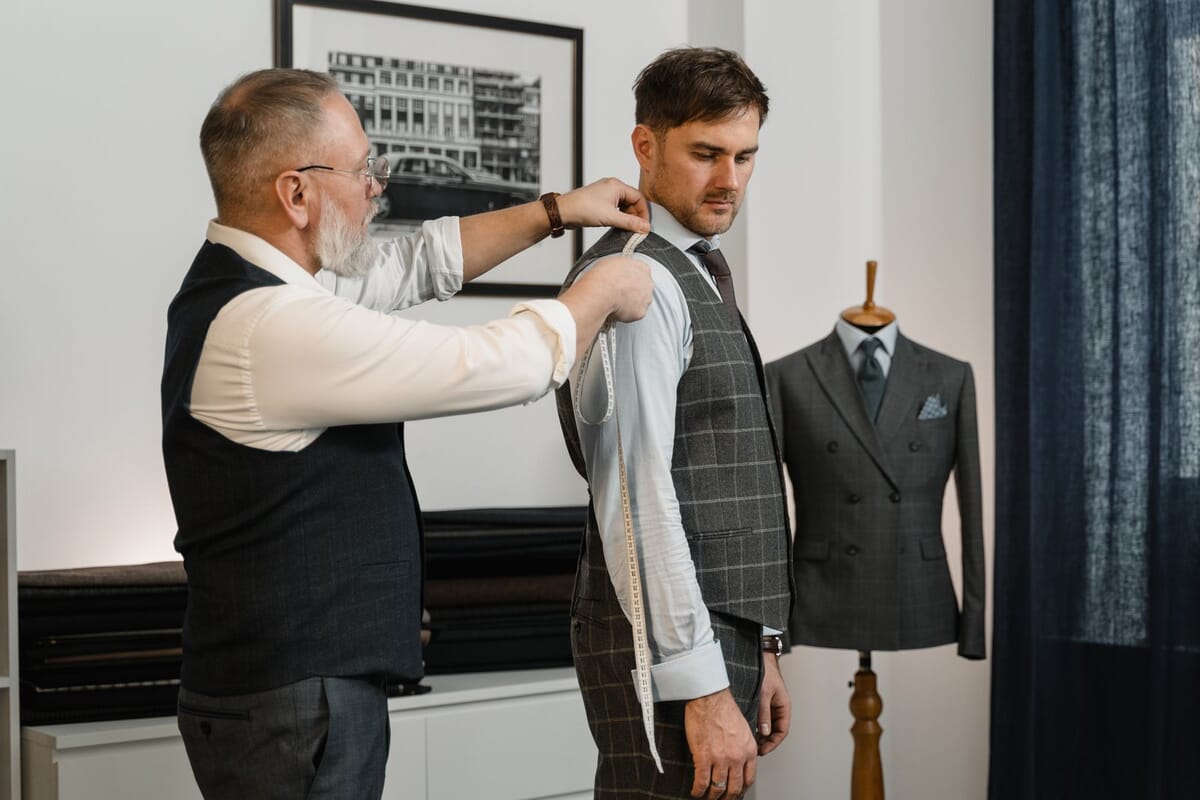
The tolerance is the part beginners drop. A chest measurement of 20 inches with no tolerance is meaningless, because no factory hits an exact number across a run. Give it a range. Half an inch on the chest, a quarter inch on the shoulder. Below is an illustrative POM table for a base size medium crew-neck tee. Treat the numbers as an example of format, not a house standard.
| Point of Measure | Base Size M | Tolerance |
|---|---|---|
| Chest, 1" below armhole (flat) | 20" | +/- 1/2" |
| Body length, HPS to hem | 28" | +/- 1/2" |
| Shoulder to shoulder | 18" | +/- 1/4" |
| Sleeve length from shoulder seam | 8.5" | +/- 1/4" |
| Neck opening, seam to seam | 7" | +/- 1/4" |
| Neck rib width, finished | 3/4" | +/- 1/16" |
| Bottom hem width | 20" | +/- 1/2" |
| Sleeve opening | 6.5" | +/- 1/4" |
Grading is how one base size becomes a full run, and not every point grows by the same amount. That's the part that trips people up. Chest and hem typically grade by a full inch between sizes, body length by a half to three-quarters, shoulder by a quarter to a half, and the neck opening barely moves at all.
The mistake is grading everything in proportion. If you let the neck opening grow a full inch per size, a 2XL swallows the wearer's collarbone and looks sloppy; the opening should grade a fraction of what the chest does. That's why a graded chart beats a single set of numbers. ASTM's D13.55 grading standards exist to keep those increments defined rather than eyeballed size to size (ASTM). Hand the factory the increments, not just the medium.
GSM, Combed vs Carded: What Fabric Spec Does a Tee Need?
Your BOM has to name the exact jersey, and GSM plus yarn type do most of the work. GSM (grams per square metre) sets weight and drape: a 140 GSM tee is light and slightly sheer, a 180-220 GSM tee feels substantial. Yarn type sets hand-feel. Sewport notes the bill of materials must specify every fabric component precisely (Sewport), and for a tee, "cotton jersey" alone tells the factory nothing.
Combed versus carded is the split that shows most. Carded cotton keeps the short fibres in the yarn, so it's cheaper and slightly rougher. Combed cotton removes them, giving a smoother, stronger, longer-lasting surface. Spell out which one. Add the knit construction (single jersey, interlock), the GSM with a tolerance, and the fibre blend with percentages.
Weight sits in tiers, and each tier signals a market position before anyone touches the cloth. Here's how the common single-jersey weights read on a finished tee:
| GSM | Feel | Typical use |
|---|---|---|
| 140 | Light, slightly sheer, drapey | Summer and layering tees, fashion fits |
| 160 | Light-mid, soft | Everyday fashion and women's tees |
| 180 | Mid, the retail standard | Most branded blanks and unisex tees |
| 200-220 | Heavy, structured, opaque | Premium and boxy streetwear tees |
Ring-spun versus open-end is the yarn-spinning split that sits beneath combed and carded. Ring-spun twists and thins the fibres into a stronger, softer, finer yarn. Open-end (rotor) spinning runs faster and cheaper but comes out coarser and slightly weaker. A combed ring-spun 180 GSM jersey is the spec behind most tees that feel expensive; a carded open-end jersey at the same weight feels flatter and rougher. Name both the spinning method and the comb, so two "180 GSM cotton jersey" quotes can't hide a big hand-feel gap.
A tee's fabric spec needs GSM with tolerance, knit type, yarn count, and combed-versus-carded cotton, not just "cotton jersey." Sewport states the bill of materials must define every fabric component precisely (Sewport), because weight and yarn choice change both hand-feel and how much the fabric shrinks after wash.
How Should You Spec Prints and Placement?
Print failures come from vague placement and missing pretreatment notes, so both go in the tech pack. Give the print a fixed anchor point: measured from the high point of shoulder (HPS) down and from centre-front, with the print's own width and height. "Centre chest" is not a spec. "Print top edge 3 inches below HPS, 9 inches wide, centred" is.
The pretreatment detail separates people who've had prints crack from people who haven't. Specify the print method (screen, DTG, heat transfer), the number of colours or the artwork file, and any pretreatment or cure requirement. A DTG print on dark cotton needs pretreatment to hold, and if you don't say so, you may get a print that washes out in three cycles.
Print specs need a measured anchor point, dimensions, method, and pretreatment or cure notes, not a rough placement label. Artwork and placement are among the eight required tech pack sections, because a print positioned by eye lands differently on every unit in the run.
If you also make heavier layers, the same placement logic carries straight over to our hoodie tech pack guide, where print positioning interacts with the pocket and hood.
Need this done properly without building it yourself? Our tech pack service delivers a factory-ready t-shirt spec from $299, with graded measurements, BOM, and print callouts checked against real production requirements.
Construction and Shrinkage: What Tolerances Keep a Tee Passing?
Construction and shrinkage decide whether a tee passes inspection, so both need explicit tolerances. Side-seam versus tubular is your first construction call: tubular tees have no side seams and use a circular knit body, side-seam tees are cut and sewn for a more tailored fit. Neckline attaches by self-fabric or by binding. State stitch types, seam types, and hem allowances for each.
Shrinkage is where tolerance thinking pays off. Cotton jersey relaxes and shrinks after wash, so your finished garment measurements should account for it, or you specify a maximum shrinkage tolerance the factory must hit. Inspection uses AQL sampling under ISO 2859-1, also published as ANSI/ASQ Z1.4, to decide pass or fail against your tolerances. QIMA notes AQL 2.5 is the most common commercial limit, AQL 1.0 applies to higher-risk goods, AQL 4.0 covers minor cosmetic defects, and critical defects carry a zero limit (QIMA).
Tee construction and shrinkage need stated tolerances because inspection is numeric, not subjective. AQL sampling under ISO 2859-1 checks a run against defined limits, and QIMA reports AQL 2.5 as the most common commercial standard (QIMA). A tee outside its shrinkage tolerance fails the same way a torn seam does.
What Should You Hand a Jersey Factory?
Hand a jersey factory the full tech pack plus a physical reference, and it quotes faster and samples closer. Guru puts spec work at 5 to 20 hours per style, and that front-loaded effort is exactly what a knit factory reads before it cuts (Guru, 2022). A knit factory reads a tee differently from a woven factory, so brief it in its own terms.
Give it the graded POM chart, the flats, the BOM with the exact jersey, and a physical reference garment if you have one. The reference settles arguments the drawing can't: hand-feel, drape, how the neck sits on the body. A drawing shows shape. A sample shows feel, and feel is most of what makes or breaks a tee.
Nail the colour standard separately from the tech pack text. Specify a Pantone TCX (textile) reference, not a screen colour, and ask for a lab-dip to approve before bulk. Cotton takes dye differently batch to batch, and the lab-dip is your one chance to sign off the shade before thousands of metres get dyed to it.
Fabric approval comes before fit approval. Ask for a knit-down or a fabric header in your specced GSM and yarn, and confirm it against your standard before the factory cuts a sample. I've watched a fit sample look perfect and still get rejected because the jersey came in at 165 GSM against a 180 spec; the tee felt limp, and the whole run had to be reknit. Approve the cloth first, then the fit.
State the wash test last. Tell the factory to wash-test the sample to your care label and report shrinkage against your tolerance. A tee that passes measurement dry and fails after one wash still passes on paper and fails in the customer's hands.
Hand a jersey factory the graded POMs, flats, a BOM naming the exact jersey, a Pantone TCX colour standard, and a physical reference. Approve the knit-down and lab-dip before the factory samples, because cloth and colour drift batch to batch. Grade the POMs to ASTM D13.55 tolerances so the size run stays consistent (ASTM).
How Much Does a T-Shirt Tech Pack Cost?
A t-shirt tech pack costs $500-$2,000 per style if you outsource it, or your own time if you build it. Guru estimates that range and puts the work at 5 to 20 hours per style (Guru, 2022). A tee sits at the lower end because it's a simple garment, though the neckline and print detail still take real effort to spec correctly.
You can build one yourself for the cost of your time. A structured template gets you most of the way, since the format is the same across garments and only the measurements and construction change. Fill in the eight sections, add graded POMs with tolerances, and pin down the fabric and print. That's a working spec a factory can quote against.
A full t-shirt tech pack runs $500-$2,000 per style outsourced, at 5 to 20 hours of work, per Guru's 2022 estimate (Guru). Tees land at the low end because of their simple construction, though neckline and print specs still demand precise, tolerance-backed detail to survive inspection.
Grab our tech pack template to start for free, and read what each page needs to include so your file opens cleanly on the factory's end.
Frequently Asked Questions
What is the most common t-shirt tech pack mistake?
The most common mistake is speccing neck rib width without speccing rib recovery. The collar gets stretched during sewing and never springs back, so it gapes after one wear. Name the rib composition and elastane content, not just the finished width, so the factory knows the recovery you expect.
How many measurements does a t-shirt tech pack need?
A crew-neck tee typically needs 8 to 12 points of measure: chest, body length, shoulder to shoulder, sleeve length, sleeve opening, neck opening, neck rib width, and hem width. Each point needs a base-size target and a tolerance. ASTM's dimensional standards exist so those tolerances grade consistently across sizes (ASTM).
What GSM should a t-shirt be?
It depends on the feel you want. Around 140 GSM gives a light, slightly sheer tee, while 180 to 220 GSM feels substantial and holds shape better. Always state GSM with a tolerance and name the knit type and yarn, since "cotton jersey" alone leaves the factory guessing (Sewport).
Does a simple t-shirt really need a tech pack?
Yes. A tee has few parts, which means each part carries more weight. The neckline, shrinkage, and print placement all fail without written tolerances, and inspection checks them numerically under AQL sampling (QIMA). A spec is what keeps a simple garment from failing in simple ways.
How do I account for shrinkage in a tee tech pack?
Build shrinkage into the finished garment measurements or set a maximum shrinkage tolerance the factory must meet after wash. Cotton jersey relaxes and shrinks post-wash, so your after-wash dimensions matter more than pre-wash ones. State the tolerance clearly, since inspection measures against it under ISO 2859-1 sampling.
Should a t-shirt have side seams or be tubular?
It depends on fit and budget. A tubular tee uses a circular-knit body with no side seams, which is cheaper and faster but can twist after wash. A side-seam tee is cut and sewn for a cleaner, more tailored fit and better hang. State which you want in construction notes, because it changes the pattern, the cost, and the drape.
What stitch is used to hem a t-shirt?
Most retail tees use a coverstitch, which lays two parallel rows on top with a looped, stretchy underside that survives repeated wear. A single-needle turned hem sits flatter and costs less but pops stitches when stretched. Name the stitch and the hem depth, usually around 1 inch, on both the sleeve and bottom hems.
What's the difference between ring-spun and open-end cotton?
Ring-spun cotton twists the fibres into a finer, stronger, softer yarn, so it feels more premium. Open-end (rotor) spinning is faster and cheaper but coarser and slightly weaker. At the same GSM, a combed ring-spun jersey outfeels a carded open-end one, so name both the spinning method and the comb in your BOM.
Peter Midea is GarmentSpec's technical lead for brand development.
We build the factory-ready spec a manufacturer can quote from without a single question: technical flats, bill of materials, graded points of measure with tolerances, colorways and construction notes. $299 per style, 3 to 5 working days, 2 to 3 revision rounds.
Get your tech pack — $299Start with the free templateWe don't take your production. The spec is yours to send to any factory, anywhere. Talk to us first if you're not sure what you need.
Sources
Every statistic and definition in this article traces to one of the following. Each is listed once here, and cited inline where it is used.