Contents
- What do you get in the free tech pack templa…
- How do you fill in the tech pack template, s…
- Why do most DIY tech packs get rejected?
- What makes the measurement page so hard to f…
- How do you set a tolerance for each point of…
- What else should you send the factory alongs…
- How much does it cost to get a tech pack mad…
- Should you fill in the template yourself, or…
- Frequently asked questions
- The honest summary

I lead technical development for the brands GarmentSpec works with. Every week, someone sends us a tech pack that can't be cut from. Usually it's not because the document looks bad. It's because the measurement page is missing four points of measure and has no tolerances, so nobody on the floor knows what "correct" means.
So we built the template we wish people would send us. It's free. Seven pages, Illustrator, PDF and Excel. No email wall halfway through the article, no watered-down "preview" version.
But I'll be straight with you: the template is the easy part. Filling it in correctly is not. That's the whole point of this page.
Key Takeaways
- The template is free, complete, and the same one we build client packs on.
- The template is 7 pages, mapping to the standard content sections a factory expects.
- Freelancers charge $500-$2,000 per style to build one.
- The hard part isn't the document. It's the points of measure, the grading rules, and the tolerances.
If you're not yet sure what a tech pack actually is, start there and come back. If you know, and you just want the file, keep reading. The wider tech pack guide covers everything this page doesn't.
What do you get in the free tech pack template?
You get a 7-page document covering what a factory reads before cutting: cover, technical flats, reference images, labels and tags, bill of materials, graded measurements with tolerances, and revision history. That's our layout. It carries the standard content sections, with grading folded into the measurement page and costing left to the factory rather than split into their own tabs. Three file formats. Zero cost.
Here's what's on each page, concretely.
Page 1, Overview. Style number, style name, season, brand, fabric, colorways, sample size, date. The cover exists so a factory can identify the style six months later without emailing you.
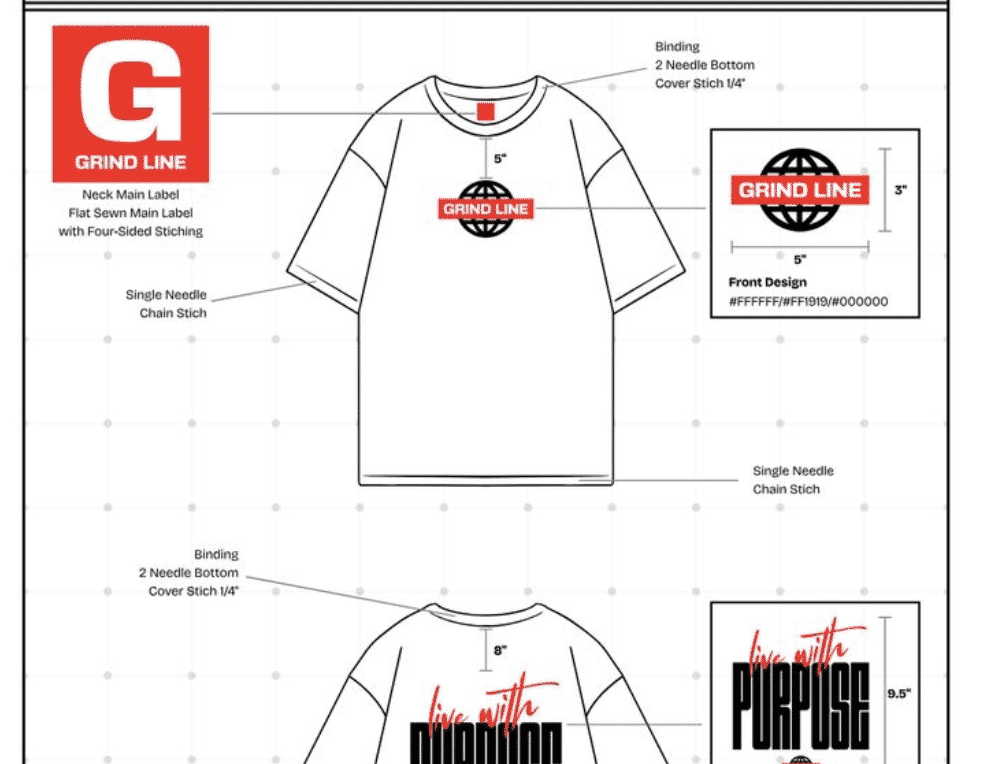
Page 2, Sketch details. Technical flats, front and back, with callouts pointing at seams, stitch types, closures, pocket bags. Not a fashion illustration. A flat.
Page 3, Reference images. Photos of a garment that already exists and behaves the way you want yours to behave. Drape, hand feel, wash. This page prevents more arguments than any other.
Page 4, Labels and tags. Brand label, size label, care label, hangtag. Position, size, attachment method. Miss this and you'll get main labels sewn wherever the operator has seen them before.
Page 5, Bill of Materials. Item, composition, supplier, colorway, quantity, position, placement. Every trim. Every thread. The BOM is what a costing team actually prices.
Page 6, Measurements. Points of measure, graded size table, tolerance per POM. This is the page that decides whether the garment gets made correctly.
Page 7, Revision history. Version, date, what changed, who approved it. Boring. Saves you from producing 500 units off version 2 while the factory works from version 1.
Download the template (Illustrator + PDF + Excel). It arrives in one email, no sequence required.
| Page | Section | What it specifies |
|---|---|---|
| 1 | Overview / cover | Style number, season, fabric, colorways |
| 2 | Sketch details | Technical flats, front and back, with callouts |
| 3 | Reference images | Fit, detail and inspiration references |
| 4 | Labels & tags | Brand, size, care and hangtag placement |
| 5 | Bill of materials | Item, composition, colorway, quantity, position |
| 6 | Measurements | Points of measure, graded size table, per-POM tolerance |
| 7 | Revision history | Version number and change log |
Citation capsule: A tech pack outlines all the design and technical specifications of a garment, structured across flat sketches, a bill of materials, measurement specs, size gradings, colorways, construction notes, a cost sheet and revision history. The GarmentSpec free template covers these across its seven pages, with grading inside the measurement page and costing left to the factory.
How do you fill in the tech pack template, step by step?
Work back to front. Start with a reference garment you own, measure it, then build the document around what you measured. The template's pages are ordered for the reader, not the writer. Filling them in that order is exactly how people stall on page 6.
Step 1: Buy the reference garment. Not a mood board. A real garment that fits the way yours should fit. You'll measure it, photograph it, and possibly cut it open.
Step 2: Measure it flat. Garment on a table, no tension, tape flat. Record every point of measure in the Excel sheet before you open Illustrator. Chest, waist, hem, body length, shoulder, sleeve, cuff, armhole, neck drop, and whatever else your style has.
Step 3: Draw the flats. Front and back, in the Illustrator file. Trace your photo if that's faster. Nobody is scoring you on line quality. They're checking whether the seams you drew are the seams you want sewn.
Step 4: Fill the BOM. Every component. Main fabric, rib, thread, zip, drawcord, tipping, labels, hangtag, polybag. Composition, colour, supplier, quantity, position.
Step 5: Grade the sizes. This is where the real work sits. One rule per point of measure, never one rule for the whole garment. More on that below.
Step 6: Set tolerances. Per POM. A hem width and a collar opening do not deserve the same tolerance.
Step 7: Version it. Fill the revision history the first time, not the fifth. You'll be glad of it when you're four rounds deep and the factory asks which file is live.
Steps 1 to 4 and step 7 are labour. Steps 5 and 6 are expertise. Those are not the same thing, and confusing them is what produces a blank tech pack template that stays blank.
Why do most DIY tech packs get rejected?
Not because the layout is wrong. Because the measurement page is incomplete. A factory cannot cut a pattern from a chest width and a length. It needs every point of measure, a value per size, and a tolerance per point. Miss one and the pattern maker guesses, and their guess is the house block, not your garment.
Think about what a missing point of measure actually does. Say you specify chest, body length and sleeve length on a hoodie, but not armhole depth. The pattern maker still has to draft an armhole. They'll use whatever their factory normally uses. The sample comes back and the sleeve reads wrong at the shoulder, and you cannot point at anything in your document that says otherwise. You didn't specify it. Their version is correct.
Now the second failure: no tolerances. Every garment measurement has a permitted deviation. Without one written down, "correct" is undefined, and undefined means the QC inspector applies the factory's default. Garment inspection is not a vibe. It runs on statistical sampling under ISO 2859-1 / ANSI-ASQ Z1.4, where a lot is accepted or rejected against a defined Acceptable Quality Limit. As QIMA puts it, AQL 2.5 is the most common standard for general consumer goods, AQL 1.0 for higher-risk categories, and AQL 4.0 where minor cosmetic defects are acceptable. Critical defects sit at AQL 0.
Here's the part people get backwards. The AQL inspection doesn't reject your garment for being ugly. It rejects it for being out of spec, against the spec you supplied. If your spec is loose, almost nothing fails inspection, and you find out what you actually built when the returns come in. US retail returns hit $890bn in 2024, and 76% of consumers say free returns affect where they shop (NRF, 2024). A vague measurement page doesn't get caught at the factory. It gets caught by your customers.
The single most-missing entry on a DIY measurement page isn't a measurement at all. It's the tolerance column. After that, the points that vanish are the ones you can't take on yourself: armhole depth, across-back from shoulder to shoulder, and front neck drop. They need a dress form or a second pair of hands, so first-timers quietly skip them. Those are exactly the points a factory needs to draft the pattern.
None of this is mysterious once you've seen the document do its job, which is the whole argument of our guide to how tech packs work end to end.
Citation capsule: Garment lots are accepted or rejected using statistical sampling under ISO 2859-1 and ANSI-ASQ Z1.4, against a defined Acceptable Quality Limit. AQL 2.5 is the most common standard for general consumer goods, AQL 1.0 applies to higher-risk categories, and critical defects are held at AQL 0 (QIMA).
What makes the measurement page so hard to fill in?
Grading. A single size is a list of numbers. A size run is a system, and the increments between sizes are not uniform across every point of measure. This is why ASTM Subcommittee D13.55 maintains standard body measurement tables at all, including ASTM D5585-21 for adult female misses sizes 00-20.
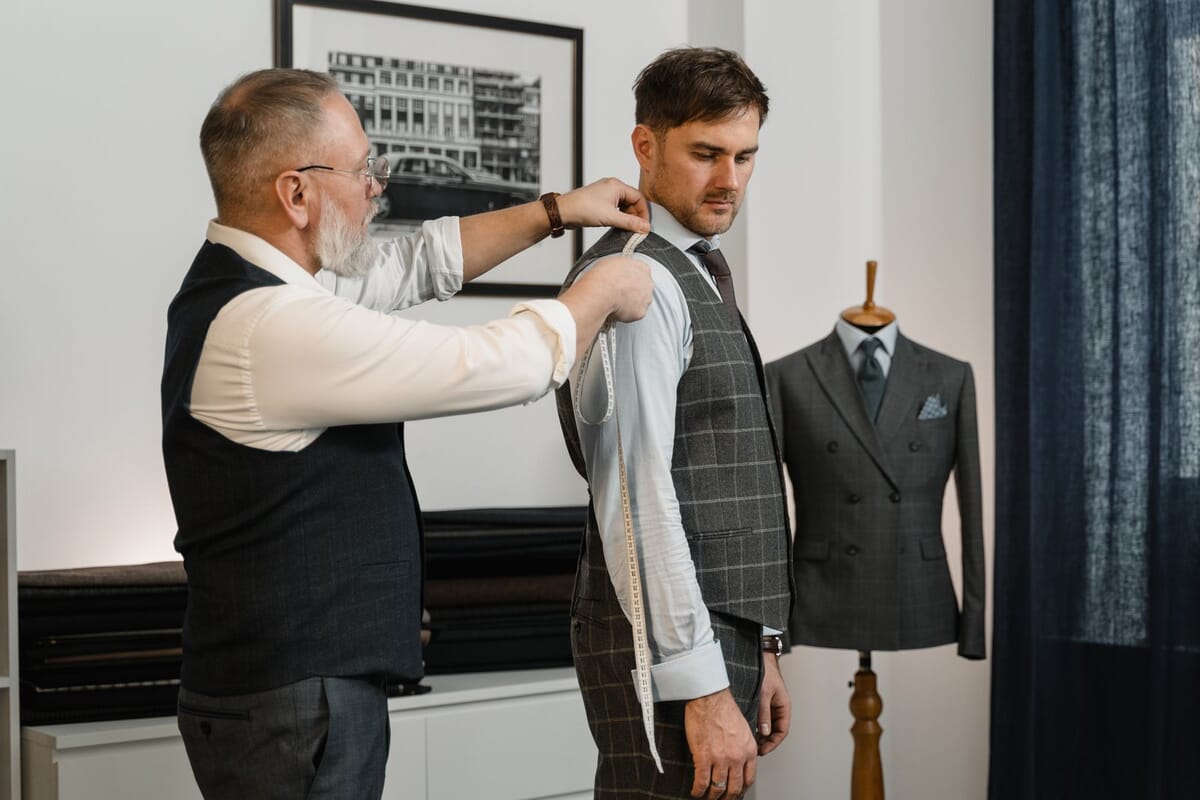
Most founders grade by adding a flat number to every measurement per size. Chest plus 2cm, waist plus 2cm, hem plus 2cm, neck plus 2cm, shoulder plus 2cm, sleeve plus 2cm. It's tidy. It's also wrong, and it produces a size XL that looks like a size S photocopied at 115%.
Real bodies don't scale like that. Neck circumference does not grow at the same rate as chest circumference. Shoulder width grows slowly. Sleeve length barely moves across a two-size jump. That's exactly why the standard tables exist: ASTM D5585-21 publishes the body measurements for misses sizes 00-20, and ASTM D6960/D6960M covers plus women's 14W-40W as a separate table, because the plus range does not simply continue the misses grade.
The three things a grading table must have
- A base size. Usually your sample size. Every rule is expressed relative to it.
- A grade rule per point of measure. Not one rule for the garment. One rule per POM.
- A tolerance per point of measure. Chest might tolerate ±1cm. A collar opening might tolerate ±0.3cm. They are not the same number and should never be a single global figure.
The classic grading error is the neckline. A brand grades the collar opening at the same rate as the chest, adding the same increment size after size. Chest scales fast. Necks barely move. Four sizes up, the body fits and the collar gapes at the back, because it was drafted for a neck two sizes smaller. It measures "correct" against a wrong rule, passes inspection, and fails on the person.
What does a grade rule look like across a size run?
A grade rule is the fixed amount a single point of measure changes from one size to the next. It isn't a percentage, and it isn't one number for the whole garment. Each point gets its own increment. Chest might step 3cm per size while the collar steps 0.5cm, and both get written into the table before anyone touches a pattern.
Here's a worked example for a plain t-shirt, half measurements in centimetres, graded off a base size M. The numbers are illustrative, not lifted from a standard. The pattern of them is the point: the increments are not equal.
| Point of measure | Grade rule / size | S | M (base) | L | XL |
|---|---|---|---|---|---|
| Chest width (½) | 3.0 | 49 | 52 | 55 | 58 |
| Body length | 2.0 | 68 | 70 | 72 | 74 |
| Shoulder width | 1.0 | 43 | 44 | 45 | 46 |
| Sleeve length | 1.0 | 20 | 21 | 22 | 23 |
| Neck width (½) | 0.5 | 18.5 | 19 | 19.5 | 20 |
Read down any column and you have one full size. Read across any row and you have that point's grade rule. A grader thinks in rows. A beginner thinks in columns, then grades the whole column by one flat number. That's the mistake, and the chart below shows what it does.
Notice how far the chest line pulls away from the neck line by XXL. A flat rule would run them in parallel. Real bodies don't, and neither should your table.
Which grading errors show up beyond the neckline?
The neckline is the famous error, but three others turn up just as often. Each comes from grading a slow-moving point at a fast-moving rate.
- Sleeve length over-grading. Arms lengthen far less than chests widen. Grade the sleeve at the chest's rate and your XL has cuffs past the wrist while the S rides up the forearm.
- Armhole depth. Drop it too fast and the XL armhole hangs halfway to the waist. Too slow and the S binds under the arm. It's the point beginners skip, so it's the point that's wrong most often.
- Rise on bottoms. Front and back rise on trousers grades gently. Treat it like the waist and the crotch either sags or cuts in, and no amount of waistband tweaking fixes a rise that was graded wrong.
The through-line: a point that barely changes on a real body must barely change in your table. When in doubt, grade conservatively and check the increment against a standard body table like ASTM D5585-21 before you commit the run.
Points of measure: how many is enough?
Enough that a stranger could rebuild the garment without calling you. For a t-shirt that's usually somewhere in the low twenties. For a structured jacket, well past forty. If you're unsure whether a POM matters, ask whether the factory would have to invent it in your absence. If they would, it matters.
Rather than guess, work from a list that already exists: we keep garment-specific point-of-measure sheets for the t-shirt tech pack and the hoodie tech pack, and both name every POM a factory expects to see.
Citation capsule: Grading is the hardest part of a tech pack because increments differ per point of measure. ASTM D5585-21 publishes standard body measurements for adult female misses sizes 00-20, and ASTM D6960/D6960M covers plus women's 14W-40W as a separate table, because plus sizing does not simply extend the misses grade.
How do you set a tolerance for each point of measure?
Set it per point: tight where fit or function lives, loose where nobody will ever notice. A tolerance is the deviation the factory is allowed on a given point before the piece counts as out of spec. Write one global number and you'll over-police the hem while under-policing the collar. The stakes aren't abstract. 76% of shoppers say free, easy returns shape where they buy, and a garment that passed a sloppy spec is a return waiting to happen (NRF, 2024).
A workable starting scheme, before you tune it per style:
| Point type | Typical tolerance | Why |
|---|---|---|
| Large circumferences (chest, waist, hip) | ±1.0-1.5cm | Big numbers, big panels, a little give is normal |
| Lengths (body, sleeve, inseam) | ±1.0cm | Visible but forgiving |
| Openings (collar, cuff, hem width) | ±0.3-0.5cm | Small and unforgiving; fit and look both suffer fast |
| Detail placement (pocket, label) | ±0.3-0.5cm | The eye catches asymmetry instantly |
At inspection, none of this is a negotiation. The QC checker pulls a sample, measures each point, and marks it in or out against the number in your tolerance column. There's no "close enough." A collar opening 0.9cm wide of a ±0.3cm tolerance is a defect, and enough defects tip the whole lot into rejection under the AQL sampling described above. Tight tolerances protect the garment. Impossibly tight ones, like ±0.1cm on a knit, just manufacture defects that were never really defects, and you'll pay for them in re-inspections. Set tolerances like you mean them, because the floor reads them literally.
Citation capsule: A garment tolerance is the deviation a factory may produce on a point of measure before the piece is out of spec. Tolerances are set per point, roughly ±1.0-1.5cm on large circumferences and ±0.3-0.5cm on openings like collars and cuffs, because at AQL inspection each point is judged literally against the number you wrote.
What else should you send the factory alongside the template?
Four physical things the template can't carry: a reference garment, real fabric and trim swatches, your colour standards, and your quantities. The tech pack is the blueprint a manufacturer costs and cuts from (Sewport), but paper can't communicate hand feel, exact shade, or how many units you actually want. Send those alongside the document, or the first sample will guess at all three.
- A reference garment. You already bought one to measure. Send it, or a close equivalent, so the factory can feel the target weight and drape rather than infer it from a fabric name.
- Real swatches. A composition line in the BOM isn't a fabric. A 10x10cm swatch is. Send the actual material and trims, or approve the factory's lab dips and knit-downs before bulk.
- Colour standards. "Navy" is not a colour. A Pantone TCX reference or a physical dyed swatch is. Colour approved on a screen is colour approved by luck.
- Quantities and size ratio. Total units and the split across sizes. It drives fabric buying, minimums and price, and it's the first thing a costing team asks for after the BOM.
In our experience the fastest way to waste a sampling round is to send a flawless tech pack and no reference garment. The factory nails every measurement and still gets the weight and drape wrong, because those live in the cloth, not the spec sheet. Ten euros of courier saves a whole sample cycle.
Citation capsule: A tech pack is the blueprint a manufacturer uses to cost and cut a garment (Sewport), but it can't carry hand feel or exact colour. Send a reference garment, physical fabric and trim swatches, a Pantone or dyed colour standard, and your quantities with the size ratio, or the first sample will be built on guesses.
How much does it cost to get a tech pack made properly?
Professional fashion designers charge between $500 and $2,000 to prepare a standard tech pack, and the work takes between five and twenty hours (Guru, October 2022). Freelance marketplaces are wilder: rates observed on Cad Crowd in July 2026 span $3/hr to $150/hr. That's an observed spread, not a benchmark.
The $3/hr end of that range is not a bargain. Somebody who has never stood next to a cutting table will produce a beautiful PDF with a measurement page that a factory cannot use. You'll pay for it later, in samples.
Should you fill in the template yourself, or have us do it?
Do it yourself. Genuinely. If you already know your points of measure, your grade rules and your tolerances, the template is a form, and you'll finish it in an afternoon. Most people don't know those three things, which is the honest reason DIY tech packs get sent back.
So here's the deal, stated plainly. Download the template. Fill in the cover, the flats, the references, the labels, the BOM. All of that is within reach of any founder with a reference garment and an afternoon.
Then you'll hit page 6. If the measurement page stops you, and in our experience it stops most people, we'll fill it in for you for $299 per style. Flat. We do it because factories have to read the result, and we'd rather they read a good one.
That's not a trick. It's the same reason a plumber sells you a wrench and still gets called.
The people who most need help with grading are exactly the people who don't know they need it, because a bad grade table looks completely normal on screen. It only looks wrong on a body.
If page 6 is where you stop, hand it over: our tech pack service is $299 per style, graded table and tolerances included.
Looking for a factory rather than a document? That's a different job, and we don't cover it here.
Citation capsule: Professional fashion designers charge between $500 and $2,000 to prepare a standard tech pack, with the work taking five to twenty hours (Guru, 2022). Marketplace rates observed on Cad Crowd in July 2026 span $3/hr to $150/hr, a spread wide enough that price alone tells you nothing about competence.
Frequently asked questions
Is the template really free?
Yes. No credit card, no trial, no locked pages. You give an email address, we send one email with the Illustrator, PDF and Excel files attached. It's the same 7-page template we build client packs on, not a stripped-down sample version.
What format does the tech pack template come in?
Three: an Adobe Illustrator tech pack template with editable flats and callout layers, a tech pack template PDF for printing and sharing with factories, and an Excel version for the measurement and BOM tables. Most people draw in Illustrator and manage measurements in Excel.
Why do most DIY tech packs get rejected?
Missing points of measure and missing tolerances. A factory cannot draft a pattern from partial specs, so it fills the gaps with its own house block. Inspection then judges the lot against your spec using AQL sampling under ISO 2859-1 (QIMA). A vague spec fails quietly.
How much does it cost to have you fill it in?
$299 per style, flat, including the graded size table and per-POM tolerances. For comparison, freelance designers charge $500-$2,000 per standard tech pack and take five to twenty hours (Guru, 2022). You can see exactly what's included on the tech pack service page.
Do I need ASTM standards to grade my sizes?
Not legally, but they're the reference point. ASTM D5585-21 covers adult female misses sizes 00-20 and ASTM D6960/D6960M covers plus women's 14W-40W. Plus sizing is a separate table for a reason: it does not extend the misses grade linearly.
What is a grade rule in a tech pack?
A grade rule is the fixed amount one point of measure changes between sizes. Each point gets its own: chest might step 3cm a size while a collar opening steps 0.5cm. Never grade the whole garment by one flat number, or the largest sizes come out distorted while measuring "correct" on paper.
How tight should garment tolerances be?
It depends on the point. Large circumferences like chest and waist usually tolerate ±1.0-1.5cm, while openings like collars and cuffs need ±0.3-0.5cm. Set them per point, because at AQL inspection each measurement is judged literally against the number you wrote in the tolerance column.
What should I send the factory besides the tech pack?
A reference garment, physical fabric and trim swatches, a colour standard (Pantone or a dyed swatch), and your quantities with the size ratio. The tech pack is the blueprint (Sewport), but it can't carry hand feel or exact shade. Physical samples close the gap the document can't.
The honest summary
The template is free and it's good. It's the same structure factories read before they cut, and you can have it in the next thirty seconds without talking to anybody.
What it won't do is know your armhole depth. It won't invent your grade rules or decide that your collar opening tolerates ±0.3cm while your chest tolerates ±1cm. Those decisions are the tech pack. Everything else is formatting.
Fill in what you can. If page 6 stops you, that's not a personal failing, it's the reason freelancers charge $500-$2,000 for this. We'll do it for $299.
Get the free tech pack template. Illustrator, PDF and Excel, one email, no sequence.
Once the file is in your inbox, the next thing worth reading is our full tech pack guide, which walks through what happens to the document after you send it to a factory.
Peter Midea is GarmentSpec's technical lead for brand development.
We build the factory-ready spec a manufacturer can quote from without a single question: technical flats, bill of materials, graded points of measure with tolerances, colorways and construction notes. $299 per style, 3 to 5 working days, 2 to 3 revision rounds.
Get your tech pack — $299Start with the free templateWe don't take your production. The spec is yours to send to any factory, anywhere. Talk to us first if you're not sure what you need.
Sources
Every statistic and definition in this article traces to one of the following. Each is listed once here, and cited inline where it is used.
- Pexels
- QIMA
- National Retail Federation
- ASTM International
- ASTM International
- Pexels
- ASTM International
- Sewport
- Guru
- Cad Crowd