Contents
- What is a jacket tech pack?
- Why do jackets fail more than any other garm…
- What goes in a jacket tech pack?
- How do you specify lining, zippers, and inte…
- How do you spec a jacket's layered construct…
- How do you spec jacket closures, collars, an…
- How do you spec pockets, seams, and finishing?
- What are the points of measure and tolerance…
- How do factories inspect a finished jacket?
- How do you make a jacket tech pack step by s…
- Frequently asked questions
- The bottom line

A jacket has more parts than anything else a new brand tries to make. Shell, lining, interlining, zippers, snaps, cuffs, a collar stand, pocket bags, bar-tacks, and two or three separate care labels. Miss one spec and the sample comes back wrong. A tech pack costs $500 to $2,000 per style to build, and takes 5 to 20 hours (Guru, 2022). That's cheap next to a failed production run. This guide walks through every section a jacket tech pack needs, where jackets go wrong, and how to spec the lining, zippers, and interlining that ruin most first samples. Grab the free template as you read.
Key Takeaways - A jacket tech pack uses the same 8 sections as any garment, but carries the biggest bill of materials. - Jackets fail on lining, zippers, and interlining more than on the shell fabric. - Every measurement needs a tolerance; graders like ASTM D6960 exist because sizes drift (ASTM). - Factories inspect to a sampling standard: AQL 2.5 is the common bar (QIMA). - Building the pack costs $500-$2,000 per style.
What is a jacket tech pack?
A jacket tech pack is the technical document a factory uses to cut, sew, and inspect your jacket. It holds the same eight sections as any tech pack (Techpacker), but a jacket packs far more trims and seams than a tee. The bill of materials is where the difference shows first.
Think of it as the instruction sheet that replaces a phone call. A factory in Portugal and a brand in Berlin never share a language of guesses. The pack removes the guessing. If a detail isn't written down, the sewing line decides for you, and you won't like every decision. Want to know the fundamentals first? Read what a tech pack is before you spec outerwear.
Techpacker defines a tech pack as the document that communicates every construction detail to a factory, built from eight core sections including flat sketches, a bill of materials, and measurement specs (Techpacker). For a jacket, the bill of materials is the section that grows the fastest.
Why do jackets fail more than any other garment?
Jackets fail more because they hide more parts. A hoodie has one fabric and a drawcord. A bomber has a shell, a lining, ribbed trims, a two-way zipper, and interlining at the collar. More components means more places a spec can go missing, and a factory fills every gap with its own habit.
I've watched jacket samples get pulled off the line for the dumbest reasons. A lining cut to the shell pattern, so it pulled the whole body tight. A zipper two centimetres short. A collar stand with no fusing, flopping like a dish rag. None of these were sewing mistakes. They were spec mistakes, written down badly or not at all.
Here's the mechanism. Factories inspect finished garments against a sampling plan, usually ISO 2859-1 or ANSI-ASQ Z1.4. A wrong zipper or a twisted lining reads as a defect, and defects add up against your acceptable quality limit. Cross the threshold and the lot fails. The common tech pack mistakes that sink jackets are almost always missing trim details, not bad art.
Garment inspection follows a statistical sampling standard, and AQL 2.5 is the level most brands accept for general apparel, with 1.0 used for higher-risk items and 4.0 for minor cosmetic faults (QIMA). A jacket's extra trims give it more chances to accumulate defects.
What goes in a jacket tech pack?
Every jacket tech pack is built from the same eight standard sections. Skip one and the factory improvises. Sewport lists the bill of materials as the section holding zippers, buttons, trims, fastenings, and labels (Sewport), and on a jacket that list is long. Here's the full set.
The 8 sections
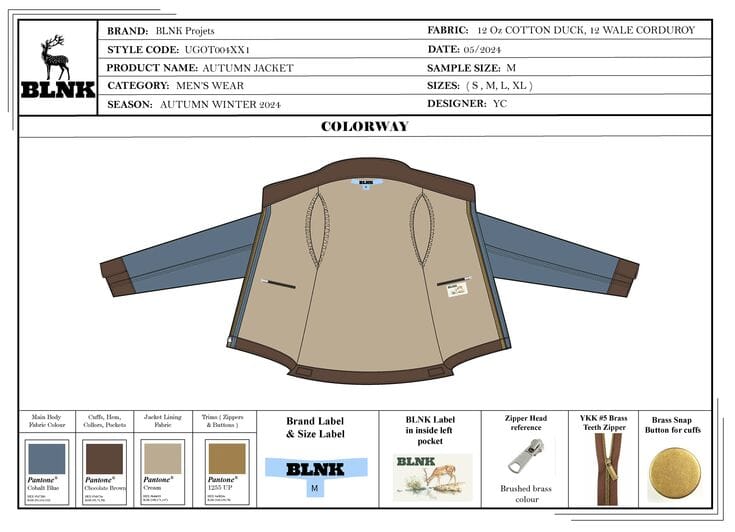
- Flat sketches front, back, and inside, showing the lining and pockets.
- Bill of materials (BOM) every fabric, trim, zipper, snap, and label.
- Measurement specs points of measure with base size and tolerance.
- Cost sheet materials, labour, and consumption per style.
- Size gradings how each measurement scales up and down.
- Colorways every colour combination, shell and lining separately.
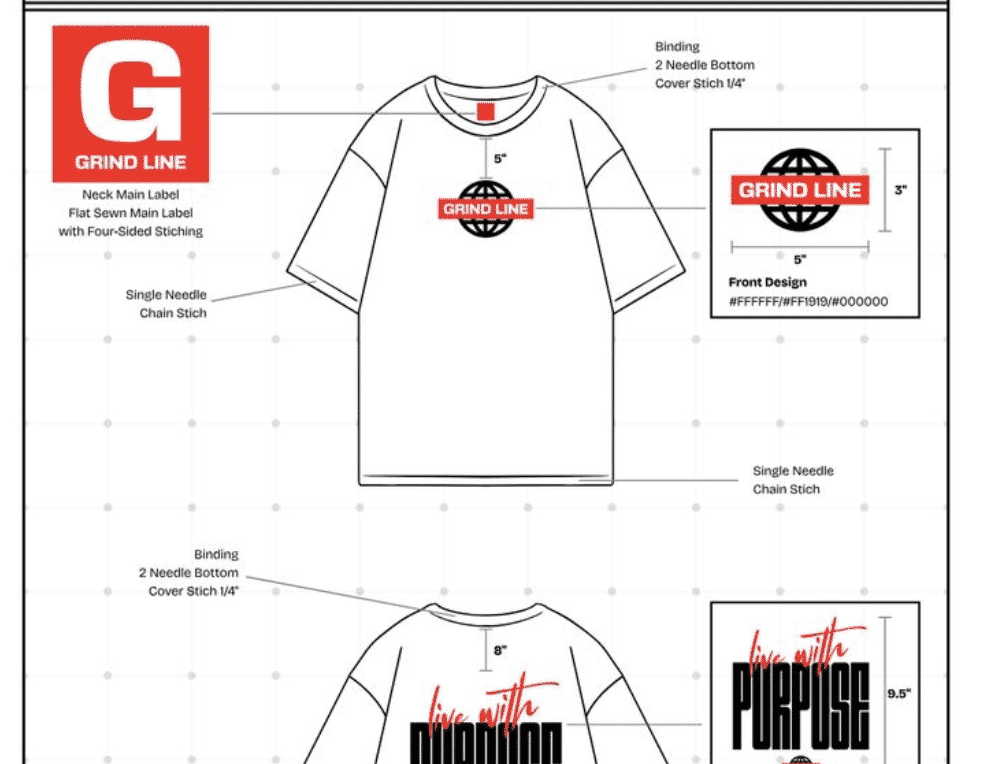
- Construction notes seam types, stitch density, bar-tack points.
- Revision history what changed, when, and why.
A jacket uses the same eight boxes as a hoodie tech pack. The boxes just hold more. Where a hoodie BOM might run fifteen lines, a lined bomber runs forty. That single fact drives most of what follows.
How do you specify lining, zippers, and interlining?
You specify them separately, on their own BOM lines, with the same detail you give the shell. This is where jacket samples die. The lining is a garment inside a garment. The zipper is a mechanism. The interlining is invisible until it's missing, and then the whole collar collapses.
Most first-time brands treat the lining as an afterthought and cut it to the shell pattern. That's the single most common reason a jacket body twists. The lining should be cut slightly fuller than the shell so it sits without strain. Write the lining pattern, fabric, and finish as their own spec. Never assume the factory will infer it from the shell.
For zippers, four things are non-negotiable: length, gauge, brand, and type. State the exact length in centimetres, the gauge (a #5 reads differently from a #8), the brand (YKK behaves differently from a generic coil), and the type (one-way for a coat, two-way for a bomber you want to open from the hem). Interlining and fusing go on the BOM too: collar stand, cuffs, plackets, and welt pockets all need it, or they go soft after one wash. When you brief a real clothing factory, these lines are the first thing they check.
Sewport lists the bill of materials as the section that captures zippers, buttons, trims, fastenings, and labels (Sewport). On a jacket, each zipper needs length, gauge, brand, and one-way or two-way type, and each fused panel needs its interlining called out as a separate line.
How do you spec a jacket's layered construction?
You spec each layer as its own line on the bill of materials: shell, lining, interlining, and insulation. The BOM captures every fabric, trim, and fastening a jacket carries (Sewport), and an insulated jacket stacks four fabric systems where a tee has one. Each layer needs its own weight, finish, and placement.
A jacket is built in layers, and the factory sews them as separate garments that meet at the seams. The shell faces the weather. The lining faces the body. The interlining stiffens the panels that have to hold their shape. The insulation, on a padded jacket, sits between shell and lining and does the warmth. Write each one down, or the sewing line decides for you.
The four layers
Each layer is a separate spec, and mixing them up is how bodies twist and collars flop. Here's what belongs on each line.
- Shell. The outer fabric. State weight in gsm, any coating or membrane, the DWR finish, and colour. This is the panel that reads on the hanger.
- Lining. The body-side fabric, usually taffeta, mesh, or a light quilt. Cut it slightly fuller than the shell and give it its own colour line. A lining cut to the shell pattern is the classic body-twist fault.
- Interlining and fusing. The invisible stiffener. Call it out by weight and placement: collar stand, cuffs, front-zip facings, plackets, and welt-pocket mouths. Skip it and those parts go soft after one wash.
- Insulation. The warmth layer on a padded jacket. Spec it by fill power for down or by gsm weight for synthetic batting, and name the baffle style.
Insulation, fill power, and fill weight
For a down jacket, two numbers matter and most brands only write one. Fill power measures loft: the cubic inches one ounce of down fills, commonly 550 to 800. Fill weight is the actual grams of down in the jacket. State both. High fill power with low fill weight makes a thin, cold jacket that photographs well and freezes you. For synthetic insulation, spec the batting by gsm (60, 100, 133, and 200 gsm are common weights) and by brand where it drives cost. Note the baffle too: sewn-through is lighter and cheaper, box-wall holds more loft and kills the cold seams that sewn-through leaves.
Quilting stitch and box dimensions
If the jacket is quilted, the stitch pattern is a spec, not a decoration. State the box or channel dimensions, for example 5 cm channels or 8 by 8 cm boxes, the stitch type, the stitches per inch, and whether the quilting passes through all layers or only shell-to-scrim. Get the box size wrong and the fill migrates, leaving cold spots and a lumpy face. Bar-tack or backstitch the ends of any quilt line that stops at a seam, so the insulation can't creep once the jacket flexes.
A jacket zip is specified by four attributes that all belong on the bill of materials: chain gauge (#3, #5, or #8), element type (coil, moulded, or metal), one-way or two-way operation, and brand. An insulated jacket adds two more layers, insulation by fill power or gsm and interlining by placement, each on its own line.
How do you spec jacket closures, collars, and hoods?
A closure spec names four things: the mechanism, its size, its brand, and its finish. Techpacker defines a tech pack as the document that carries every construction detail to a factory (Techpacker). On a jacket, the front zip is the first hardware a buyer touches, so it earns the most detail on the page.
Zippers and separating closures
A front zip on outerwear is a separating zip: it splits fully at the base so the jacket opens flat. That's different from the closed-end zip on a pocket. Spec the chain gauge by number, because it changes both look and feel. A #3 is light, for liners and inner pockets. A #5 suits most jackets. A #8 is heavy, for parkas and rugged shells. State the element type as well: coil is flexible and quiet, moulded plastic is chunky and sporty, metal is heavy and reads as workwear or biker.
Two-way is the callout brands forget. A two-way zip carries a second slider at the base, so the wearer can open the hem to sit, cycle, or reach a hip pocket without unzipping the chest. If you want that, write it, and say where each slider parks at rest. Then add the comfort trims: a storm flap is a fabric placket over the chain to block wind and rain, a zip garage is a small chin guard at the top that stops the slider biting your neck, and an inner windguard is a baffle behind the teeth. I've seen a sample come back with a raw zip and no garage, and the first thing everyone did was catch their chin on it.
Snaps, buttons, and rivets
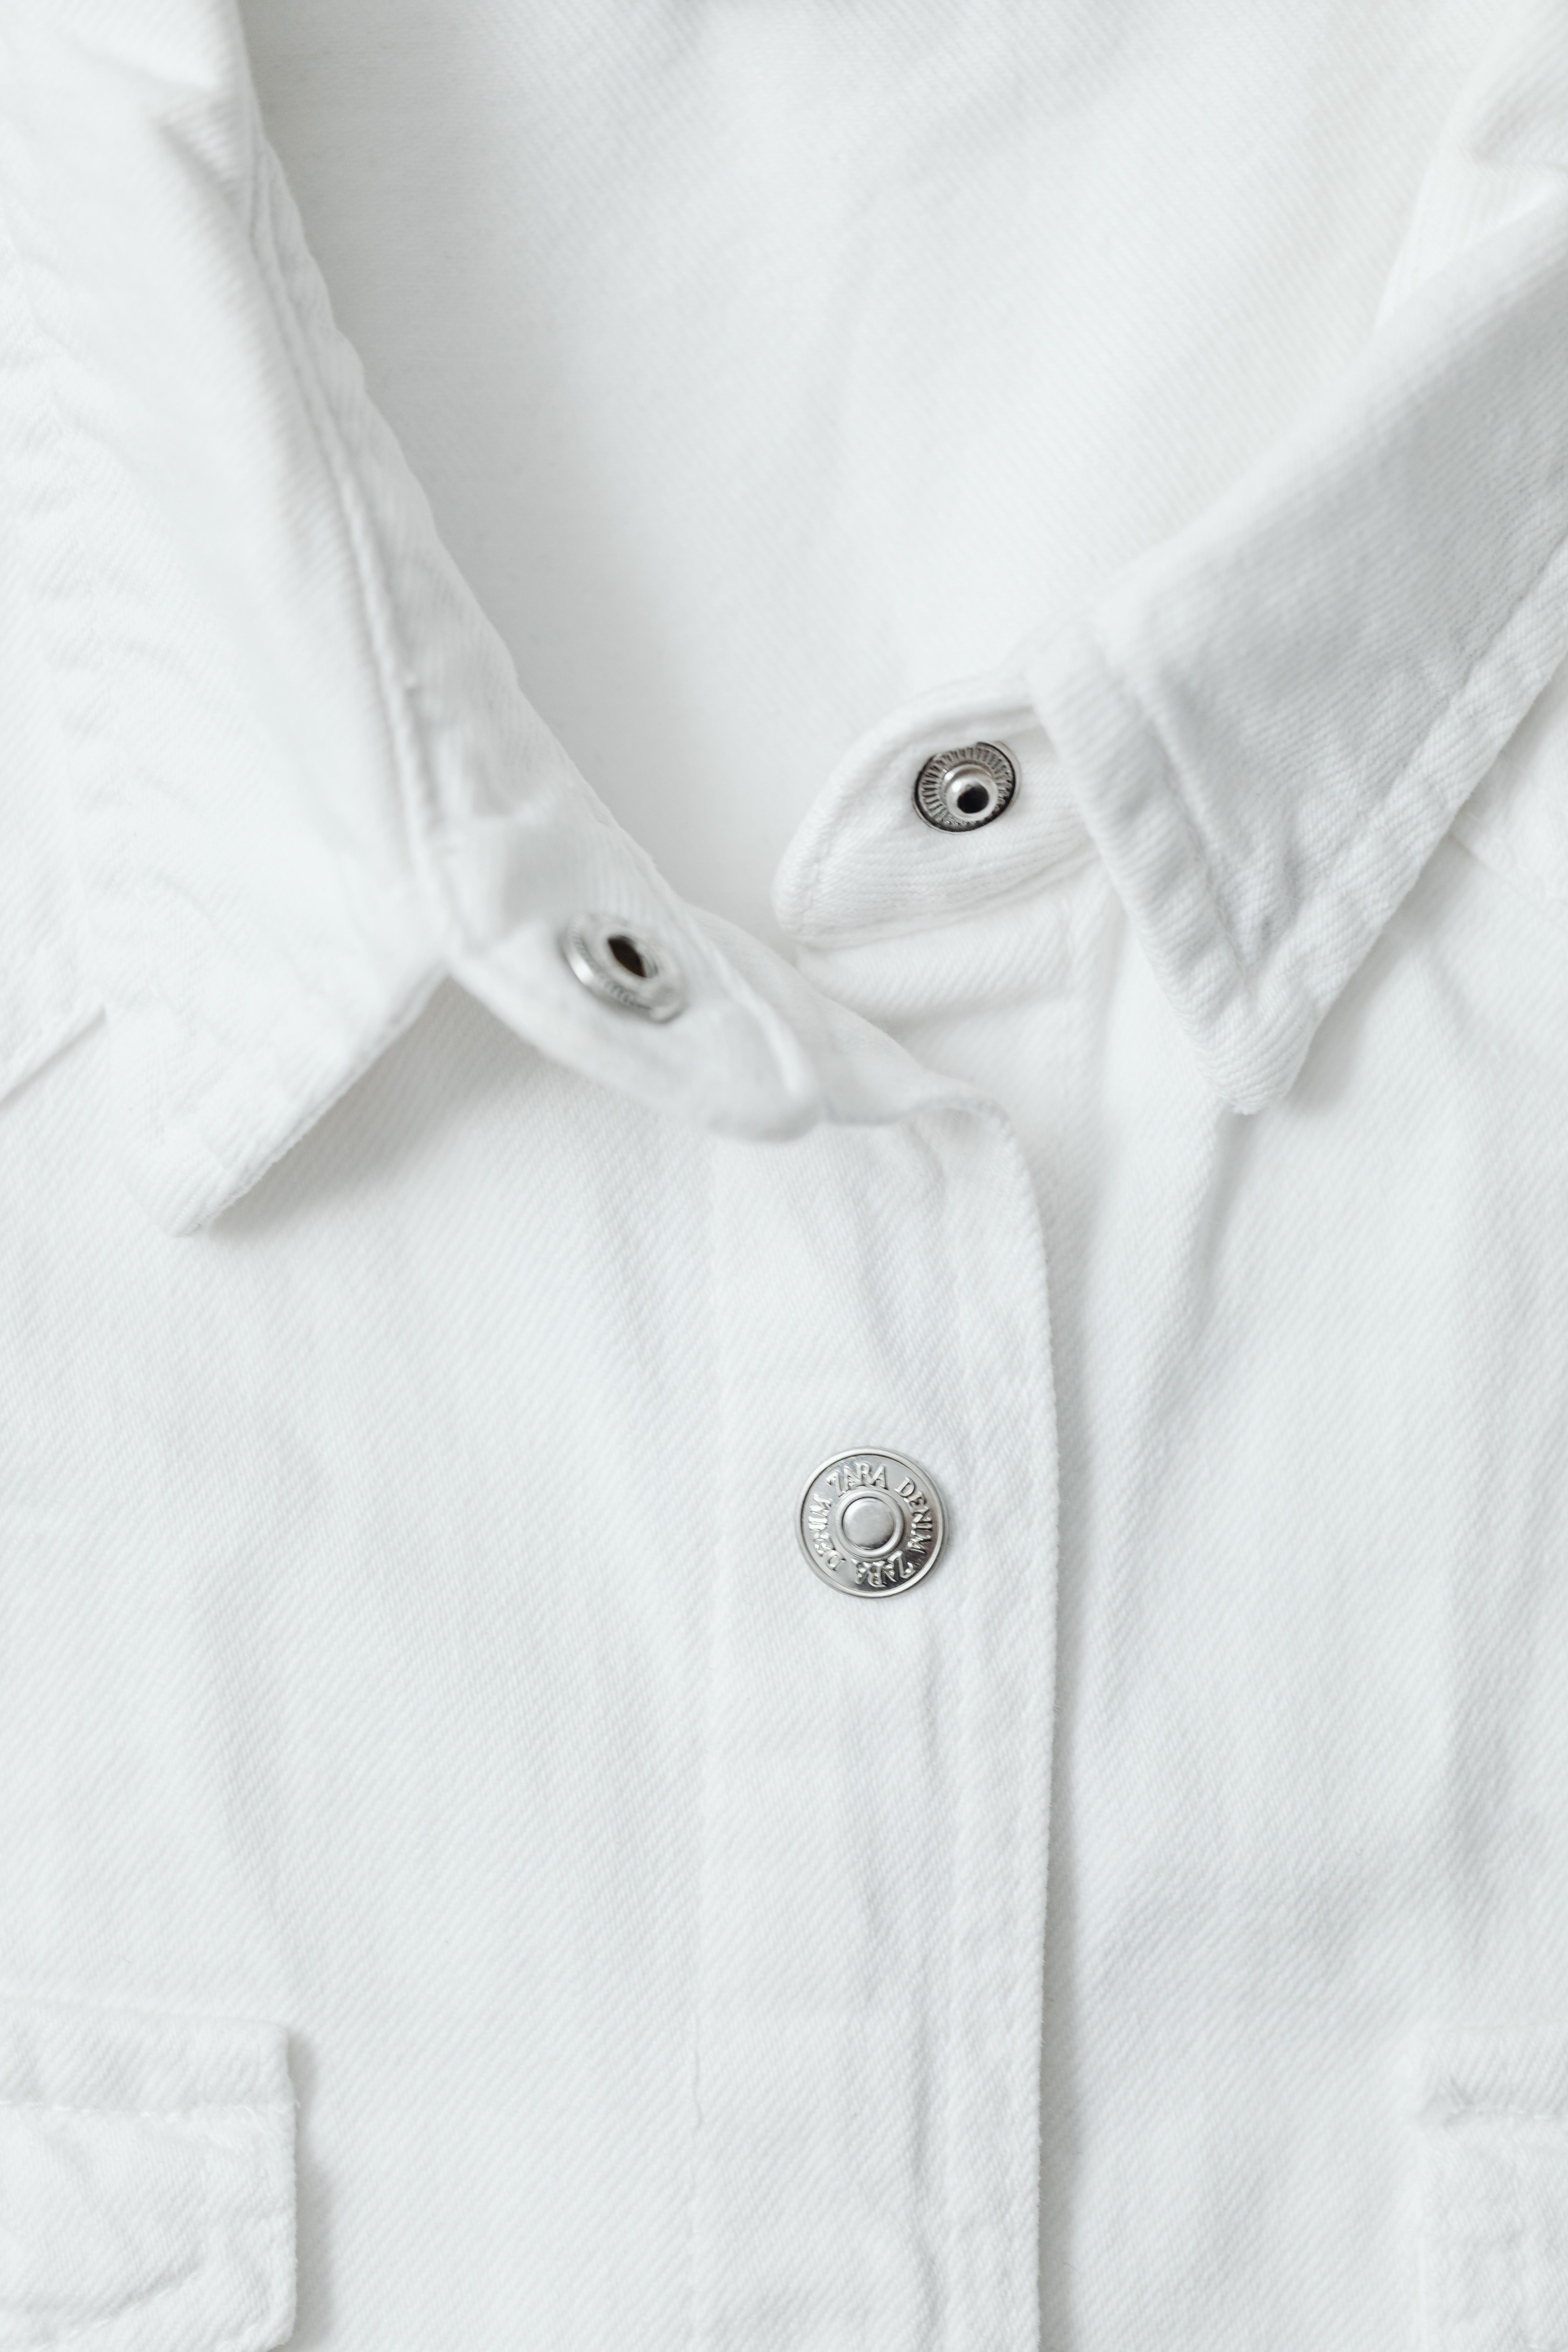
Metal trims carry their own line each, with size, brand, and finish. Snaps get a stud diameter, say 15 mm, and a type: ring, prong, or S-spring. Buttons get a ligne size, material, and attachment method. Rivets reinforce pocket corners on workwear styles. Finish matters for compliance as much as looks: state nickel-free on anything that touches skin, and pick one finish family, matte black, antique brass, or gunmetal, so the hardware reads as a set.
| Trim | Spec to state | Finish |
|---|---|---|
| Front zip | #5 moulded, two-way, brand, length | Matte black, nickel-free |
| Zip pulls | Stock or custom, cord or metal tab | Tonal to shell |
| Snaps | 15 mm ring snap, brand | Antique brass |
| Rivets | Pocket-corner reinforcement | Nickel-free |
| Cord locks | Spring barrel, single or dual hole | Matte black |
| Drawcord | 3 mm braided, tipped ends | Tonal to shell |
Collars and hoods
The collar and hood are shape decisions that need their own construction lines. Name the collar type: a stand collar rises straight, a notch or lapel folds open, a funnel neck zips high over the chin. Say whether the hood is fixed, sewn in for good, or detachable by zip or snaps around the neck seam, and give its panel count (two-panel is flatter, three-panel wraps the head). Drawcords at the hem and hood need a cord thickness, tipped or moulded ends, and a cord lock. Don't forget the interlining at the collar stand, or it flops the moment the jacket comes off the press.
A jacket closure spec names the mechanism, its size, its brand, and its finish. Zippers add gauge (#3, #5, #8), element type (coil, moulded, metal), and one-way or two-way operation. Comfort trims, the storm flap, zip garage, and inner windguard, each get their own construction line so the factory builds them in.
How do you spec pockets, seams, and finishing?
Pockets, seams, and finishing all live in the construction notes, and they take real time to write. A full pack runs 5 to 20 hours per style (Guru, 2022), and much of the second half lands here: every pocket bag, every seam class, every topstitch row gets a line.
Pockets
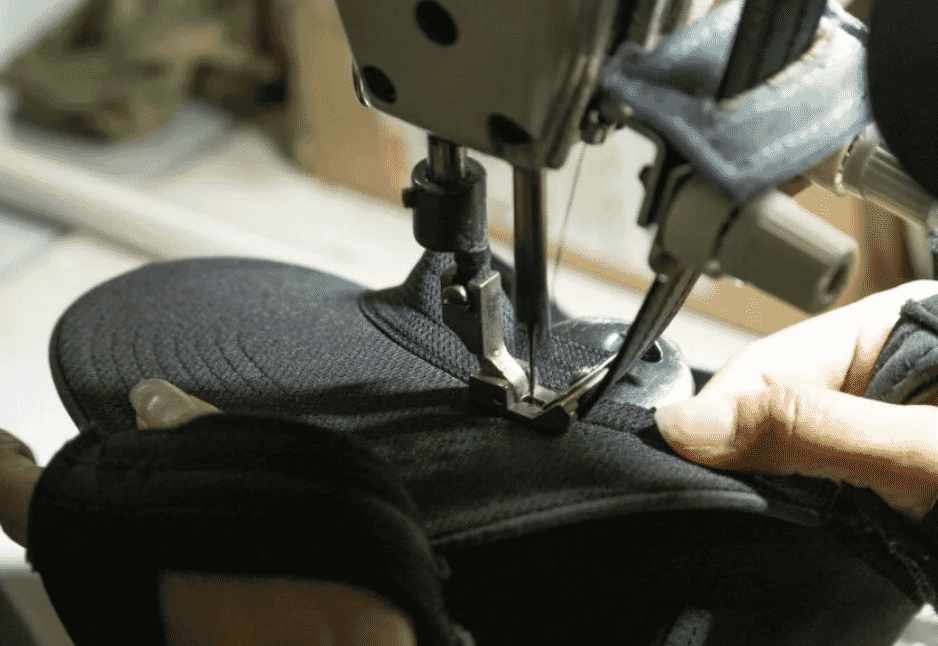
Each pocket is a small assembly, so spec it whole. Name the type: welt (single or double besom), patch, zip, hand-warmer, chest, or an internal media pocket for a phone. For each one, state the bag fabric, the opening width, the depth, and the placement measured from the high point of shoulder or centre front. Then call out the closure, zip, snap, button, or open. Bar-tack the corners and the mouth ends, and say how many stitches, because a pocket mouth without bar-tacks is the first seam to fail when someone jams a hand in.
Seams and performance finishing
The seam class is a spec, not a default. A plain seam is quick. A flat-fell seam encloses the raw edges and reads clean inside, which is why it suits unlined shells and denim. A bound or French seam tidies a lining. For a waterproof jacket, add seam-sealing: a heat-bonded tape over the needle holes, stated by tape width, because the fabric can be waterproof while the stitch holes still leak. Spec the shell's water resistance too, as a hydrostatic head in millimetres (5,000 mm sheds rain, 10,000 mm and up handles a storm), and confirm the DWR finish that makes water bead off the face.
Topstitching, thread, and care
Topstitching is visible construction, so pin it down. State the number of rows, the margin from the edge (6 mm is common), the stitches per inch, and the thread colour, tonal or contrast. Name the thread by tex size: Tex 40 handles general seaming, Tex 60 to 80 suits heavy seams and topstitch on outerwear. Last, the care label. A multi-fabric jacket carries more than one fibre content, so list shell and lining percentages separately, add the care symbols, and include the RN or supplier code if you sell into the US.
Pockets, seams, and finishing carry the second half of a jacket's construction notes. Each pocket states bag fabric, opening, depth, placement, and bar-tacks. Each seam states its class, and a waterproof jacket adds seam-sealing tape and a hydrostatic-head rating in millimetres alongside the shell's DWR finish.
What are the points of measure and tolerances on a jacket?
A jacket's measurement spec lists every point of measure with a base size and a tolerance. The tolerance is the allowed drift, plus or minus, before the piece fails. Grading standards exist because sizes shift predictably: ASTM D5585-21 covers women's misses sizes 00 to 20 (ASTM), and D6960 extends to plus sizes 14W to 40W.
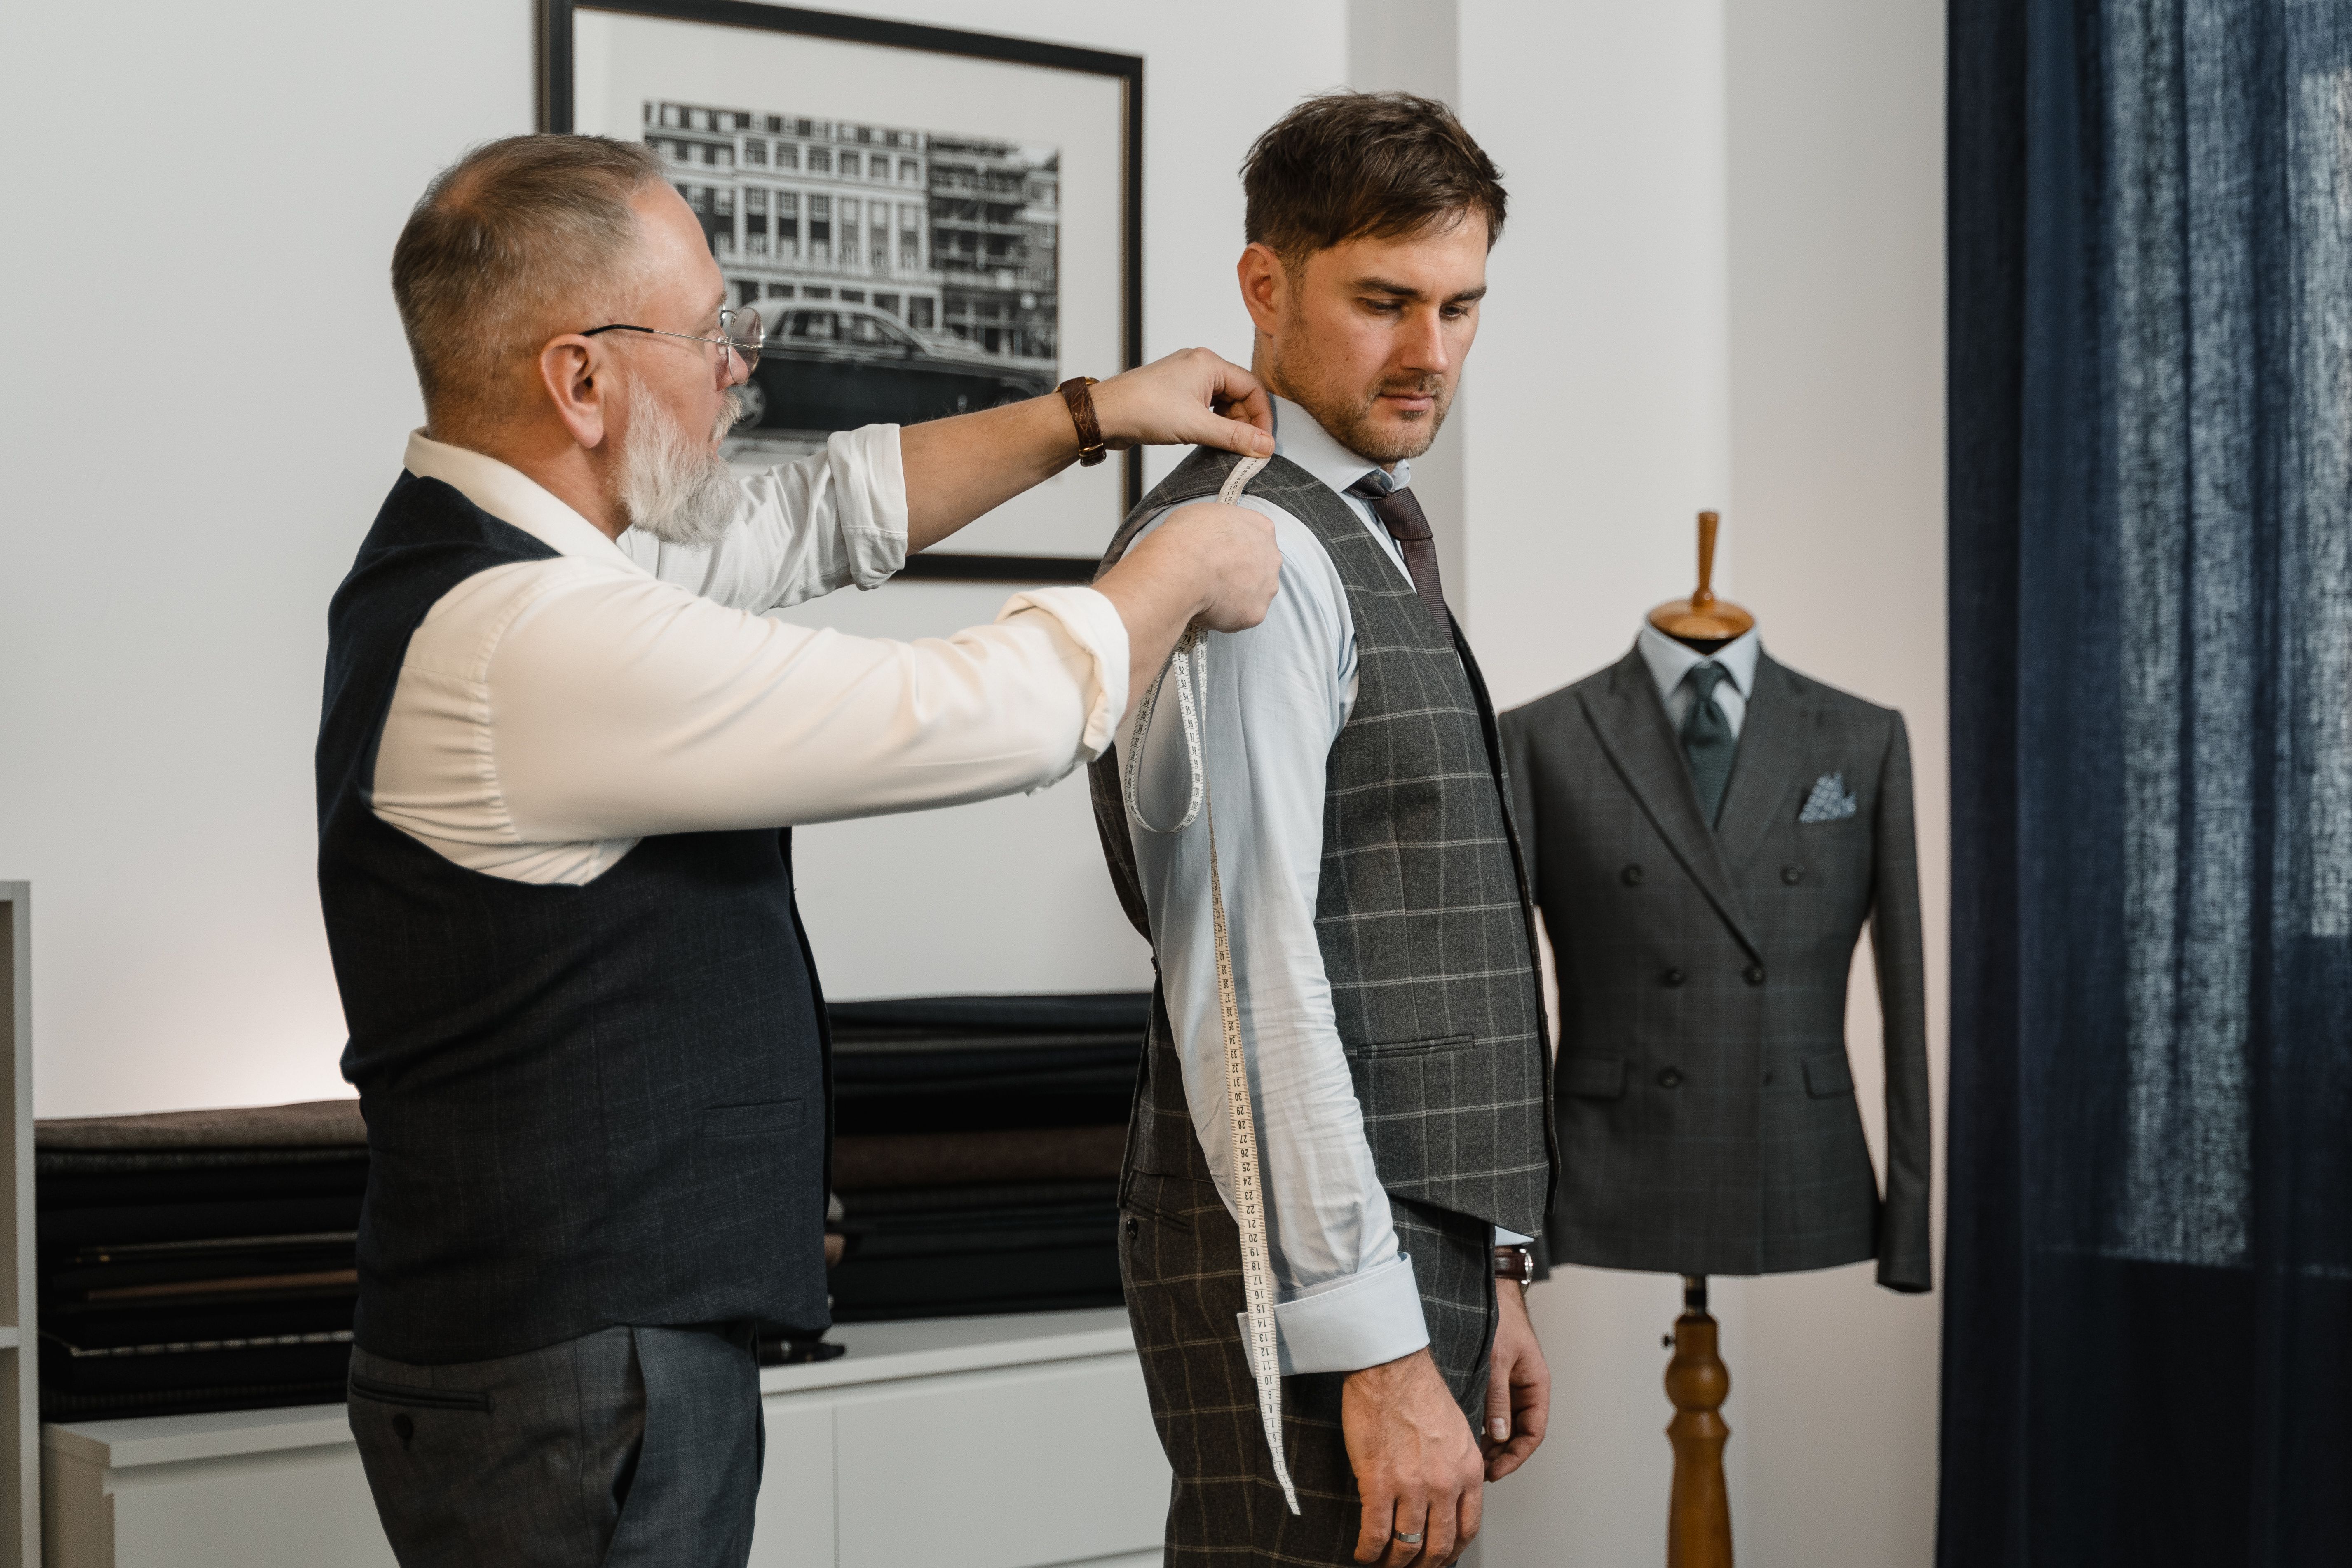
Why does tolerance matter so much on outerwear? Because a jacket has curved seams, set-in sleeves, and a collar that has to meet the front edges exactly. A shirt can drift a centimetre and nobody notices. A collar stand that's three millimetres off shows in the mirror. Tighter tolerances go on the parts the eye lands on: collar, zipper opening, cuff. Looser ones go on body length. The tech pack template gives you a table to fill in.
Here's an illustrative POM table for a base-size-M zip jacket. The numbers are illustrative, not a real spec. Use them to see the shape of the thing, then measure your own approved sample.
| Point of measure | Base size M | Tolerance |
|---|---|---|
| Chest width, 2.5 cm below armhole | 54.0 cm | ± 1.0 cm |
| Body length, HPS to hem | 68.0 cm | ± 1.0 cm |
| Shoulder width, seam to seam | 46.0 cm | ± 0.5 cm |
| Sleeve length, from centre back | 84.0 cm | ± 1.0 cm |
| Cuff opening, relaxed | 12.0 cm | ± 0.5 cm |
| Collar stand height | 7.5 cm | ± 0.3 cm |
| Front zipper length | 66.0 cm | ± 0.5 cm |
| Armhole, curved | 26.0 cm | ± 0.5 cm |
| Hem sweep, relaxed | 56.0 cm | ± 1.0 cm |
| Hood height, if present | 36.0 cm | ± 0.5 cm |
| Pocket placement from HPS | 40.0 cm | ± 0.5 cm |
ASTM maintains the body-measurement standards factories grade against, from D5585-21 for misses 00 to 20 to D6960/D6960M for plus sizes 14W to 40W, all governed by Subcommittee D13.55 (ASTM). Your tolerance column is what turns those standards into a pass-or-fail check.
Grading notes for outerwear
Grading is where the base size becomes a full size run, and outerwear grades differently than a knit. You set an increment for each point of measure, then scale it up and down. On a jacket, chest and hip often grade in 4 cm steps between whole sizes, while shoulder and neck move in smaller 1 cm steps because the body changes less there. ASTM D5585-21 gives the misses body dimensions those increments track (ASTM), so your grade rule stays anchored to real bodies rather than a flat percentage.
Two jacket points need a note in the grade rule, or they break. The sleeve grades on its own increment, usually about 1 cm per size, because arm length and arm girth don't scale together. And the zipper length has to grade with the body length, or a size XL ends up with a size M zip. Write the graded zipper length into the BOM for each size, not just the base. When a factory reads a clean grade rule, it cuts the whole run right the first time. Miss it, and every size but the sample comes back wrong.
How do factories inspect a finished jacket?
Factories inspect against a statistical sampling standard, not by checking every piece. Most use ISO 2859-1 or ANSI-ASQ Z1.4, pulling a sample from the lot and counting defects. AQL 2.5 is the level most apparel brands accept, while 1.0 applies to higher-risk goods and 4.0 to minor cosmetic faults (QIMA).
Critical defects sit at zero. A jacket with a broken zipper slider or an exposed pin is a critical fail, no matter how few appear. Major defects, like a twisted lining or a short zipper, count against your 2.5 limit. Minor ones, a slightly loose thread, count against 4.0. The more trims a jacket carries, the more chances it has to rack up counts. That's the statistical reason outerwear needs a tighter spec than a tee.
Apparel inspection uses acceptable quality limits set out in ISO 2859-1 and ANSI-ASQ Z1.4, where critical defects allow zero, general goods sit at AQL 2.5, and minor cosmetic issues run to 4.0 (QIMA). Every extra jacket trim adds another point where a defect can be counted.
Not sure your pack is inspection-ready? A tech pack service builds the whole spec, all eight sections, for a fixed $299 per style, so the factory has nothing to guess and nothing to reject on a technicality.
How do you make a jacket tech pack step by step?
You build it section by section, front-loading the parts jackets fail on. The whole job takes 5 to 20 hours for a single style (Guru, 2022). Do the BOM and the zipper spec first, because those are the lines a factory reads before it quotes.
Build it in this order
- Draw the flats front, back, and inside, so the lining is visible.
- Write the BOM shell, lining, interlining, zipper, snaps, and labels as separate lines.
- Spec the zipper and lining length, gauge, brand, type, and lining cut allowance.
- List points of measure with base size and a tolerance for each.
- Add construction notes seam types, stitch density, and bar-tacks at pockets and belt loops.
- Grade and set colorways shell and lining colours listed separately.
- Log a revision history so every sample round is traceable.
The bar-tack line is the one brands forget. Every stress point on a jacket, pocket corners, belt loops, the base of a two-way zipper, needs a bar-tack called out in the construction notes. I've seen pockets rip clean off a sample because nobody wrote it down. A jacket carries a multi-fabric care label too, so the content label has to list shell and lining percentages separately. Get the format right the first time by copying a proven tech pack template.
Building a tech pack takes an estimated 5 to 20 hours per style and costs $500 to $2,000 when outsourced. For a jacket, most of that time lands on the bill of materials and the zipper spec, the two sections that carry the highest trim count.
Frequently asked questions
What's different about a bomber jacket tech pack?
A bomber tech pack lives or dies on its ribbing and its two-way zipper. You spec the rib trim (collar, cuffs, hem) as separate BOM lines with gauge and width, and the zipper as two-way so it opens from the hem. The lining is usually full, cut with its own allowance. Everything else follows the standard eight sections.
How is a denim jacket tech pack different?
A denim jacket tech pack leans on wash, hardware, and topstitching. You spec the denim weight in ounces, the wash and any distressing, the button and rivet hardware by brand, and the topstitch colour and stitch-per-inch density. Denim jackets are often unlined, so the interior seam finish, felled or taped, becomes a named construction line instead.
Do I need a separate spec for an outerwear coat?
Yes, a coat tech pack adds length, weight, and closure detail a short jacket skips. You spec the fuller lining, the interlining across larger panels, and any storm flap or inner windguard. Care and content labels still list shell and lining separately, since multi-fabric outerwear carries more than one fibre content (Sewport).
How much does a jacket tech pack cost to make?
Building one costs $500 to $2,000 per style when outsourced, and takes 5 to 20 hours (Guru, 2022). A jacket sits at the higher end because of its bigger bill of materials and higher trim count. That cost is small next to a rejected production run, which is what an incomplete jacket spec risks.
What tolerance should I put on jacket measurements?
Tolerance depends on the point of measure. Tighter values, around 0.3 to 0.5 cm, go on collar stand, cuff, and zipper opening, where the eye lands. Looser values, up to 1.0 cm, suit body length and chest. Grading standards like ASTM D6960 exist because sizes drift predictably (ASTM), so every point needs its own number.
What zipper gauge should a jacket use?
Match the gauge to the weight. A #3 chain is light, right for liners and inner pockets. A #5 covers most jackets and is the safe default for a front zip. A #8 is heavy, for parkas and rugged shells. State the number, the element type (coil, moulded, or metal), and one-way or two-way operation on the BOM.
How do you spec insulation on a down jacket?
State two numbers, not one. Fill power measures loft, commonly 550 to 800, and fill weight is the actual grams of down in the jacket. High fill power with low fill weight makes a thin, cold jacket. For synthetic insulation, spec the batting by gsm, 60 to 200 is common, and name the baffle style, sewn-through or box-wall.
What seams make a jacket waterproof?
Seam-sealing does, not the seam class alone. A shell fabric can be waterproof while the needle holes still leak, so a waterproof jacket adds heat-bonded tape over the seams, stated by tape width. Spec the shell's hydrostatic head in millimetres too, 5,000 mm sheds rain and 10,000 mm handles a storm, plus the DWR finish that beads water off the face.
The bottom line
A jacket is the most component-heavy garment a new brand attempts, so its tech pack is where a missing line costs the most. Use the same eight sections every garment uses, then pour your attention into the bill of materials, the lining, the zippers, and the interlining. Give every measurement a tolerance. Write the bar-tacks down. Label shell and lining content separately. The factory will inspect your sample against a sampling standard whether or not you specced it well, so spec it well. Start from a working tech pack template, then read the wider tech pack pillar to see how jackets compare to simpler garments. Get these details right and your first sample comes back as a jacket, not a lesson.
Peter Midea runs a network of 80 clothing factories in Portugal and has watched more garments get rejected on a production line than he'd like to admit.
We build the factory-ready spec a manufacturer can quote from without a single question: technical flats, bill of materials, graded points of measure with tolerances, colorways and construction notes. $299 per style, 3 to 5 working days, 2 to 3 revision rounds.
Get your tech pack — $299Start with the free templateWe don't take your production. The spec is yours to send to any factory, anywhere. Talk to us first if you're not sure what you need.
Sources
Every statistic and definition in this article traces to one of the following. Each is listed once here, and cited inline where it is used.
- Guru
- ASTM International
- QIMA
- Techpacker
- Sewport
- Portugal Clothing Factory
- otextilpt.sirv.com
- ASTM International
- images.pexels.com
- ASTM International
Related guides
- Tech packs: the complete guide
- Denim & jeans tech pack
- Shoe & handbag tech packs
- Hoodie tech pack
- Streetwear tech pack
- Free tech pack template