Contents
- What Are the Rules of a Fashion Flat Sketch?
- How Do Proportion and the Croquis Ratio Work?
- What Stroke Weights Should a Flat Use?
- How Do You Draw Stitch-Line and Topstitch Co…
- Why Must a Flat Show Front and Back?
- How Do You Indicate Gathers, Elastic, and Ri…
- How Do You Draw Darts, Pleats, and Hardware?
- What Are the Callout and Leader-Line Convent…
- How Should Fill, Color, and Scale Work Acros…
- Should You Draw Flats by Hand or in Software?
- What Flat-Sketch Mistakes Confuse a Factory?
- How Do These Conventions Feed the Tech Pack?
- Frequently Asked Questions
- The Bottom Line
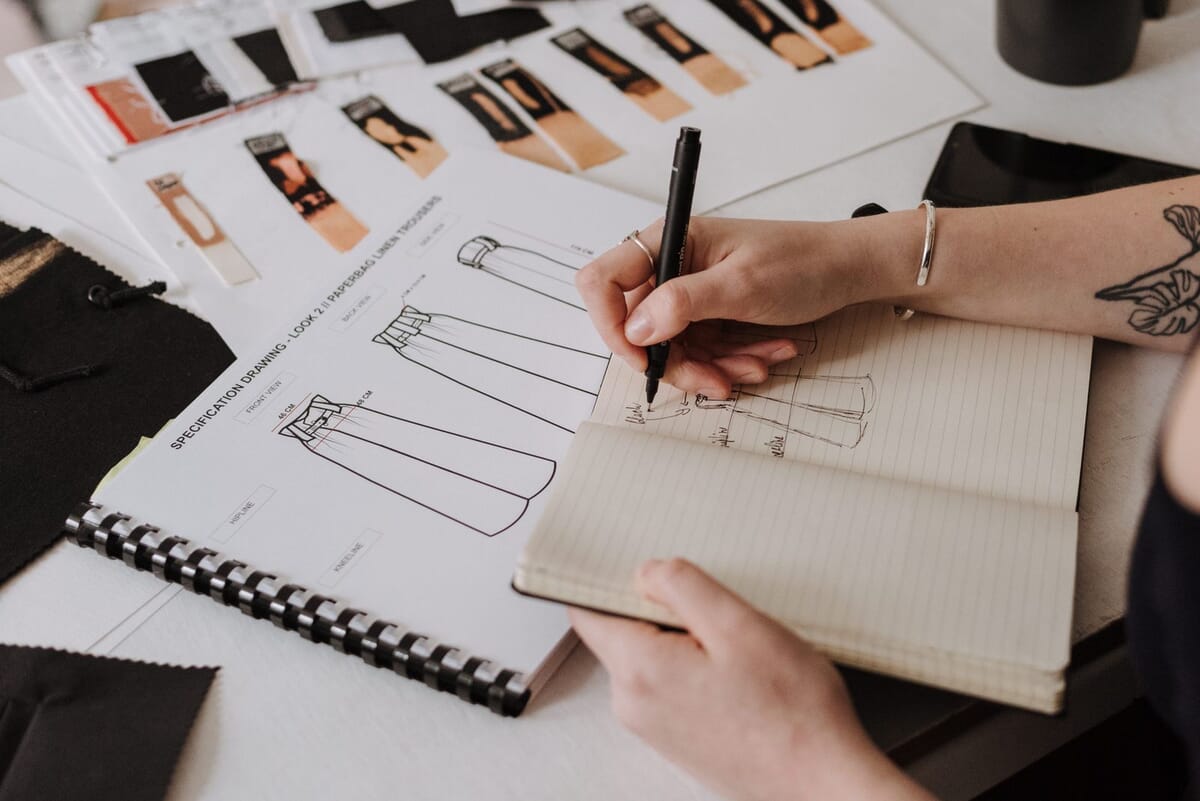
A fashion flat sketch follows rules, and the rules are what make it useful. I've watched a cutter stop mid-run because a flat showed a dashed line where the pattern wanted a seam. Nobody could tell if that line meant topstitch or a panel join. The sample went back. That's the whole game here: a flat isn't judged on how good it looks, it's judged on whether a stranger in a sample room can build from it without asking a single question. Outsourcing that drawing runs $500 to $2,000 per style (Guru, 2022), so learning the conventions yourself pays off fast. This guide is the rulebook, not the how-to.
Key Takeaways
- A fashion flat sketch is governed by conventions, not taste: symmetry, stroke hierarchy, and stitch notation.
- Use a heavier outline, a lighter internal seam line, and a dashed line for topstitch, held consistent everywhere.
- Always draw front and back, and show closures, pockets, darts, and pleats to scale.
- Flats are section one of a standard eight-part tech pack.
- Every line must trace to a pattern piece, or the flat is just decoration.
What Are the Rules of a Fashion Flat Sketch?
The rules of a fashion flat sketch are simple to list and hard to hold: draw to proportion, keep it symmetrical, use a consistent stroke hierarchy, and always show front and back. Flat sketches are the first of eight tech pack sections, which means every rule here serves the pages that follow.
Think of a flat as a legal document written in lines. Each convention has one job: remove ambiguity. A solid heavy line means "this is the garment edge." A dashed line means "this is topstitch, not a seam." A callout means "this needs a word the line can't say." Break one convention and you don't get a worse drawing, you get a wrong garment.
The rest of this guide walks each rule in turn. If you want the step-by-step drawing method instead of the conventions, start with the technical flats pillar. For the software side, our Illustrator workflow pairs with this one.
How Do Proportion and the Croquis Ratio Work?
Proportion is the first rule, and a flat breaks from the croquis on purpose. The nine-head croquis stretches legs and shrinks waists to sell a mood; a flat holds true human proportion so measurements read straight off the drawing. ASTM D5585-21 defines women's misses body measurements for sizes 00 to 20 (ASTM, 2021), and your flat should look like it could wear those numbers.
Here's the split that trips people up. A croquis is roughly nine heads tall. A real body is closer to seven and a half. If you trace a garment off a croquis, the torso lands too short and the sleeves too long, and the pattern maker inherits a shape that can't exist. Draw the flat on its own proportion grid, not on top of a fashion figure.
The flats that reach a factory looking "off" almost always started life on a croquis. The armhole sits high, the rise looks wrong, and the sample room quietly corrects it, which means the sample no longer matches the drawing you signed.
Keep a light center line, a shoulder line, and a hem line. Build the garment inside real proportion. A flat drawn true plugs straight into a size chart; a stylized one starts a fight.
Symmetry is proportion's other half. Draw one side of the garment, then mirror it exactly across the center line so the left cuff matches the right and the collar sits square. In software, this is a hard mirror, not an eyeballed copy. By hand, fold the paper on the center line and trace through, or work over a light gridded template. A collar that leans two millimeters to one side reads as a design choice to a factory, and they'll build the lean.
What Stroke Weights Should a Flat Use?
A flat uses at least three stroke weights: a heavy line for the garment outline, a medium line for internal seams, and a light dashed line for topstitch. Sewport describes technical drawings as precise, proportional garment views built for production (Sewport), and stroke hierarchy is how that precision reads at a glance.
The logic is legibility. When a sewing operator scans a flat, the heavy outline tells them the garment's boundary in half a second. The lighter seam lines sit inside without competing. The dashed topstitch reads as "surface detail," not structure. Flatten all three into one weight and the reader has to decode every line by hand.
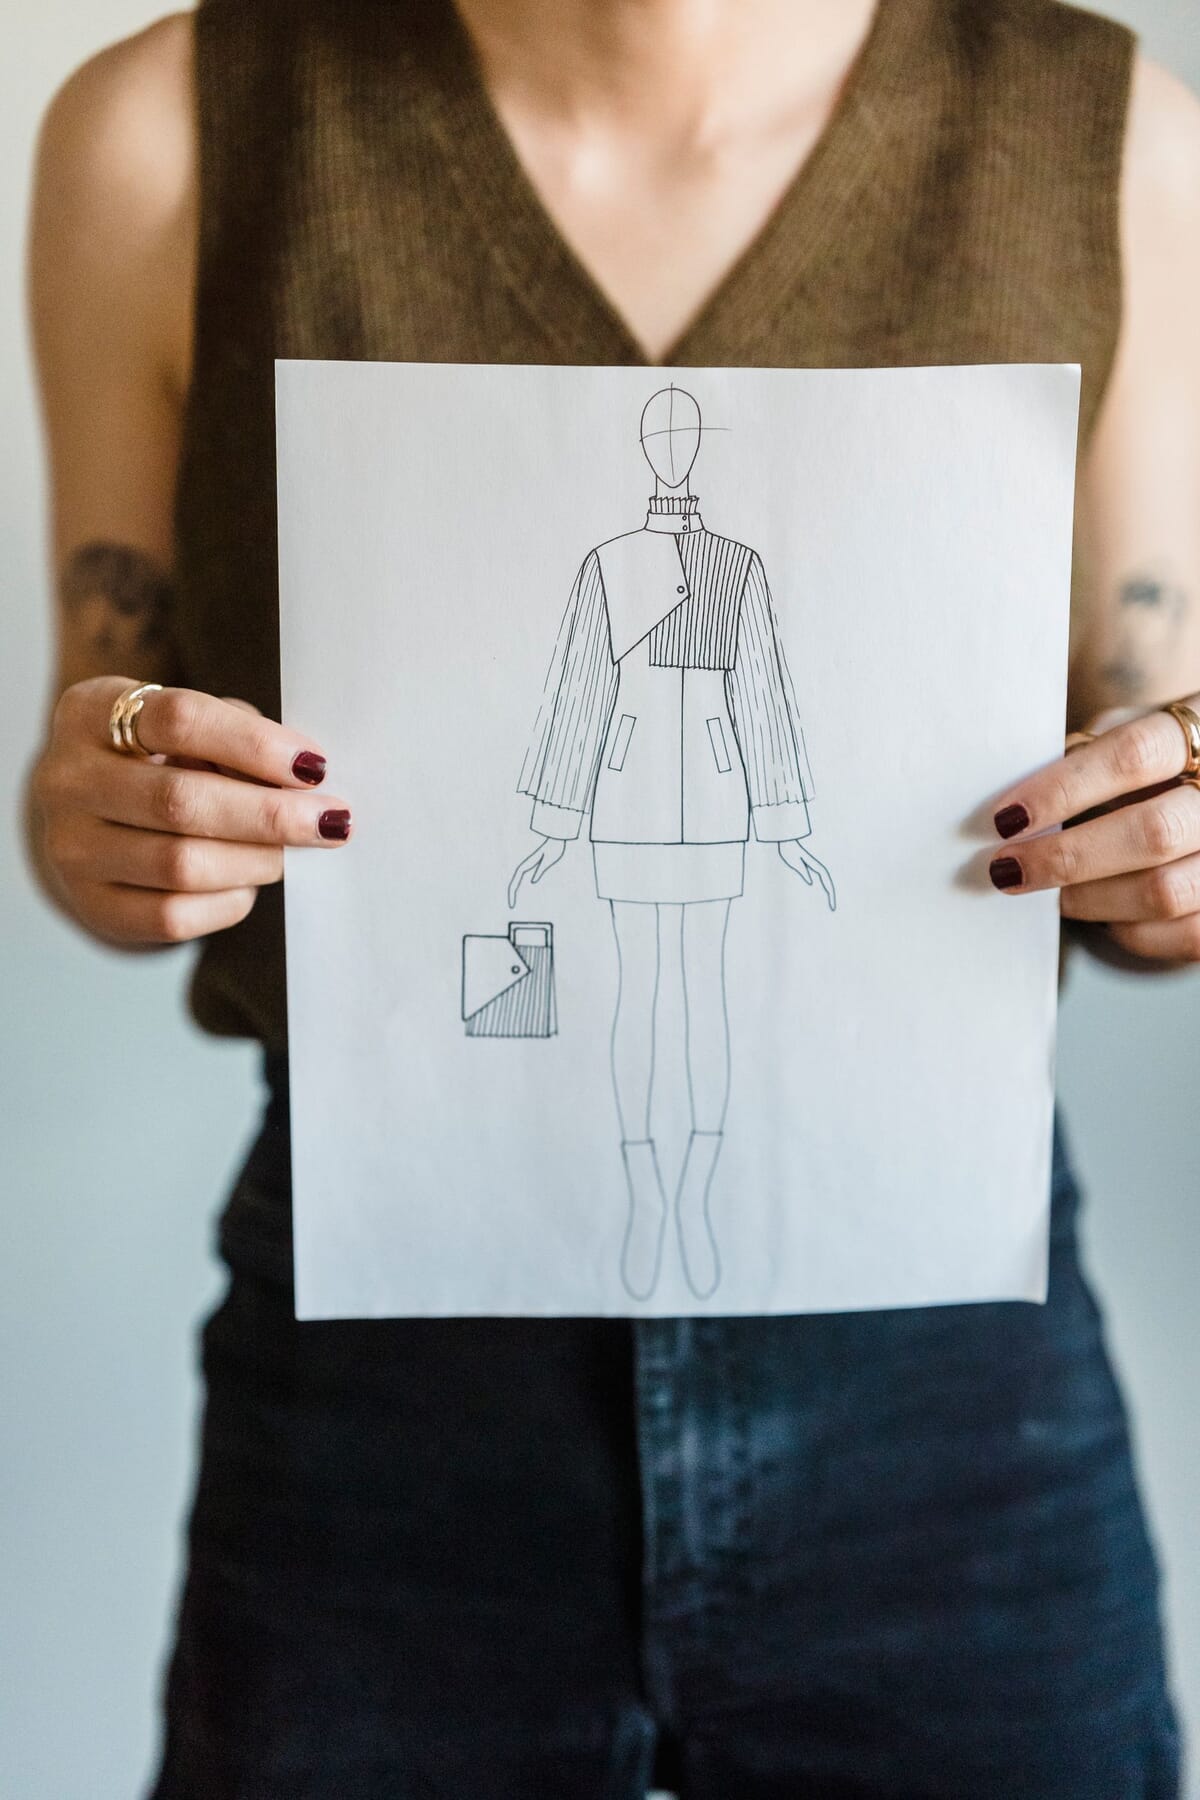
Set the weights and never change them mid-pack. A common studio ratio is roughly 2pt outline, 1pt seam, 0.5pt topstitch, but the exact numbers matter less than holding them steady. Draw one collar with a heavy outline and the next with a thin one, and the pack tells two stories about the same garment.
How Do You Draw Stitch-Line and Topstitch Conventions?
Stitch conventions are the part factories actually read to build without asking: solid lines for seams, evenly spaced dashes for topstitch, and symbols plus callouts for anything specialized. This is where a flat earns its keep. A vague stitch line turns a defect into an argument, and inspections judge defects against sampling limits like AQL 2.5 for general goods (QIMA).
Hold the dash spacing steady so single-needle and double-needle stitching read differently on the page. A double-needle hem gets two parallel dashed lines at a fixed gap; a single-needle topstitch gets one. Keep the spacing consistent and an operator counts needles from the drawing. Let it drift and they guess, and a guess on a production run is a reject waiting to happen.
The stitch line is the one convention I'd never let a designer improvise. Outline errors get caught by eye; a wrong topstitch notation gets sewn exactly as drawn, at scale, before anyone notices. Get the dashes right and the cutter builds without a single email.
Don't lean on color to carry stitch meaning. Many packs print in grayscale, and a red topstitch that vanishes in a black-and-white PDF takes its information with it. Bartacks, buttonholes, and rivets each get a symbol plus a short numbered note. The dashed line says where; the callout says what.
Why Must a Flat Show Front and Back?
A flat must show front and back because a sewing operator builds only what they can see. Skip the back and someone in the sample room fills the gap with a guess about yokes, vents, or seams. Garment inspections check a sample against the spec using sampling standards like ISO 2859-1, mirrored by ANSI/ASQ Z1.4, and a missing view means the spec itself is incomplete.
Front and back aren't two drawings, they're one garment seen twice. They must share the exact shoulder width, body length, and hem width. If the front shows a princess seam, the back has to resolve where it goes. When the two views disagree, the pattern maker can't reconcile them, and the tie goes to whoever is standing closest to the machine.
| Convention | How to draw it | What the factory reads |
|---|---|---|
| Heavy outline | Thick solid line around the garment edge | This is the cut boundary of the panel |
| Internal seam | Medium solid line inside the outline | Two pattern pieces join here |
| Topstitch | Evenly spaced dashed line parallel to a seam | Surface stitching, single or double needle by dash count |
| Dart | Two converging lines to a point, drawn to scale | Fabric is folded and stitched out for shaping |
| Pleat | Directional fold lines with arrows showing lay | Fabric is folded this way and secured |
| Gather | Short wavy or looped lines along the seam | Fabric is drawn up to a shorter measurement |
| Elastic / ribbing | Stacked parallel lines across the zone | Stretch trim or self-fabric rib sits here |
Front and back are the floor, not the ceiling. Add a side view when the silhouette can't be read straight on: a garment with side panels, a gusset, a princess seam that wraps, or a distinctive armhole. Add a detail view, an exploded call-out drawn larger than flat scale, whenever a feature is too small to read: a pocket bartack, a collar stand, a zipper garage, a specialty cuff. Add an interior view when construction lives inside: a lining, a hidden pocket bag, a bound seam, a drawstring channel. A single external flat hides the half of the garment the sample room still has to sew.
The single most common gap I see on incoming flats is a missing interior view on a lined jacket. The outside looks complete, the pack looks finished, and then the sample room invents a seam finish because nobody drew one. An interior view would have cost the designer ten minutes and saved a whole sample round.
To see front and back working inside a real document, walk through our hoodie tech pack, where the flat anchors every measurement on the page.
How Do You Indicate Gathers, Elastic, and Ribbing?
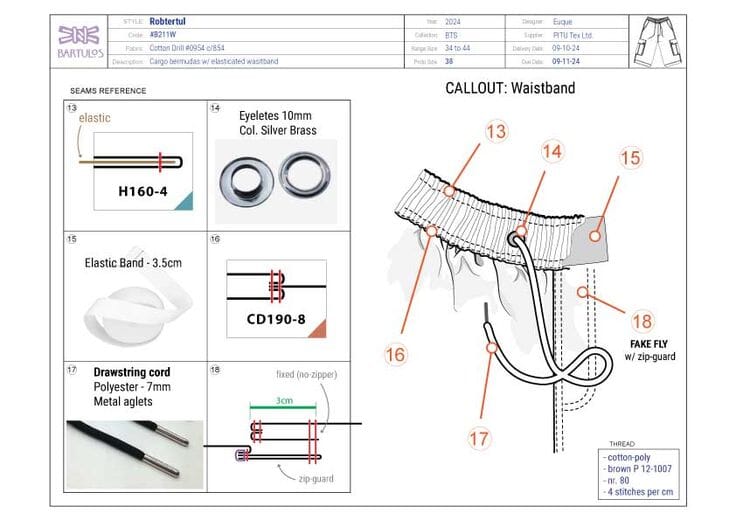
Gathers, elastic, and ribbing each have a standard notation, and mixing them up changes the garment. Draw gathers as short wavy or looped lines bunched along the seam, elastic as stacked parallel lines with a callout for width, and ribbing as evenly stacked lines across the cuff or hem. The tech pack's eight-section structure expects these details to match the bill of materials exactly.
The distinction matters on the floor. Gathers mean a longer piece of fabric is drawn up to a shorter seam, so the pattern piece is cut oversized. Elastic means a stretch trim is applied, and the callout has to state the width and whether it's exposed or in a casing. Ribbing means a separate knit trim, cut and sewn on. Draw all three the same way and the pattern room orders the wrong pieces.
Show the effect to scale, not as a token. A cuff with light ribbing and a cuff with deep ribbing are different patterns, and the drawing has to say which. When a detail can't be drawn clearly at flat scale, add an exploded callout that zooms in on it.
How Do You Draw Darts, Pleats, and Hardware?
Darts, pleats, and hardware each have a fixed notation, and the difference between them is the difference between shaping, folding, and fastening. Draw a dart as two lines converging to a point, a pleat as directional fold lines with arrows, and hardware as a scaled symbol with a callout. Sewport frames technical drawings as precise, production-ready garment views (Sewport), and these three details are where imprecision costs the most fabric.
Darts shape flat fabric into a body curve, so draw them true. Show both legs of the dart and mark the point, because the length and angle tell the pattern maker how much fabric folds out. A dart drawn a centimeter too long changes the bust or waist suppression, and the fit walks with it. Draw the dart on both front and back if it appears on both, and keep it symmetric across the center line.
Pleats need direction. A knife pleat all folds one way; a box pleat folds two edges toward a center; an inverted pleat folds them apart. The arrows carry that information, and without them a pleat is just an ambiguous fold. State the pleat depth in a callout, because the depth sets how much extra fabric the pattern adds.
Hardware gets a symbol plus a spec, never a freehand blob. A snap, a rivet, a D-ring, a jean button, a zipper pull: draw each at its real position and size, then call out the type, the finish, and the ligne or millimeter dimension. The bill of materials will list the same trim, so the flat and the BOM have to agree on count and placement. Two rivets on the drawing means two rivets ordered.
What Are the Callout and Leader-Line Conventions?
Callouts use a thin leader line from the detail to a short, numbered note, and the convention is to keep them clean and non-crossing. A callout exists for anything a line can't say: a zipper type, a bartack, a hem allowance, a specific trim. Sewport frames technical drawings as production-ready references (Sewport), and callouts are how a flat carries the words that lines can't.
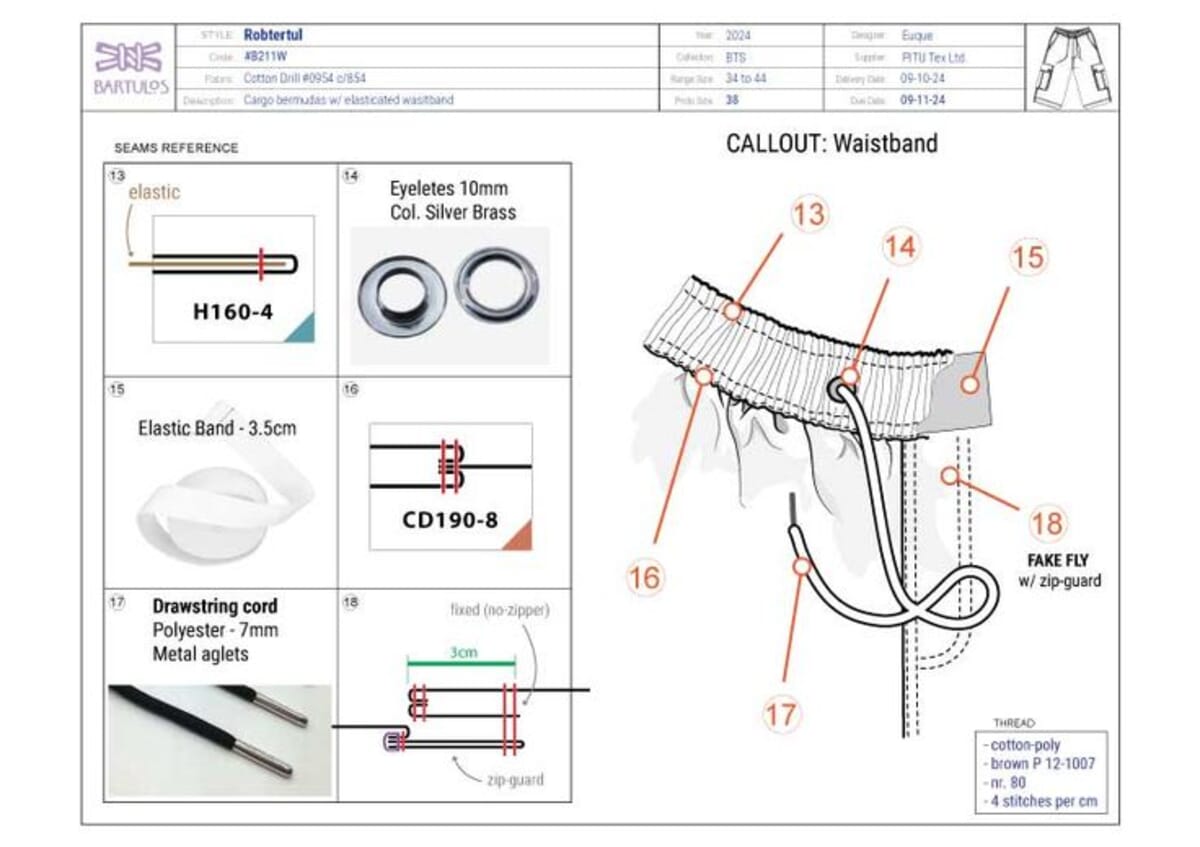
Keep the rules tight. One leader line per note, ending in a dot or a small arrow at the detail. Number the callouts and match them to a legend so the note stays short on the drawing. Never let leader lines cross each other or the garment outline, because a crossed leader reads as a stray seam. Park the text outside the silhouette, not on top of it.
There's a reason to be strict here. A leader line that clips a seam or a topstitch dash becomes noise, and noise is exactly what a flat is supposed to remove. In a grayscale print at reduced size, a messy callout zone is the first thing to become unreadable. Discipline on the page is discipline on the line.
How Should Fill, Color, and Scale Work Across a Range?
A flat uses flat fill and flat line, never rendering, and it holds one scale across a whole range. Fill a garment with a single solid color to show a colorway, not with gradients, shadows, or fabric texture that imitate a photo. ASTM D5585-21 defines graded body measurements across sizes (ASTM, 2021), and a flat that changes scale between styles breaks the visual link those numbers depend on.
Keep the fill honest. A flat is a diagram, not an illustration, so shading and highlights only hide the seam and stitch lines a factory needs. If you're showing colorways, use one clean fill per color and keep the line work fully visible on top. A heathered or printed fabric gets a callout and a swatch reference in the bill of materials, not a hand-drawn texture that a grayscale printer will smear into mud.
Scale is the quiet rule nobody teaches. When every flat in a range is drawn at the same scale, a buyer can lay the styles side by side and read the line of the collection in one glance. Draw one tee large and the next small and the range looks incoherent, even though each flat is technically correct. Consistent scale is a merchandising tool hiding inside a technical rule.
Set a template with fixed body height and reuse it for every style in the drop. The sleeve on a shirt and the sleeve on a jacket should read at a believable relative size. This is also what lets a grader trust the flat, because the points of measure sit in the same relative place on every drawing.
Should You Draw Flats by Hand or in Software?
Software wins for production flats because vectors scale, mirror, and export clean, while hand sketches suit early ideation. Freelance flat and tech-pack drawing runs a wide observed range, roughly $25 to $150 an hour on open marketplaces (Cad Crowd, observed), so most brands draw in-house in a vector tool. The reason isn't cost alone, it's that vectors hold the conventions this guide describes without drift.
Vector tools give you the symmetry and stroke control the rules demand. A mirror command guarantees the left matches the right. Global stroke styles let you set the 2pt outline, 1pt seam, and 0.5pt dashed topstitch once, then apply them everywhere so weights never wander. Brushes stay off structural lines: a calligraphic or textured brush reads as noise on a spec, so keep seams and outlines on plain uniform strokes.
Export matters as much as drawing. Save flats as clean vectors, PDF or SVG, so they stay crisp when a factory zooms in or prints at reduced size. Flatten stray points, close open paths, and delete hidden layers before you export, because a rogue anchor point can print as a phantom mark that reads like a seam. AI flat-sketch tools have appeared too, like Adstronaut (an AI vendor), but whatever draws the lines, the output still has to obey the same conventions a cutter reads.
Hand sketching keeps its place. It's faster for exploring a silhouette, and a marker sketch communicates a mood in seconds. Just treat it as a step before the flat, not the flat itself. The drawing that goes into the tech pack is the clean, scalable, symmetric version a factory can measure.
What Flat-Sketch Mistakes Confuse a Factory?
The mistakes that confuse a factory are the ones that make a line ambiguous, and they all trace back to a broken convention. The costly ones are a missing back or interior view, inconsistent stroke weight, topstitch drawn as a solid line, and asymmetry left uncorrected. Inspectors judge the resulting sample against fixed limits like AQL 2.5 for general goods (QIMA), so a drawing error becomes a measurable defect.
Here are the errors I see most, and what each one does on the floor:
| Mistake on the flat | What the factory does with it |
|---|---|
| No back view | Guesses the yoke, vent, and back seams, often wrong |
| Topstitch drawn solid | Reads it as a seam and cuts an extra panel |
| One stroke weight for everything | Decodes every line by hand and misreads structure |
| Asymmetric collar or cuffs | Builds the lean exactly as drawn |
| Rendered shading or gradients | Loses seam and stitch lines under the shading |
| Crossed leader lines | Mistakes a stray leader for a seam or dart |
| Traced off a croquis | Inherits a body shape the pattern can't build |
| Flat and BOM trim counts disagree | Orders the wrong hardware quantity |
The pattern across all of them is the same. Each mistake forces the sample room to make a decision the designer should have made on the page. A factory will always fill an ambiguous line with the cheapest or fastest reading, and that reading is rarely the one you intended. Fix the convention and you remove the decision.
How Do These Conventions Feed the Tech Pack?
These conventions feed the tech pack because the flat is section one, and every later section describes it. A tech pack is an eight-section document, with flat sketches at section one feeding the measurement chart, bill of materials, and construction notes that follow. Get the conventions right and the rest of the pack has a spine.
Each convention hands off to a later page. Points of measure sit on the flat, so the grading team knows where to lay a tape. The topstitch dashes map to construction notes that name the stitch and the needle count. Every trim you call out reappears in the bill of materials. A flat drawn to loose conventions forces every downstream page to correct it in words.
Outsourcing the whole document runs $500 to $2,000 per style (Guru, 2022). If a deadline beats the learning curve, our tech pack service delivers a factory-ready pack, flats included, from $299 per style. For the wider document, read the tech packs pillar and what a tech pack is. Factories working from complete specs hold a sample to the drawing, not to a mood.
Frequently Asked Questions
What is the most important rule of a flat sketch?
The most important rule is that every line traces to a pattern piece. A seam on the flat needs a pattern seam; a dart needs a pattern dart. Consistency of stroke weight and stitch notation comes next, but traceability is the test. A flat that can't be built from is decoration, not a spec.
What line weights do fashion flats use?
Flats use at least three weights: a heavy outline for the garment edge, a medium line for internal seams, and a light dashed line for topstitch. The exact points matter less than holding them steady across the whole pack. A collar drawn heavy on one page and thin on the next tells the factory two different stories.
How do you show topstitch on a flat sketch?
Show topstitch as an evenly spaced dashed line running parallel to the seam. Keep the dash gap consistent, and use two parallel dashed lines for double-needle stitching. Don't rely on color, since many packs print in grayscale (QIMA notes defects are judged against fixed limits). The dashes say where; a callout says what.
Do flat sketches always need a front and back view?
Yes, always. A sewing operator builds what the drawing shows, and skipping the back forces a guess on yokes, vents, and seams. Front and back must share the same shoulder width, length, and hem, or the pattern maker can't reconcile them. Complex garments add side views and exploded callouts on top.
How are flat sketch conventions used in a tech pack?
Flats are section one of a standard eight-part tech pack, and every later section references them. Measurement points sit on the flat, callouts map to the bill of materials, and topstitch dashes map to construction notes. Loose conventions on the flat force every downstream page to correct the drawing in words.
Should you draw flat sketches by hand or in software?
Draw production flats in vector software, and keep hand sketching for early ideation. Vectors mirror for perfect symmetry, hold a fixed stroke hierarchy, and export clean to PDF or SVG so they stay crisp when a factory zooms in. A marker sketch explores a silhouette fast, but the tech pack needs the scalable version.
Can you use color and shading in a flat sketch?
Use flat solid fill for colorways, never rendering or shading. A flat is a diagram, so gradients, highlights, and hand-drawn texture only hide the seam and stitch lines a factory needs. Show a printed or heathered fabric with a callout and a swatch reference in the bill of materials, not with drawn texture.
How do you draw a dart on a flat sketch?
Draw a dart as two lines converging to a marked point, shown to scale on the garment. The length and angle tell the pattern maker how much fabric folds out for shaping, so a dart drawn too long changes the fit. Draw it symmetrically across the center line, and repeat it on the back if it appears there.
The Bottom Line
Fashion flat sketch rules exist for one reason: to let a stranger build the garment without asking. Draw to true proportion, not croquis stretch. Hold a heavy outline, a medium seam line, and a dashed topstitch line, and never let them drift across the pack. Always show front and back, and draw closures, pockets, darts, pleats, gathers, and ribbing to scale. Keep callouts clean, numbered, and non-crossing. Every line has to trace to a pattern piece. Get the stitch and topstitch conventions right and the cutter works without a single question, which is the whole point. Ready to put these rules to work? Start with the technical flats pillar, then follow the Illustrator workflow to draw them clean.
Peter Midea is GarmentSpec's technical lead for brand development.
We build the factory-ready spec a manufacturer can quote from without a single question: technical flats, bill of materials, graded points of measure with tolerances, colorways and construction notes. $299 per style, 3 to 5 working days, 2 to 3 revision rounds.
Get your tech pack — $299Start with the free templateWe don't take your production. The spec is yours to send to any factory, anywhere. Talk to us first if you're not sure what you need.
Sources
Every statistic and definition in this article traces to one of the following. Each is listed once here, and cited inline where it is used.
Related guides
- How to draw technical flats
- Adobe Illustrator for tech packs
- Flat sketch software