Contents
- What do you need before you measure a t-shir…
- How do you find the HPS and the shoulder poi…
- What are the 10 points of measure on a t-shi…
- How do you measure each point on a t-shirt?
- What tolerances should a t-shirt spec use?
- What does a graded t-shirt size set look lik…
- How does grading work on a t-shirt?
- How do you check a t-shirt sample against th…
- Should the neck opening be measured relaxed…
- How do you measure boxy, raglan, long-sleeve…
- Should you measure a t-shirt before or after…
- Frequently asked questions
To measure a t-shirt for a spec sheet, lay it flat on a table, smooth it without stretching, and measure ten coded points: A 1/2 chest, B body length from HPS, C shoulder width, D sleeve length, E 1/2 sleeve opening, F armhole, G 1/2 hem, H neck width, I front neck drop and J neck rib height, each recorded against a plus or minus tolerance.
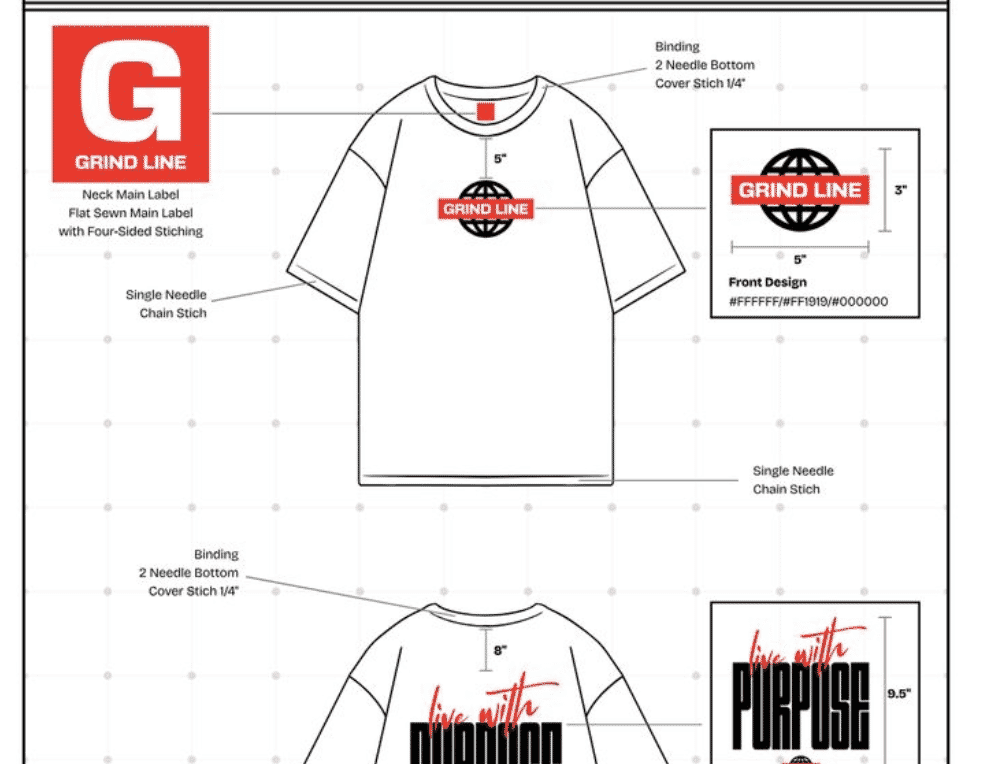
Below: numbered steps and common errors for each point, the tolerances, a graded size set from XS to 3XL, inch values for size M, and a method for checking a sample. Codes A to I are the ones drawn on the tee in our free how to measure garments guide; J is the tenth row in our size chart generator tee preset.
Key Takeaways
- Measure the base-size sample flat, smoothed and relaxed, in one unit for the whole chart.
- Find the high point shoulder (HPS) and the shoulder point first: five of the ten points start from them.
- Widths are half measurements taken edge to edge across the flat garment.
- Tolerances follow size and visibility: ±1 cm on chest, hem and body length, ±0.5 cm on shoulder, sleeve and neck width, ±0.3 cm on neck drop, ±0.2 cm on rib height.
- Girths grade most (2.5 cm a size, 3 cm above XL), lengths less, and the neck rib height not at all.
What do you need before you measure a t-shirt?
You need a hard flat table, a tape measure, a rigid ruler, the sample in its base size, and a garment that has rested flat before you start.
- A flat table big enough for the whole tee with sleeves spread. A bed or sofa sinks under your hand and bends the garment.
- A tape measure in the unit of your spec. Check it reads zero at the very end and has not stretched.
- A rigid ruler of at least 30 cm, for the front neck drop and for checking that a line runs square to center front (CF).
- The base-size sample. The base size is the size the pattern and sample are made in, often M. Every other size is graded from it.
- A blank chart with the codes written in. Our measuring guide prints one, and the free tech pack templates include a spec sheet as PDF and CSV.
Conditioning is the step people skip. A tee straight out of a bag or off a hanger carries folds and tension. Lay it front side up, let it rest, then smooth it with a flat hand from the center outwards so the side seams sit straight and the hem lies flat. Smooth, do not pull: jersey grows easily under a firm hand, and the chest tolerance is only ±1 cm. Knits are measured relaxed by convention; if a point also needs an extended reading, the spec says so on that line.
A t-shirt is measured for a spec by laying the base-size sample flat on a hard table, smoothed but not stretched, and taking ten coded points: 1/2 chest 2.5 cm below the armhole, body length from the high point shoulder, shoulder width, sleeve length, 1/2 sleeve opening, armhole, 1/2 hem, neck width, front neck drop and neck rib height. Each point carries a plus or minus tolerance, and the base values are graded across the size range.
How do you find the HPS and the shoulder point?
The HPS is where the shoulder seam meets the neckline; the shoulder point is where the shoulder seam meets the armhole seam.
- Lay the tee front side up and follow the shoulder seam inwards until it meets the seam joining the neck rib to the body. That meeting point is the HPS. Using the seam, not the folded outer edge of the rib, keeps the HPS in the same place whatever the rib height.
- Follow the same shoulder seam outwards until it meets the armhole seam. That is the shoulder point. Use the seam line, not the rolled fold beside it.
- Mark both sides lightly with a pin or chalk so the same marks serve every point.
Some brands put the HPS on the outer edge of the neckline. That is valid if the spec says so and everyone uses it; if the brand measures from the seam and the factory from the edge, body length moves by the rib height. On a drop-shoulder tee the shoulder point is still the meeting of the two seams, lower on the arm. A raglan tee has no shoulder point; see the variations section.
What are the 10 points of measure on a t-shirt?
A 1/2 chest, B body length from HPS, C shoulder width, D sleeve length, E 1/2 sleeve opening, F armhole straight, G 1/2 hem, H neck width, I front neck drop and J neck rib height. The flat shows A to I as drawn in our measuring guide.
Tolerances in the table are the tee preset defaults in our generator, a starting point and not a standard: no ASTM or ISO standard sets garment points of measure or tolerances. Those are agreed per brand and factory in the spec. For points of measure across other garments, see our points of measure guide.
| Code | Point | How to measure | Tol. cm | Tol. in |
|---|---|---|---|---|
| A | 1/2 chest | Side seam to side seam, straight across, 2.5 cm below the armhole | ±1 | ±0.39 |
| B | Body length from HPS | From HPS straight down, parallel to CF, to the hem edge | ±1 | ±0.39 |
| C | Shoulder width | Across the back, shoulder point to shoulder point | ±0.5 | ±0.2 |
| D | Sleeve length | Shoulder point along the top fold of the sleeve to the sleeve hem | ±0.5 | ±0.2 |
| E | 1/2 sleeve opening | Across the sleeve hem, edge to edge | ±0.5 | ±0.2 |
| F | Armhole, straight | Shoulder point to underarm point, in a straight line | Set from sample | Set from sample |
| G | 1/2 hem | Across the bottom edge, relaxed, edge to edge | ±1 | ±0.39 |
| H | Neck width | HPS to HPS, seam to seam at the inside edge of the neck rib | ±0.5 | ±0.2 |
| I | Front neck drop | Ruler laid HPS to HPS, measure straight down at CF to the neck seam | ±0.3 | ±0.12 |
| J | Neck rib height | Height of the finished rib, seam to folded edge | ±0.2 | ±0.08 |
F armhole is drawn in the guide but is not a preset row, so it has no default value. Measure it on your approved sample, write it in, and agree its tolerance with your factory.
How do you measure each point on a t-shirt?
Take each point the same way every time: same start mark, end mark, tape direction, and relaxed or extended state. Followed exactly, the steps below let two people land within tolerance of each other on the same tee.
A: 1/2 chest
- Find the underarm point, where the sleeve seam meets the side seam.
- Mark 2.5 cm (1 in) below it on the side seam, both sides.
- Lay the tape across the front between the marks, square to CF, and read the value.
Common errors: measuring right at the armhole, letting the tape drift diagonally, pulling the side seams outwards. On a tubular knit with no side seams, measure fold to fold at the same height.
B: body length from HPS
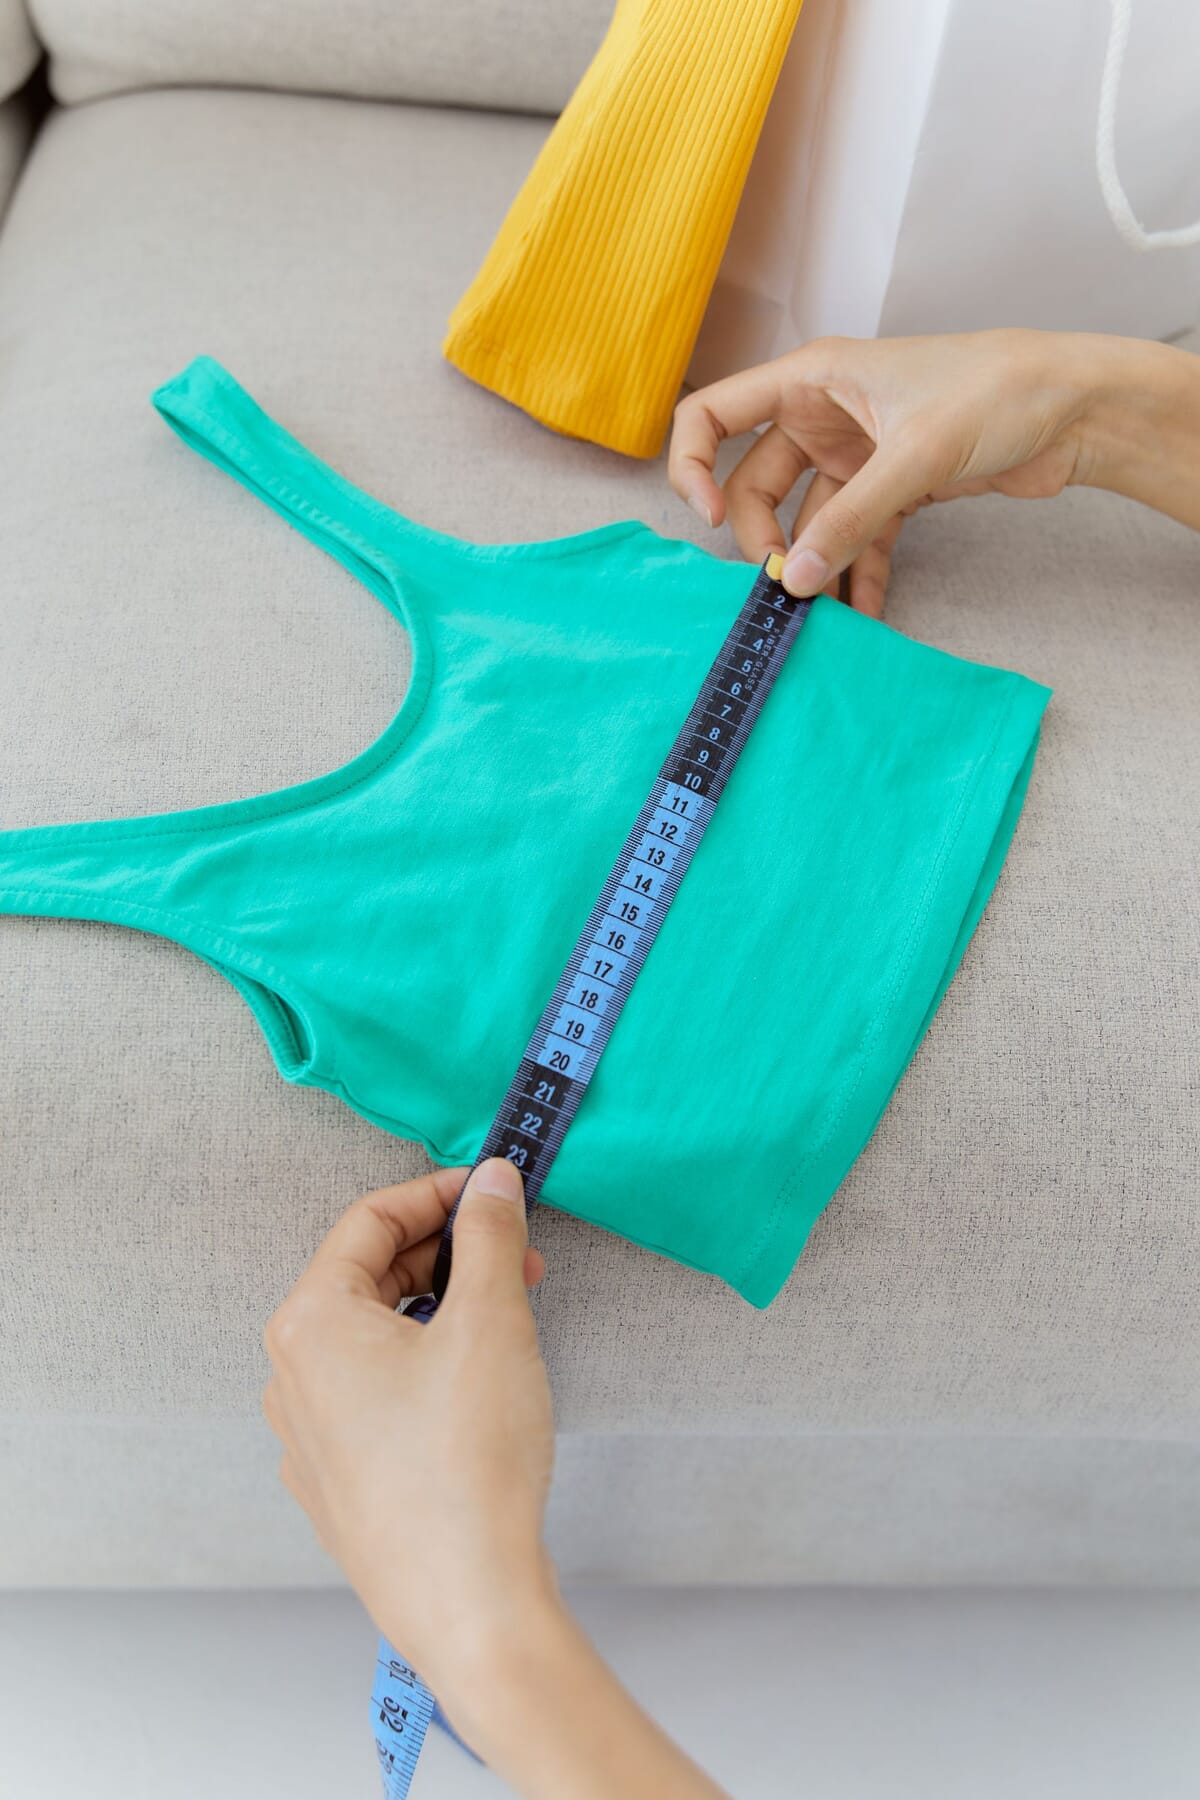
Body length on a cropped tank top: tape held at the top edge and run straight down to the hem. On a tee the start is the HPS, and spec values are best taken on a hard table rather than a sofa.
- Place the tape at the HPS on one side.
- Run it straight down the front, parallel to CF, not following the armhole.
- Read the value at the folded hem edge. Repeat on the other side as a check.
Common errors: angling the tape towards CF, which shortens the reading; measuring from the CF neckline, which is a different point; reading at the stitch line instead of the fold. If the back hem drops lower, add a back length or center back (CB) length point and say which.
C: shoulder width
- Turn the tee back side up; the back gives a cleaner straight line.
- Lay the tape straight across from shoulder point to shoulder point and read the value.
Common errors: measuring across the front, following the shoulder seams down and across, using the rolled fold instead of the seam. Shoulder carries ±0.5 cm because small changes show on the body.
D: sleeve length
- Lay the sleeve flat with its top fold straight out from the shoulder point.
- Run the tape from the shoulder point along the top fold to the sleeve hem edge.
Common errors: measuring along the underarm seam (a shorter, different point), or starting at CB neck, which is a raglan convention and must be named if used.
E: 1/2 sleeve opening
- Lay the sleeve flat with the hem straight.
- Measure across the hem from top fold to underarm fold, square to the hem.
Common errors: measuring a few centimetres up the sleeve, or stretching a cover-stitched hem flat. Measure relaxed.
F: armhole, straight
- Lay the sleeve as your spec states (folded towards the body or extended).
- Measure in a straight line from the shoulder point to the underarm point.
Common errors: following the curve of the seam, which is a curved armhole, a different point. Write "straight" or "curved" in the point name.
G: 1/2 hem
- Smooth the bottom of the tee so the hem lies flat and relaxed.
- Measure across the bottom edge, side to side, at the hem fold.
Common errors: measuring a little above the hem, and stretching the hem. On a straight tee the half hem equals the half chest, as in the preset (54 cm in M); on a tapered or flared tee the difference is the body shape.
H: neck width
- Lay the neckline flat and relaxed.
- Measure straight across from HPS to HPS, seam to seam, at the inside edge of the neck rib.
Common errors: measuring from the outer rib edge, which adds two rib heights, and pulling the neckline open.
I: front neck drop
- Lay a rigid ruler across the neck from HPS to HPS.
- At CF, measure straight down from the ruler edge to the neck seam.
Common errors: measuring to the outer rib edge, or letting the ruler sag. A few millimetres change the look of a crew neck, hence ±0.3 cm. Add a back neck drop at CB the same way if needed.
J: neck rib height
- At CB, measure from the seam joining rib to body up to the folded rib edge.
- Check at CF and one shoulder too; the rib should be even all round.
Common errors: including the seam allowance, or measuring on a twisted section. The preset holds it at 2 cm in every size with ±0.2 cm, the tightest tolerance on the chart.
What tolerances should a t-shirt spec use?
Wide tolerances on big girths and lengths, tight ones on small visible details: ±1 cm on chest, hem and body length, ±0.5 cm on shoulder, sleeve, sleeve opening and neck width, ±0.3 cm on neck drop, ±0.2 cm on rib height. The chart shows each one.
The logic is proportion and visibility. 1 cm on a 54 cm half chest is under 2 percent of the value; the same 1 cm on a 2 cm rib would be half of it. These are not a standard: they are what you and your factory agree, written on each line. Agree them before the first sample, not after it fails. Our guide on how to measure a garment covers tolerances as a concept across garments.
What does a graded t-shirt size set look like?
A graded size set lists every point for every size, built from the base size by a fixed grade per size. This is the tee preset in our size chart generator, base M, in cm.
| Code | Point | XS | S | M | L | XL | 2XL | 3XL | Tol. ± |
|---|---|---|---|---|---|---|---|---|---|
| A | 1/2 chest | 49 | 51.5 | 54 | 56.5 | 59 | 62 | 65 | 1 |
| B | Body length from HPS | 68 | 70 | 72 | 74 | 76 | 78 | 80 | 1 |
| C | Shoulder width | 43 | 44.5 | 46 | 47.5 | 49 | 51 | 53 | 0.5 |
| D | Sleeve length | 19 | 20 | 21 | 22 | 23 | 24 | 25 | 0.5 |
| E | 1/2 sleeve opening | 16.5 | 17.25 | 18 | 18.75 | 19.5 | 20.5 | 21.5 | 0.5 |
| F | Armhole, straight | Add from your approved sample | Agree | ||||||
| G | 1/2 hem | 49 | 51.5 | 54 | 56.5 | 59 | 62 | 65 | 1 |
| H | Neck width | 18 | 18.5 | 19 | 19.5 | 20 | 20.5 | 21 | 0.5 |
| I | Front neck drop | 8 | 8.5 | 9 | 9.5 | 10 | 10.5 | 11 | 0.3 |
| J | Neck rib height | 2 | 2 | 2 | 2 | 2 | 2 | 2 | 0.2 |
These are example values, not a body standard or a fit recommendation. ASTM D6240 (adult male, chest 34 to 52), ASTM D5585 (adult female misses, 00 to 20) and ISO 8559-1 define body dimensions; they do not say what a finished tee should measure. Your approved sample sets your base values, which you then grade.
The chart plots the four main points. Body length climbs 2 cm a size from 68 cm in XS to 80 cm in 3XL; the half chest climbs 2.5 cm a size to XL (49 to 59 cm), then 3 cm to 62 and 65 cm.
Inch values for size M
| Code | Point | M (in) | Tol. ± (in) |
|---|---|---|---|
| A | 1/2 chest | 21.26 | 0.39 |
| B | Body length from HPS | 28.35 | 0.39 |
| C | Shoulder width | 18.11 | 0.2 |
| D | Sleeve length | 8.27 | 0.2 |
| E | 1/2 sleeve opening | 7.09 | 0.2 |
| G | 1/2 hem | 21.26 | 0.39 |
| H | Neck width | 7.48 | 0.2 |
| I | Front neck drop | 3.54 | 0.12 |
| J | Neck rib height | 0.79 | 0.08 |
If your factory works in inches, convert the whole chart once and stay in inches. The generator outputs the full chart in either unit, and as CSV.
How does grading work on a t-shirt?
Girths move most per size, lengths less, and construction details a little or not at all.
- Girths: 1/2 chest and 1/2 hem grade 2.5 cm a size from XS to XL, which is 5 cm of full circumference.
- Shoulder: 1.5 cm a size, less than the chest.
- Lengths: body length 2 cm a size, sleeve length 1 cm.
- Openings: 1/2 sleeve opening 0.75 cm, neck width and front neck drop 0.5 cm.
- Fixed details: neck rib height stays 2 cm in every size; hem depth and label position usually stay fixed too.
Above XL the preset steps up: half chest and half hem move 3 cm a size to 2XL and 3XL, shoulder 2 cm, sleeve opening 1 cm. Body and sleeve length keep their step. A larger step above XL gives the bigger sizes more room in the body; whether you use one, and how big, is your decision with your pattern maker. Grade rules for a full range are covered in our grading chart template guide. Our size grading service is $89 per style ($49 for the size chart only).
How do you check a t-shirt sample against the spec?
Measure the sample with the same method as the spec, record actual next to spec, work out the deviation, and mark each point within or out of tolerance.
- Condition the sample flat and confirm its size label.
- Measure every point in order, with the same start and end marks as the spec.
- Write the actual value in its own column; never overwrite the spec value.
- Deviation = actual minus spec, keeping the sign (plus is bigger, minus is smaller).
- Compare with the tolerance: within is a pass, outside is a comment for the factory.
- Read the pattern. Chest and hem both over suggests fabric growth; length short on every piece can point to shrinkage or cutting.
The table shows the format with illustrative readings for size M. The readings only show how the columns work; they are not results from a real sample.
| Code | Point | Spec M | Actual (illustrative) | Deviation | Tol. ± | Result |
|---|---|---|---|---|---|---|
| A | 1/2 chest | 54 | 54.5 | +0.5 | 1 | Within |
| B | Body length from HPS | 72 | 70.5 | -1.5 | 1 | Out |
| C | Shoulder width | 46 | 46.3 | +0.3 | 0.5 | Within |
| I | Front neck drop | 9 | 9.5 | +0.5 | 0.3 | Out |
| J | Neck rib height | 2 | 2.1 | +0.1 | 0.2 | Within |
At inspection the same check runs on the sealed or approved sample, then on production pieces. Written fit comments turn the readings into clear corrections; we do them at $89 per style per fit round.
Should the neck opening be measured relaxed or extended?
Measure neck width relaxed as standard, and add a "neck opening extended" point if you want to control the stretch, because the neck must pass over the head.
Relaxed neck width (H) controls the look: how wide the neckline sits. The extended opening controls function: whether the tee goes on without distorting the rib. A narrow crew in a firm rib can look right flat and still be tight to pull on. To measure extended, stretch the neck gently from two opposite points to its natural limit, without straining the seams, and measure edge to edge, or the full circumference if your spec states that. We give no default value: it depends on the rib, the neck shape and your fit. Add it as its own coded line, for example "H2 neck opening extended", measure it on your approved sample, and agree a minimum or tolerance with the factory.
How do you measure boxy, raglan, long-sleeve and fitted tees?
Use the same points and method, then adjust start marks and add points where the construction changes.
Boxy and oversized tees
A dropped shoulder puts the armhole seam down the arm. The shoulder point is still where the two seams meet, so shoulder width reads wider and sleeve length shorter than on a set-in tee. The half chest is still 2.5 cm below the armhole, which now sits lower on the body. Add a 1/2 bicep point if the sleeve shape matters.
Raglan sleeve tees
A raglan sleeve runs up to the neckline, so there is no shoulder seam or shoulder point, and shoulder width usually drops off the spec. Measure sleeve length one of two ways and state which in the point name: from CB neck, across the top of the sleeve to the hem (center back sleeve length), or from the neck seam, where the raglan seam meets the neckline, along the top of the sleeve to the hem. Either works; mixing them does not. Body length runs from the top of the raglan seam at the neckline.
Long-sleeve tees
Keep the body points and measure sleeve length from the shoulder point to the cuff edge, including the cuff. Add a 1/2 cuff relaxed and a cuff height (seam to edge), plus a cuff extended point if the rib must pass over the hand. A 1/2 bicep helps control a slim sleeve.
Women's fitted tees
Shaped side seams need a waist point. Measure the 1/2 waist straight across at a stated distance from the HPS, and write the distance into the point name, such as "1/2 waist, X cm below HPS", with X taken from your sample. Without the distance, everyone finds a different narrowest point.
Should you measure a t-shirt before or after washing?
Measure the way the spec says: if it gives finished measurements after wash, measure after the agreed wash test.
Put one line at the top of the spec, such as "Finished measurements after one wash to the care label" or "Measurements before wash". Agree the wash test with the factory: method, cycles, and conditioning time before measuring. Then measure the washed sample with the same method. If the fabric shrinks, the pattern is cut larger so the garment reaches spec after washing, with the allowance set from the fabric's own test results. We give no shrinkage percentage because it depends on the fabric, finish and test. The t-shirt tech pack guide shows where wash and care notes sit in the full spec; common tech pack mistakes lists what else tends to go missing.
Frequently asked questions
Where do you measure the chest on a t-shirt?
Measure the 1/2 chest straight across the front from side seam to side seam, 2.5 cm (1 in) below the armhole, with the tee laid flat and smoothed but not stretched. Doubling the half chest gives the full chest circumference on a tee with straight side seams.
What is HPS on a t-shirt?
HPS means high point shoulder: the point where the shoulder seam meets the neckline seam, at the highest point of the shoulder. Body length, neck width and front neck drop are all measured from the HPS, so the spec should state exactly where it sits.
How do you measure t-shirt length?
Place the tape at the HPS and run it straight down the front, parallel to center front, to the folded hem edge. Do not angle it towards the center or follow the armhole. If the back hem is longer, add a separate back or center back length point.
What tolerance is normal for a t-shirt spec?
Tolerances are agreed between brand and factory, not set by a standard. Our generator preset uses plus or minus 1 cm on chest, hem and body length, 0.5 cm on shoulder, sleeve and neck width, 0.3 cm on front neck drop and 0.2 cm on neck rib height.
How much does a t-shirt grade between sizes?
In our tee preset the 1/2 chest and 1/2 hem grade 2.5 cm a size up to XL and 3 cm above it, body length 2 cm, shoulder 1.5 cm, sleeve 1 cm, neck width and drop 0.5 cm. The neck rib height stays at 2 cm in every size.
Should t-shirts be measured before or after washing?
Follow the spec. If it gives finished measurements after wash, measure the sample after the agreed wash test, conditioned flat, using the same method. Write the wash condition at the top of the spec so the factory and the brand measure the same garment state.
Peter Midea is GarmentSpec's technical lead for brand development.
Send us your sample, sketch or reference and we spec it: technical flats, bill of materials, coded points of measure graded across your sizes with a tolerance on every line, colorways and construction notes. $299 per style, 3 to 5 working days, 2 to 3 revision rounds. Our team replies within 24 hours.
Get your tech pack, $299Open the measuring guideSources
- ASTM D6240/D6240M-24, Standard Tables of Body Measurements for Adult Male, Chest Size Range 34-52 Short, Regular, and Tall: store.astm.org (body dimensions, not garment points of measure).
- ASTM D5585-21, Standard Tables of Body Measurements for Adult Female Misses Figure Type, Size Range 00-20: store.astm.org.
- ISO 8559-1:2017, Size designation of clothes, Part 1: Anthropometric definitions for body measurement: iso.org.
- GarmentSpec how to measure garments guide: POM codes A to I and the tee flat.
- GarmentSpec size chart generator: tee preset values, grades and tolerances (base M, cm).